Introduction
What is 3D Printing?
3D printing, also known as additive manufacturing, is a revolutionary technology that has transformed the way objects are produced. Unlike traditional manufacturing methods that rely on subtractive processes, such as cutting, milling, or carving away material from a larger block, 3D printing builds objects layer by layer. This process starts with a digital model, typically created using computer - aided design (CAD) software or obtained through 3D scanning. The 3D printer then reads the digital file and deposits material, such as plastic, metal, ceramic, or even biological materials, in precise layers until the final three - dimensional object is complete.
For Yigu Technology example, in a simple Fused Deposition Modeling (FDM) 3D printer, a spool of thermoplastic filament is melted and extruded through a nozzle. The nozzle moves in a programmed pattern, depositing the molten plastic layer by layer on a build platform. As each layer cools and solidifies, it bonds to the layer below it, gradually forming the desired object.
Significance of Understanding the Layer - by - Layer Process
Understanding the layer - by - layer process of 3D printing is crucial for several reasons, especially for businesses, researchers, and enthusiasts.
For hobbyists and enthusiasts, understanding the layer - by - layer process allows for greater creativity and problem - solving. They can troubleshoot common 3D - printing issues, such as layer adhesion problems or warping, and make adjustments to their printing settings to achieve better results. Overall, grasping the fundamentals of the layer - by - layer process in 3D printing is essential for anyone looking to make the most of this transformative technology.
The Core Mechanics of 3D Printing
1. From Digital Blueprint to Physical Object
1.1 3D Modeling
The journey of 3D printing begins with 3D modeling. This is the stage where the digital representation of the object is created. There are two primary methods to obtain a 3D model: using CAD software or 3D scanning.
When using CAD software, designers have the freedom to create a model from scratch. They start by defining the basic geometric shapes such as cubes, spheres, cylinders, etc., and then combine and modify them to form the desired complex structure. For Yigu Technology example, in the design of a custom - made 3D - printed jewelry piece, a designer might use CAD software to create a detailed model of a necklace pendant. They would first create the outer shape of the pendant, perhaps a heart - like form, and then add intricate patterns and details, such as filigree designs.
On the other hand, 3D scanning is a process of capturing the physical shape and appearance of an existing object and converting it into a 3D digital model. This is useful when one wants to replicate an object or make modifications to an existing design. For example, in the field of archaeology, 3D scanning can be used to create a digital model of a fragile artifact. The scanner emits light (such as laser light or structured light) onto the object, and the reflected light is captured by sensors. The scanner then uses this data to generate a 3D point cloud, which is further processed to create a watertight 3D model.
1.2 Slicing the Model
Once the 3D model is created, it needs to be prepared for the 3D - printing process. This is where slicing comes in. Slicing is the process of dividing the 3D model into a series of thin, horizontal layers. Each layer represents a cross - section of the final object.
Slicing software is used to perform this task. Popular slicing software includes Cura, Simplify3D, and PrusaSlicer. These software programs analyze the 3D model and determine the optimal way to slice it based on various factors, such as the type of 3D printer being used, the printing material, and the desired print quality.
One of the most important parameters determined during slicing is the layer thickness. Layer thickness has a significant impact on the quality and printing time of the final object. A thinner layer thickness generally results in a higher - quality print with smoother surfaces and better detail resolution. However, it also increases the printing time because more layers need to be printed. For Yigu Technology example, a layer thickness of 0.1 mm will produce a much smoother surface compared to a layer thickness of 0.3 mm. But a print that would take 2 hours with a 0.3 - mm layer thickness might take 4 hours or more with a 0.1 - mm layer thickness.
The slicing software also calculates other important parameters, such as the printing speed, the amount of infill (the internal structure of the object), and the placement of support structures. The printing speed can be adjusted based on the capabilities of the 3D printer and the properties of the printing material. A faster printing speed can save time but may also lead to issues such as poor layer adhesion or inaccurate prints. The infill pattern and density can be customized to control the strength and weight of the printed object. A high - density infill will result in a stronger but heavier object, while a low - density infill will make the object lighter but less strong. Support structures are automatically generated by the slicing software in areas where the object has overhanging or bridging features. These support structures are necessary to hold up the object during printing but need to be removed during the post - processing stage.
2. The Printing Process: Layer by Layer Deposition
2.1 Material Extrusion (e.g., FDM)
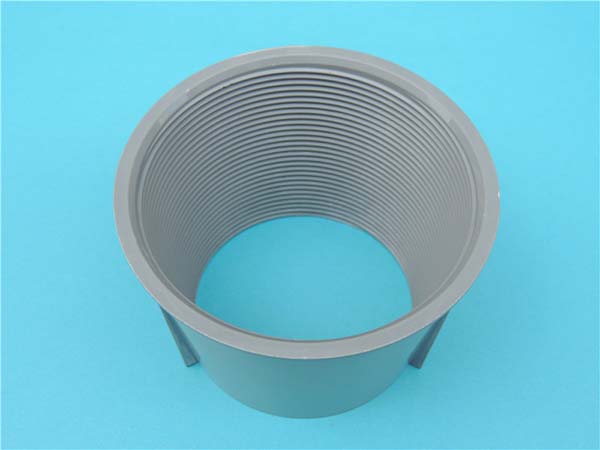
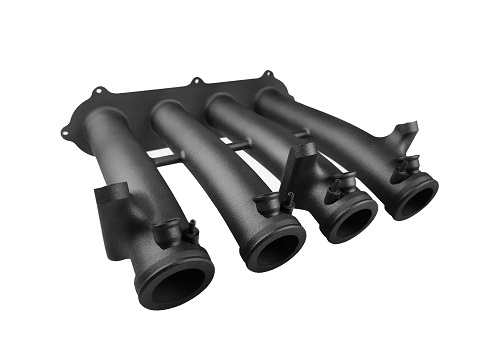
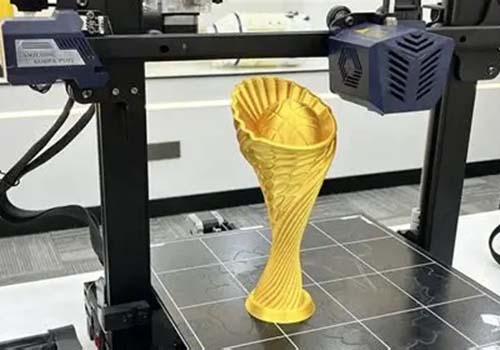
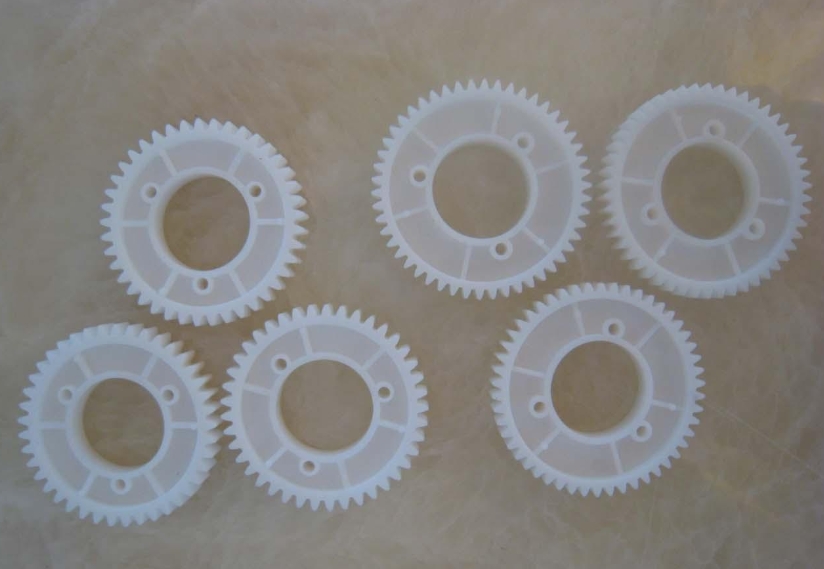
Material extrusion is one of the most common 3D - printing techniques, with Fused Deposition Modeling (FDM) being the most well - known example. In an FDM 3D printer, the printing material is typically in the form of a thermoplastic filament, such as Polylactic Acid (PLA), Acrylonitrile Butadiene Styrene (ABS), or Polyethylene Terephthalate Glycol - modified (PETG).
The process begins with the filament being fed from a spool into the printer's extruder. The extruder contains a heating element that heats the filament to its melting point. Once melted, the plastic is forced through a small nozzle, which moves in a programmed pattern determined by the sliced 3D model. As the molten plastic is extruded from the nozzle, it is deposited onto the build platform or on top of the previously printed layer. The extruded plastic cools and solidifies quickly, bonding to the underlying layer. This process is repeated layer by layer until the entire object is completed.
2.2 Vat Photopolymerization (e.g., SLA, DLP)
Vat photopolymerization is another important class of 3D - printing technologies, which includes Stereolithography (SLA) and Digital Light Processing (DLP). In these processes, the printing material is a liquid photopolymer resin.
Stereolithography (SLA): In an SLA 3D printer, a vat is filled with the liquid photopolymer resin. A high - precision ultraviolet (UV) laser is used to selectively cure the resin layer by layer. The build platform is initially positioned at the surface of the resin. The laser traces the cross - sectional shape of the first layer of the object on the surface of the resin, causing the resin in that area to polymerize and solidify. Once the first layer is complete, the build platform is lowered slightly, and a new layer of resin is spread over the previously cured layer. The laser then traces the next layer, and the process continues until the entire object is formed.
Digital Light Processing (DLP): DLP 3D printers also use a liquid photopolymer resin. However, instead of a laser, they use a digital micromirror device (DMD) and a projector. The DMD is a microchip with a large number of tiny mirrors. The projector projects a UV light image of the cross - section of the object onto the resin. Each mirror on the DMD can be individually tilted to either reflect the UV light onto the resin (curing it) or direct it away (leaving the resin uncured). This allows for the entire layer to be cured at once, rather than point - by - point as in SLA. As a result, DLP printers can be faster than SLA printers for some applications.
2.3 Powder - Bed Fusion (e.g., SLS, DMLS)
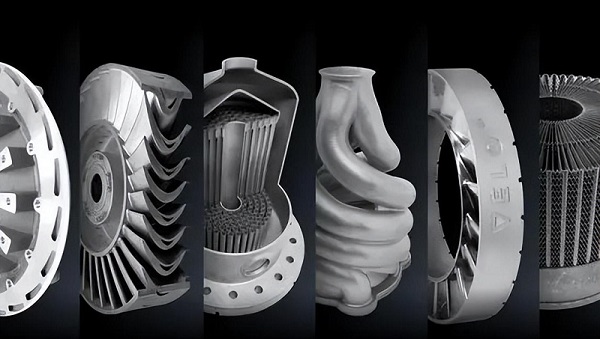
Powder - bed fusion is a group of 3D - printing technologies that use a laser or an electron beam to sinter or melt powdered materials, such as plastics, metals, or ceramics, layer by layer to form a solid object. Two common examples of powder - bed fusion technologies are Selective Laser Sintering (SLS) and Direct Metal Laser Sintering (DMLS).
Selective Laser Sintering (SLS): In an SLS 3D printer, a powder bed is created by spreading a thin layer of powdered material, usually a polymer powder like nylon, across the build platform. A high - power laser is then used to selectively heat and sinter the powder particles in the areas corresponding to the cross - section of the object. The sintered powder particles bond together, forming a solid layer. After each layer is completed, a new layer of powder is spread over the previous layer, and the process is repeated until the entire object is built.
Direct Metal Laser Sintering (DMLS): DMLS is similar to SLS but is specifically designed for metal powders. A high - energy laser is used to fully melt the metal powder particles in the desired areas, fusing them together to form a solid metal layer. This process allows for the production of complex metal parts with high density and excellent mechanical properties.
3. Post - Processing: Refining the Printed Object
Post - processing is an essential step in the 3D - printing process that often determines the final quality and functionality of the printed object. After the object is printed layer by layer, it usually requires several post - processing operations to meet the desired specifications.
Removing Support Structures: In many 3D - printing techniques, especially those that involve material extrusion or vat photopolymerization, support structures are used to hold up overhanging or bridging parts of the object during printing. Once the printing is complete, these support structures need to be removed. In the case of FDM - printed objects, the support structures are usually made of the same material as the object itself. They can be removed by hand, using tools such as pliers or wire cutters, or by dissolving them in a suitable solvent if a soluble support material was used. In SLA and DLP printed objects, the support structures are often more delicate and need to be carefully removed to avoid damaging the main object.
Sanding and Polishing: To improve the surface finish of the printed object, sanding and polishing are often carried out. Sanding involves using abrasive materials, such as sandpaper, to gradually smooth down the rough surface of the printed object, reducing the visibility of layer lines. Polishing, on the other hand, uses finer abrasives or polishing compounds to create a high - gloss finish. This is especially important for objects where aesthetics are crucial, such as in the production of consumer products, art pieces, or jewelry.
Sintering (for Powder - Bed Fusion Printed Objects): In powder - bed fusion processes like SLS and DMLS, the printed object may undergo additional sintering in a furnace after printing. This further densifies the object, improving its mechanical properties. The sintering process can also help to reduce porosity in the printed part, making it stronger and more suitable for high - stress applications.
Dyeing and Coating: Dyeing can be used to add color to the printed object, especially for objects made of materials that can absorb dyes, such as some polymers. Coating, on the other hand, can be applied to improve the object's surface properties, such as adding a protective layer to prevent corrosion in metal parts or enhancing the scratch - resistance of plastic objects. For Yigu Technology example, a 3D - printed metal part for an outdoor application may be coated with a layer of paint or a corrosion - resistant finish to extend its lifespan.
Applications Showcasing the Power of Layer - by - Layer 3D Printing
1. Healthcare
The healthcare industry has been significantly transformed by 3D printing, with the layer - by - layer manufacturing process enabling a wide range of innovative applications.
Custom - made Prosthetics: One of the most prominent applications is in the production of custom - made prosthetics. Traditional prosthetics often have a one - size - fits - most approach, which may not provide the best fit or functionality for every patient. With 3D printing, prosthetics can be tailored to an individual's unique body shape and needs. For example, companies like E - nable have been using 3D printing to create affordable and customized prosthetic hands for people around the world. By taking a 3D scan of the patient's residual limb, a digital model is created. This model is then sliced and printed layer by layer, resulting in a prosthetic that offers a more comfortable fit and better functionality. According to a study by the World Health Organization, 3D - printed prosthetics can reduce the cost of production by up to 70% compared to traditional prosthetics, making them more accessible to those in need.
Dental Applications: In dentistry, 3D printing is widely used for creating dental crowns, bridges, and orthodontic appliances such as clear aligners. Dental laboratories can use digital impressions of a patient's teeth, obtained through intra - oral scanners, to create 3D models. These models are then used to print dental restorations layer by layer. For instance, a 3D - printed dental crown can be fabricated in a matter of hours, compared to the days it would take using traditional casting methods. A report by the American Dental Association found that 3D - printed dental appliances have a 95% accuracy rate in fitting the patient's teeth, leading to better treatment outcomes and patient satisfaction. Clear aligners, like those produced by companies using 3D - printing technology, have also become a popular alternative to traditional braces. They are custom - printed to gradually move the teeth into the desired position, providing a more aesthetically pleasing and comfortable orthodontic treatment option.
Surgical Guides: 3D - printed surgical guides are another crucial application in healthcare. These guides are designed to assist surgeons during complex procedures, such as joint replacements or spinal surgeries. By creating a 3D model of the patient's anatomy from medical imaging data (such as CT scans or MRIs), a surgical guide can be printed that precisely fits the patient's unique anatomy. This allows surgeons to perform the surgery with greater precision, reducing the risk of complications. For example, in a hip replacement surgery, a 3D - printed surgical guide can help the surgeon accurately position the implant, leading to better long - term outcomes for the patient. A clinical study published in the Journal of Arthroplasty showed that the use of 3D - printed surgical guides in total knee replacement surgeries reduced the alignment error by 50% compared to traditional surgical methods.
2. Fashion
The fashion industry has witnessed a creative revolution with the integration of 3D printing, allowing for innovative designs, personalized products, and sustainable practices.
Innovative Design and Complex Structures: 3D printing enables fashion designers to bring their most imaginative and complex designs to life. Traditional manufacturing methods often have limitations when it comes to creating intricate patterns, textures, and shapes. However, 3D printing allows for the production of garments and accessories with unique geometric patterns, lattice structures, and other complex details. For example, designer Iris van Herpen is renowned for her use of 3D printing in creating avant - garde fashion pieces. Her designs feature complex, organic shapes that would be nearly impossible to achieve with traditional sewing and molding techniques. These 3D - printed designs not only push the boundaries of fashion but also attract significant attention in the fashion world, with her pieces often being showcased in high - profile fashion shows and exhibitions.
Personalized Fashion: Consumers today are increasingly seeking personalized fashion items that reflect their individual style. 3D printing makes it possible to create customized clothing and accessories based on a customer's measurements, style preferences, and even mood. Some companies offer 3D - printed jewelry where customers can choose the design, color, and material. In the case of clothing, 3D - scanning technology can be used to capture a customer's body measurements accurately. These measurements are then used to create a custom - fit garment that is printed layer by layer. A survey by the Fashion Institute of Technology found that 70% of consumers were interested in purchasing personalized 3D - printed fashion items, indicating a strong market demand for this type of customization.
Sustainable Fashion Practices: Sustainability is a growing concern in the fashion industry, and 3D printing offers several advantages in this regard. Since 3D printing adds material only where it is needed, it can significantly reduce material waste compared to traditional manufacturing methods. Additionally, 3D - printed fashion items can be produced locally, reducing the carbon footprint associated with transportation. For example, a 3D - printed fashion startup might produce its products in a local studio, eliminating the need to ship materials and finished products from factories overseas. Some companies are also exploring the use of sustainable materials, such as recycled plastics and biodegradable polymers, in 3D - printed fashion. A study by the Ellen MacArthur Foundation estimated that 3D printing in the fashion industry could reduce material waste by up to 80% compared to traditional manufacturing processes, making it a more environmentally friendly option.
Conclusion
Yigu Technology3D printing, with its layer - by - layer manufacturing process, has emerged as a revolutionary force in the manufacturing landscape. By starting with a digital blueprint, slicing it into layers, and then depositing materials layer by layer, 3D printing has enabled the creation of objects with unprecedented complexity and customization.
The technology offers numerous advantages across various industries. In healthcare, it has made custom - made prosthetics more accessible and improved surgical precision with 3D - printed surgical guides. The aerospace industry benefits from lightweight, high - performance components, leading to fuel - efficient aircraft. In the automotive sector, 3D printing accelerates prototyping and allows for customized parts production. Even the fashion industry has been transformed, with innovative designs and sustainable practices made possible by this technology.
FAQ
Q1: What are the most common 3D - printing materials?
A1: The most common 3D - printing materials include thermoplastics like PLA, ABS, and PETG in material extrusion (FDM) printers. In vat photopolymerization, liquid photopolymer resins are used. For powder - bed fusion, materials such as nylon powder in SLS and metal powders in DMLS are typical.
Q2: How can I improve the surface quality of my 3D - printed objects?
A2: You can improve the surface quality by using a smaller layer thickness during slicing. Post - processing techniques such as sanding and polishing are also effective. Additionally, choosing the right 3D - printing technology, like SLA or DLP which generally offer smoother surfaces compared to FDM, can be beneficial.
Q3: Is 3D printing cost - effective for large - scale production?
A3: Currently, 3D printing is more cost - effective for small - batch production and customization. For large - scale production, traditional manufacturing methods often have lower per - unit costs due to economies of scale. However, as 3D - printing technology advances and equipment and material costs decrease, its cost - effectiveness for large - scale production may improve in the future.