Introduction
In the ever - evolving landscape of manufacturing, 3D parts printing and assembling have emerged as revolutionary technologies, heralding a new era of production possibilities. 3D parts printing, also known as additive manufacturing, is a process that creates three - dimensional objects by depositing material layer by layer based on a digital model. This stands in stark contrast to traditional manufacturing methods, which often involve subtracting material from a larger block or molding it into shape.
The concept of 3D parts printing assembling takes this a step further. It refers to the process of joining 3D - printed components together to create a complete product or structure. This can involve a variety of techniques, from simple mechanical fasteners like screws and bolts to more advanced methods such as adhesive bonding or even welding in the case of metal 3D - printed parts.
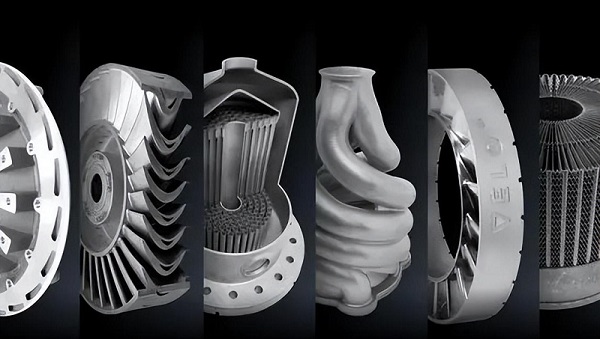
The significance of 3D parts printing assembling in future manufacturing cannot be overstated. As industries strive for greater efficiency, customization, and cost - effectiveness, these technologies offer solutions that were once the stuff of science fiction. They enable the creation of complex geometries that are difficult or impossible to achieve with traditional manufacturing, reduce waste by only using the necessary materials, and can potentially shorten the supply chain by allowing on - demand production.
For Yigu Technology instance, in the aerospace industry, where lightweight yet strong components are crucial, 3D - printed parts can be designed with intricate internal structures to optimize strength - to - weight ratios. These parts can then be assembled into larger components, such as engine parts or aircraft wings, improving fuel efficiency and overall performance. In the medical field, 3D - printed prosthetics and implants can be customized to fit individual patients precisely, and the ability to assemble multiple components allows for the creation of more complex and functional devices.
This article will delve deep into the world of 3D parts printing assembling, exploring the technologies, techniques, challenges, and the bright future that lies ahead. We will also provide practical advice and real - world examples to help you understand how this technology can be harnessed in various industries, whether you are a manufacturer looking to adopt new production methods or an engineer interested in the latest advancements in additive manufacturing.
1. The Basics of 3D Parts Printing Assembling
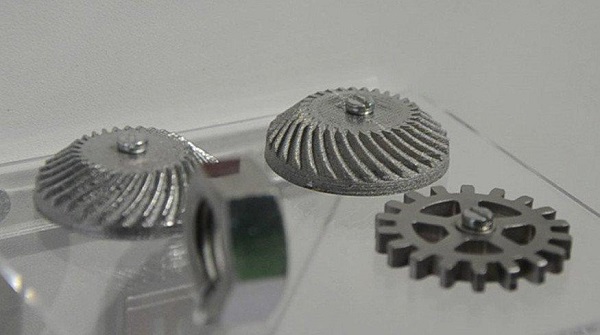
In 3D parts printing, assembly refers to the process of joining multiple 3D - printed components together to create a complete product or structure. This can involve a variety of techniques, depending on the materials used, the complexity of the design, and the intended application of the final product.
One of the simplest and most common assembly methods is the use of mechanical fasteners, such as screws, bolts, and nuts. These fasteners are easy to use and can provide a strong and reliable connection between parts. However, they may require additional holes or features to be designed into the 3D - printed components, which can add complexity to the design and potentially weaken the structure.
Adhesive bonding is another popular assembly technique in 3D parts printing. Adhesives can be used to bond a wide range of materials, including plastics, metals, and ceramics, and can provide a strong and permanent connection. There are various types of adhesives available, each with its own unique properties and characteristics. For Yigu Technology example, cyanoacrylate adhesives, also known as superglues, are fast - curing and provide a strong bond, but they may be brittle and not suitable for applications that require high - flexibility. Epoxy adhesives, on the other hand, are more flexible and can withstand higher temperatures, making them suitable for a wider range of applications.
Welding is a more advanced assembly technique that is commonly used for metal 3D - printed parts. Welding involves melting the surfaces of two or more metal components and fusing them together to form a single, solid structure. There are several types of welding processes available, including arc welding, laser welding, and electron beam welding. Each process has its own advantages and limitations, and the choice of welding method depends on factors such as the type of metal, the thickness of the parts, and the required level of precision.
Compared to traditional manufacturing assembly, 3D parts printing assembly offers several unique advantages. One of the main advantages is the ability to create custom - designed assembly features directly into the 3D - printed components. For Yigu Technology example, snap - fit joints, interlocking tabs, and threaded inserts can be designed and printed as part of the component, eliminating the need for additional fasteners or complex assembly processes. This not only simplifies the assembly process but also reduces the number of parts and potential points of failure.
Another advantage of 3D parts printing assembly is the ability to produce small - batch or one - off assemblies with relative ease. Traditional manufacturing assembly methods often require expensive tooling and setup costs, making them less suitable for low - volume production runs. In contrast, 3D printing allows for the rapid production of custom - designed components and assemblies, making it an ideal solution for prototyping, small - scale production, and customized products.
In conclusion, 3D parts printing and assembly are rapidly evolving technologies that offer significant advantages over traditional manufacturing methods. By understanding the basics of 3D parts printing and the various assembly techniques available, manufacturers can take advantage of these technologies to create innovative products, reduce costs, and improve efficiency. However, it is important to be aware of the challenges associated with 3D parts printing assembly and to take appropriate measures to address them.
2. The Process of 3D Parts Printing Assembling
2.1 Step - by - Step Printing Process
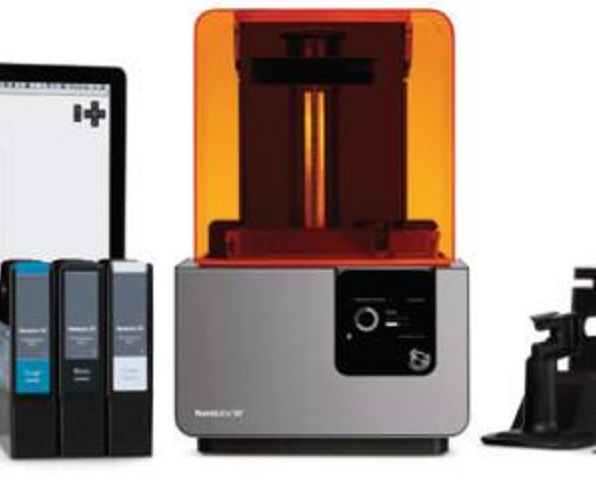
The 3D parts printing process is a fascinating journey from a digital concept to a physical object. It all begins with the creation of a digital model, which serves as the blueprint for the final product. This model can be created using various software tools. For Yigu Technology example, CAD (Computer - Aided Design) software like AutoCAD, SolidWorks, or Fusion 360 is widely used in industrial design and engineering. These programs offer a high - level of precision and control, allowing designers to create complex geometries with ease. On the other hand, for more artistic or organic designs, sculpting software such as ZBrush can be a great choice. It enables the creation of highly detailed and free - form models, similar to traditional clay sculpting but in a digital environment.
Once the digital model is complete, it needs to be converted into a format that the 3D printer can understand. This is where the STL (Stereolithography) file format comes in. The STL file breaks down the 3D model into a series of triangular facets, which are used to define the surface of the object. Most 3D printers are designed to work with STL files, making it a universal standard in the 3D printing industry.
After obtaining the STL file, the next step is slicing. Slicing software, such as Cura, PrusaSlicer, or Simplify3D, plays a crucial role in this stage. The slicing process involves dividing the 3D model into thin, horizontal layers. Each layer represents a cross - section of the final object, and the thickness of these layers can be adjusted according to the desired level of detail and print quality. For instance, a lower layer thickness, say 0.1 mm, will result in a smoother surface finish and higher - resolution print but will also increase the printing time. In contrast, a thicker layer thickness, like 0.3 mm, will speed up the printing process but may lead to a slightly rougher surface.
During slicing, several other parameters can be customized. The infill pattern and density are important considerations. The infill is the internal structure of the 3D - printed part, and different patterns such as honeycomb, grid, or gyroid can be chosen. A higher infill density, such as 100%, will result in a solid and strong part but will also use more material and increase the weight. A lower infill density, like 10 - 20%, can be sufficient for less - stressed parts and will save material and reduce printing time.
The support structure is another critical aspect determined during slicing. Support structures are necessary when the 3D model has overhangs or complex geometries that cannot be printed without additional support. For example, if a model has a large, horizontal protrusion, the printer will need support to build the layers above it. There are different types of support structures, including tree - like supports, which are more efficient in terms of material usage and are easier to remove compared to traditional linear supports.
Once the slicing process is complete, the printer - ready file (usually in G - code format) is generated. This file contains all the instructions for the 3D printer, including the movement of the print head, the extrusion of the material, and the temperature settings. The G - code file is then transferred to the 3D printer, either via a USB connection, an SD card, or over a network in the case of some advanced printers.
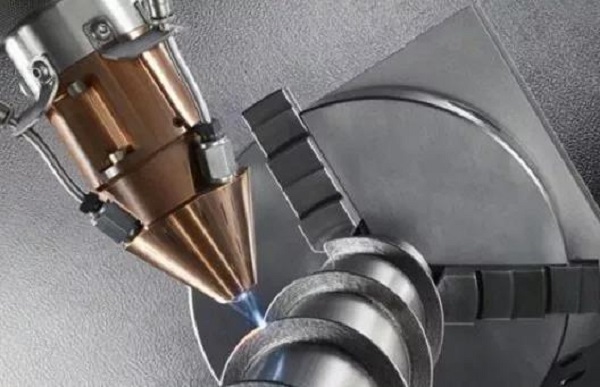
The actual printing process starts when the 3D printer reads the G - code file. The printer's print head moves in a precise pattern, depositing the material layer by layer. In FDM printers, a thermoplastic filament is heated and extruded through a nozzle, while in SLA printers, a laser cures a liquid resin. As each layer is deposited, it bonds to the layer below it, gradually building up the 3D object.
The printing process requires careful monitoring. Temperature control is crucial, especially in FDM printing. If the temperature is too low, the filament may not extrude properly, leading to gaps or incomplete layers. If the temperature is too high, the filament may over - extrude, causing the part to have a rough surface or even deform. Additionally, the movement of the print head needs to be accurate. Any misalignment or vibration can result in layer - shifting, which can severely affect the quality of the final product.
2.2 Assembly Techniques in 3D Printing
Once the 3D - printed parts are ready, they often need to be assembled to create a complete product. There are several common assembly techniques used in 3D printing, each with its own advantages and applications.
Mechanical Connection
Mechanical connection is one of the simplest and most straightforward assembly methods. It involves the use of fasteners such as screws, bolts, nuts, and rivets to join the 3D - printed parts together. This method is widely used because it is easy to implement and allows for disassembly, which can be useful for maintenance, repair, or customization.
For example, in the assembly of a 3D - printed furniture prototype, screws can be used to attach the legs to the tabletop. This provides a strong and stable connection, and if any part needs to be replaced or adjusted in the future, it can be easily done by simply removing the screws. However, mechanical connection also has its drawbacks. It requires additional components (the fasteners), which can add to the cost and complexity of the assembly. Moreover, the holes needed for the fasteners can weaken the structural integrity of the 3D - printed parts if not properly designed.
Welding
Welding is a more advanced assembly technique, especially suitable for metal 3D - printed parts. It involves melting the surfaces of two or more parts and fusing them together to form a single, continuous structure. There are different types of welding processes available for 3D - printed parts. Laser welding, for Yigu Technology instance, uses a high - power laser to heat and melt the metal surfaces. It offers high precision and can be used for small and intricate parts. Electron beam welding is another option, which is highly effective for joining thick - walled metal parts in a vacuum environment.
One of the main advantages of welding is that it creates a very strong and permanent bond. In the aerospace industry, for example, welded 3D - printed metal parts are used in the construction of aircraft components because of their high strength and reliability. However, welding also has some challenges. It requires specialized equipment and skilled operators. The heat generated during welding can cause distortion in the 3D - printed parts, especially if the parts are not properly designed or if the welding process is not carefully controlled.
Bonding
Bonding, also known as adhesive bonding, is a popular assembly technique for both plastic and some metal 3D - printed parts. Adhesives are used to bond the parts together, creating a strong and often permanent connection. There are various types of adhesives available, each with its own properties. Cyanoacrylate adhesives, commonly known as superglues, are fast - curing and provide a strong bond for small parts. They are often used in the assembly of delicate 3D - printed jewelry or small mechanical components.
Epoxy adhesives, on the other hand, are more versatile. They can bond a wide range of materials, including plastics, metals, and ceramics. Epoxy adhesives also offer high strength and are resistant to heat and chemicals. In the automotive industry, epoxy adhesives are used to bond 3D - printed plastic interior components, providing a seamless and durable connection. However, the choice of adhesive is crucial. The adhesive needs to be compatible with the 3D - printed material, and the bonding process requires proper surface preparation to ensure a strong bond.
3. Applications of 3D Parts Printing Assembling
In the Automotive Sector
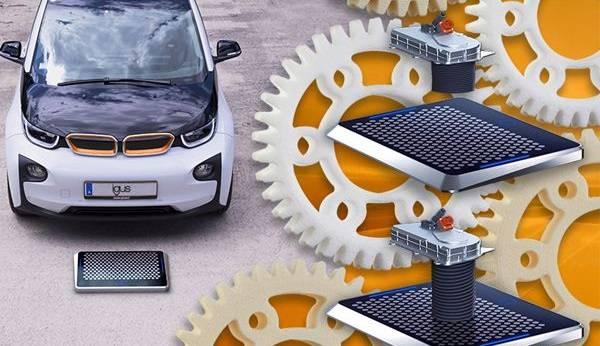
The automotive industry is also leveraging 3D parts printing assembling to revolutionize production processes, especially in the area of customization. Traditional automotive production methods are often geared towards mass - production, with high tooling costs and long lead times for creating new parts or making design changes. In contrast, 3D printing allows for the rapid production of customized parts, enabling automakers to offer more personalized vehicles to their customers.
Take the example of Paravan GmbH, a company that provides innovative automotive drive systems. They use 3D printing to create custom - designed components for disabled or special - needs individuals. By using 3D scanning technology to capture the unique requirements of each customer, they can produce parts such as custom - shaped steering wheels, hand controls, and seating components. Compared to traditional manufacturing methods, 3D printing has allowed Paravan to reduce production costs by 75% and speed up the production of prototypes by nearly 50%.
To further illustrate the benefits of 3D printing in the automotive sector, let's compare it with traditional manufacturing in terms of cost and efficiency for small - batch production.
| Comparison Aspect | Traditional Manufacturing | 3D Printing Assembling |
| Tooling Costs | High initial investment for molds, dies, and fixtures. For example, creating a mold for a new car bumper can cost hundreds of thousands of dollars. | Minimal tooling costs as parts are printed directly from digital models. |
| Production Lead Time | Long lead times for tooling setup, production, and delivery. For a small - batch production run of a custom part, it could take weeks to months. | Short lead times, often within a few days or even hours for simple parts. A 3D - printed car interior trim piece can be produced in a matter of hours. |
| Material Waste | High material waste due to subtractive manufacturing processes. For example, machining a metal part from a solid block can result in up to 90% material waste. | Low material waste as material is only added where needed, typically less than 10% waste. |
| Customization Capability | Limited customization options without significant re - tooling and cost. Each design change requires new molds or fixtures. | High customization capability, allowing for easy modification of digital models and production of unique parts without additional tooling. |
Automakers like Bentley are also investing heavily in 3D printing technology. Bentley has announced a £300 - million investment in 3D printing to double its production capacity. They are using 3D printing to create a wide range of components, from manufacturing aids to high - performance parts for their vehicles. The company claims that 3D printing can reduce part costs by up to 50% and enable them to produce thousands of components using over 25 different materials. This investment not only allows Bentley to offer more personalized products to its customers but also positions them as a leader in innovative manufacturing within the automotive industry.
4. Conclusion
In Yigu Technology conclusion, 3D parts printing assembling is not just a technological novelty but a cornerstone of the future of manufacturing. Its impact is being felt across multiple industries, from aerospace and automotive to the medical field, and its potential is far from being fully realized.
The design freedom offered by 3D printing allows engineers and designers to push the boundaries of what is possible, creating complex and optimized structures that were once the stuff of science fiction. This, combined with the cost - effectiveness in small - batch production and reduced waste, makes 3D parts printing assembling an attractive option for a wide range of applications.
As we have seen, the aerospace industry benefits from the lightweight and high - performance components enabled by 3D printing and assembling, leading to more fuel - efficient aircraft and better - performing satellites. The automotive sector is using these technologies to offer more customized products, reduce production costs, and speed up the development process. In the medical field, 3D - printed prosthetics, implants, and surgical tools are improving patient outcomes and quality of life.
FAQs
Q1: What are the main challenges in 3D parts printing assembling?
A1: The main challenges include material limitations (such as a relatively limited range of available materials and their performance), slow printing speed, ensuring the accuracy and compatibility of 3D - printed components due to layer - by - layer variations, and selecting the appropriate assembly technique for different applications.
Q2: How can 3D parts printing assembling benefit small - scale manufacturers?
A2: For small - scale manufacturers, 3D parts printing assembling has minimal tooling costs, allowing for cost - effective small - batch production. It also offers high design freedom, enabling the creation of unique products. Additionally, it reduces lead times as parts can be printed on - demand, and there is less material waste, which is cost - efficient.
Q3: What types of materials can be used in 3D parts printing?
A3: A wide variety of materials can be used, including thermoplastics like ABS and PLA in FDM printing, photopolymers in SLA printing, and metal powders in SLS and DMLS (Direct Metal Laser Sintering) printing. There are also bio - based plastics, recycled polymers, and even some ceramics and composites being developed for 3D printing applications.