Introduction
Injection molding is one of the most sophisticated manufacturing processes in the world. It transforms raw plastic pellets into finished products with remarkable precision, consistency, and efficiency. But behind every perfect part lies a complex interplay of engineering disciplines—material science, thermal dynamics, fluid mechanics, and precision mechanics.
Crafting perfect injection molding parts is not a matter of luck. It requires mastery of multiple factors: material selection, temperature control, pressure management, and time optimization. Each parameter influences the final outcome, and a deviation in any area can compromise part quality.
This guide unveils the engineering behind perfect injection molding parts. You will learn the step-by-step process, key equipment, critical parameters, and how to optimize each for superior results. Whether you are a designer, engineer, or manufacturer, this comprehensive overview will help you achieve consistent, high-quality parts.
What Is the Injection Molding Process?
Injection molding is a manufacturing process where molten plastic is injected into a mold cavity under high pressure. The plastic cools and solidifies, taking the shape of the cavity. The mold opens, and the finished part is ejected.
Step-by-Step Breakdown
Step 1: Plastic Raw Material Preparation
The process begins with selecting the appropriate plastic resin based on product requirements.
| Material | Key Properties | Common Applications |
|---|---|---|
| Polyethylene (PE) | Lightweight; chemical resistance; flexible | Bottles; containers; bags |
| Polypropylene (PP) | Good strength; heat resistance; fatigue resistance | Food containers; automotive parts; hinges |
| Polystyrene (PS) | Rigid; low cost; easy to process | Disposable products; packaging |
| ABS | Impact resistance; good surface finish | Electronics housings; toys; automotive trim |
| Polycarbonate (PC) | High strength; optical clarity; heat resistance | Lenses; medical devices; safety equipment |
Drying: Hygroscopic plastics (nylon, ABS, PC) absorb moisture from the air. Moisture causes voids, bubbles, and surface defects. Drying removes this moisture before processing.
Example: Nylon requires drying at 80–100°C for 4–6 hours to achieve moisture content below 0.2%.
Step 2: Heating and Melting
Dried plastic granules are fed from the hopper into the heating barrel. Electric heaters raise the temperature, melting the plastic into a viscous fluid.
| Material | Melting Temperature Range |
|---|---|
| Polyethylene (PE) | 120–180°C |
| Polypropylene (PP) | 180–250°C |
| ABS | 200–250°C |
| Polycarbonate (PC) | 250–320°C |
Key principle: The screw rotates, conveying the plastic forward while shearing and mixing it. This ensures uniform melting and consistent melt temperature.
Step 3: Injection
The molten plastic is forced through the nozzle into the mold cavity under high pressure.
| Parameter | Typical Range | Impact |
|---|---|---|
| Injection pressure | 50–200 MPa | Fills the cavity; higher for complex parts |
| Injection speed | 20–100 mm/s | Affects fill pattern; surface quality |
Critical: Insufficient pressure = short shots (incomplete filling). Excessive pressure = flash (plastic leakage at parting line).
Step 4: Cooling and Solidification
Cooling channels circulate coolant (water or oil) to remove heat. The plastic solidifies, taking the shape of the cavity.
| Factor | Impact on Cooling |
|---|---|
| Part thickness | Thicker parts require longer cooling |
| Material | Crystalline plastics (PP, PE) release additional heat; longer cooling |
| Cooling channel design | Efficient channels reduce cooling time |
Rule of thumb: Cooling time accounts for 70–80% of total cycle time. Optimizing cooling is the most effective way to increase productivity.
Step 5: Mold Opening and Part Ejection
The mold opens, and ejector pins push the solidified part out. The part is now ready for post-processing.
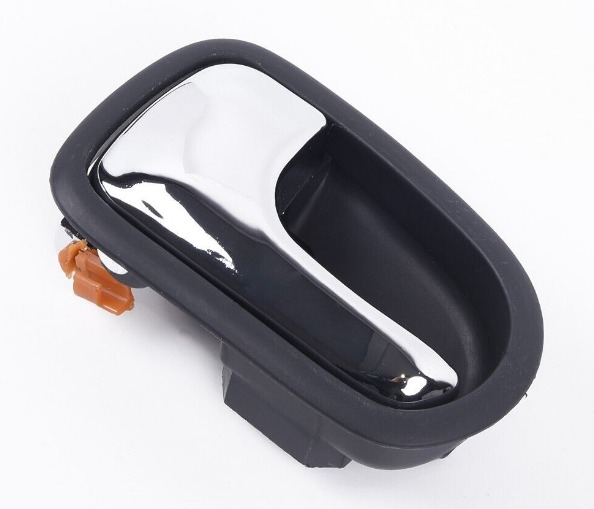
Step 6: Post-Processing
| Operation | Purpose |
|---|---|
| Trimming | Remove flash, runners, and gates |
| Polishing | Improve surface finish |
| Assembly | Combine with other components |
| Painting/coating | Add color; protection |
What Are the Key Equipment Components?
Injection Molding Machine
Plunger-Type vs. Screw-Type
| Comparison | Plunger-Type | Screw-Type |
|---|---|---|
| Plasticizing ability | Poor; uneven | Good; uniform |
| Pressure loss | Larger | Smaller |
| Injection speed uniformity | Inconsistent | Consistent |
| Applicable products | Simple; low-precision | Wide range; high-precision; complex |
Modern standard: Screw-type machines dominate the industry due to superior plasticization, consistent melt quality, and better control.
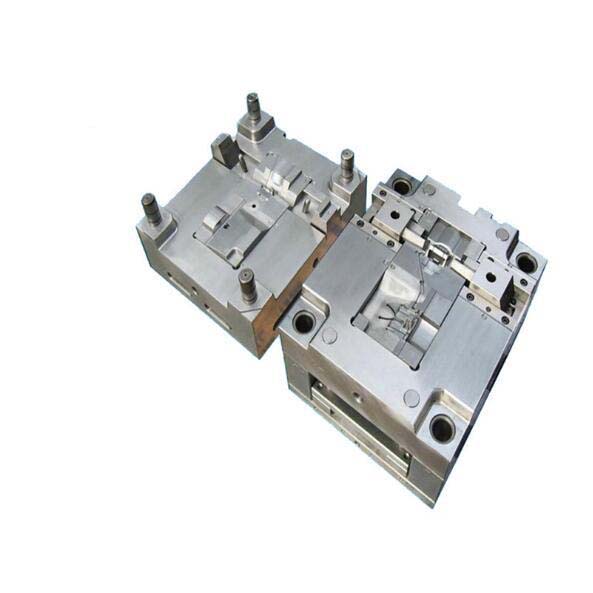
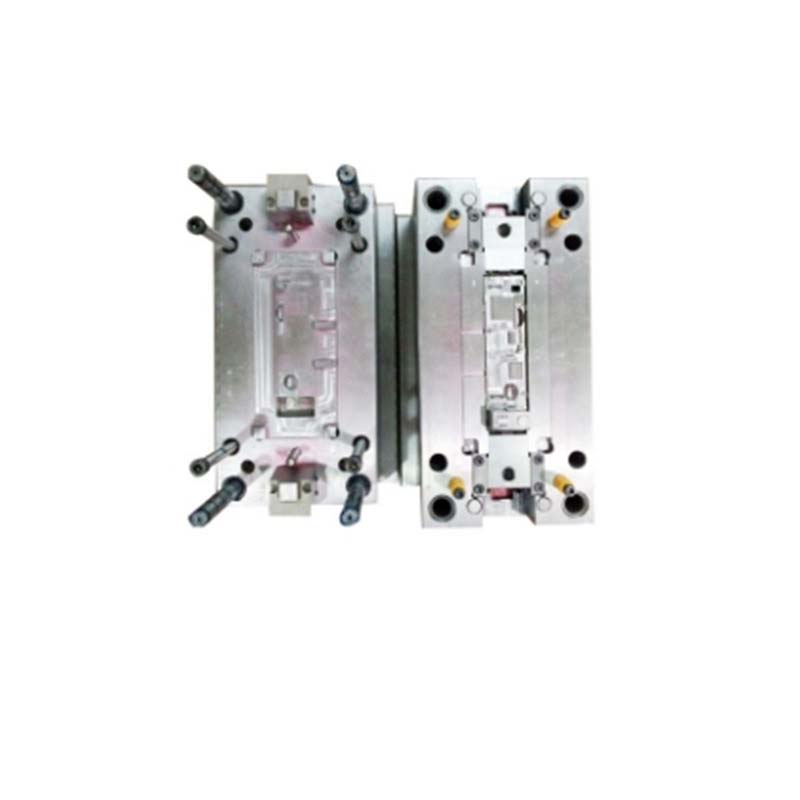
Mold Components
| Component | Function |
|---|---|
| Fixed mold base plate | Stationary part; attaches to fixed platen |
| Moving mold base plate | Moves with movable platen |
| Mold cavity | Forms outer shape of the part |
| Mold core | Forms internal features |
| Runner system | Sprue + runners + gates; delivers plastic to cavity |
| Ejector system | Ejector pins and plate; pushes part out |
What Factors Are Crucial for Perfect Parts?
Material Selection
The choice of plastic material determines the part’s mechanical, thermal, and chemical properties.
| Material | Tensile Strength (MPa) | HDT (°C at 1.82 MPa) | Chemical Resistance | Applications |
|---|---|---|---|---|
| Polycarbonate (PC) | 60–70 | 130–140 | Good (except strong alkalis) | Safety goggles; electronics; automotive |
| ABS | 25–50 | 80–100 | Decent (affected by acetone) | Toys; appliance housings |
| Polypropylene (PP) | 30–40 | 100–130 | High resistance | Food containers; hinges; chemical storage |
Selection criteria:
- Mechanical requirements – Strength; impact resistance; flexibility
- Thermal requirements – Operating temperature; heat deflection
- Chemical exposure – Resistance to oils, solvents, cleaning agents
- Regulatory – Food contact; medical; flame retardancy
- Cost – Material cost vs. performance
Temperature Control
| Parameter | Function | Typical Range |
|---|---|---|
| Barrel temperature | Melts plastic | 120–320°C (material-dependent) |
| Nozzle temperature | Slightly lower than barrel; prevents drooling | 130–300°C |
| Mold temperature | Affects cooling rate; surface finish | 30–100°C (material-dependent) |
Material-specific ranges:
| Material | Barrel Temp (°C) | Nozzle Temp (°C) | Mold Temp (°C) |
|---|---|---|---|
| PE | 120–200 | 130–190 | 30–70 |
| PP | 180–250 | 190–240 | 30–80 |
| ABS | 200–250 | 210–230 | 40–90 |
| PC | 250–320 | 250–300 | 80–100 |
Critical: Too low = incomplete melting; poor flow. Too high = degradation; discoloration; reduced properties.
Pressure Management
| Pressure Type | Function | Typical Range |
|---|---|---|
| Plasticizing pressure (back-pressure) | Improves melt homogeneity; mixes additives | 5–20 MPa |
| Injection pressure | Fills mold cavity | 50–200 MPa |
Plasticizing pressure effects:
- Higher = better mixing; more uniform melt
- Too high = excessive shear heating; degradation
Injection pressure effects:
- Too low = short shots; incomplete filling
- Too high = flash; over-packing; internal stress
Time Management (Cycle Time)
| Time Component | Function | Typical Range |
|---|---|---|
| Filling time | Duration to fill cavity | Seconds to 20 seconds |
| Holding pressure time | Compensates for shrinkage | 5–30 seconds |
| Cooling time | Solidification before ejection | 70–80% of cycle; 10 seconds to minutes |
Cooling time rule: Double the thickness = quadruple the cooling time.
Example:
- 2 mm thick part: 10–20 seconds cooling
- 4 mm thick part: 40–80 seconds cooling
How Do You Optimize for Perfect Parts?
Process Optimization Checklist
| Area | Action |
|---|---|
| Material | Select appropriate grade; dry properly; verify properties |
| Mold | Balanced cooling channels; proper venting; smooth surfaces |
| Temperature | Set within material range; monitor consistently; adjust for ambient changes |
| Pressure | Start with recommended values; adjust based on part quality; avoid over-packing |
| Time | Balance cycle time with quality; don’t shorten cooling excessively |
Common Defects and Solutions
| Defect | Likely Cause | Solution |
|---|---|---|
| Short shots | Low pressure; low temperature | Increase pressure; raise temperature |
| Flash | Excessive pressure; worn mold | Reduce pressure; repair mold |
| Warpage | Uneven cooling; internal stress | Balance cooling; optimize holding pressure |
| Sink marks | Insufficient holding | Increase holding pressure/time |
| Voids | Moisture; poor venting | Dry material; add vents |
| Surface defects | Poor flow; contamination | Adjust temperature; clean mold |
How Does Yigu Technology Engineer Perfect Parts?
At Yigu Technology, we apply engineering principles to every injection molding project. Our approach combines material science, precision mold design, and process optimization to deliver consistent, high-quality parts.
Our Engineering Approach
| Step | Method |
|---|---|
| Material selection | Analyze application requirements; recommend optimal material |
| Mold design | Advanced CAD/CAM; mold flow analysis; balanced cooling |
| Process development | Scientific molding; parameter optimization; data-driven settings |
| Quality control | In-process monitoring; dimensional inspection; mechanical testing |
| Continuous improvement | Analyze production data; refine processes |
Example: For a medical device component requiring high precision and biocompatibility, we select medical-grade PC, design precision molds with conformal cooling, optimize injection parameters, and perform rigorous quality inspection—ensuring parts meet stringent standards.
Conclusion
Crafting perfect injection molding parts requires mastering the interplay of material selection, temperature control, pressure management, and time optimization.
Key principles:
- Material selection – Match material properties to application requirements
- Temperature control – Set barrel, nozzle, and mold temperatures within optimal ranges
- Pressure management – Balance plasticizing and injection pressures for consistent fills
- Time management – Optimize filling, holding, and cooling times for quality and efficiency
When these factors align, injection molding produces parts with:
- Consistent dimensions (tolerances to ±0.01 mm)
- Excellent surface finish
- Strong mechanical properties
- Repeatable quality across millions of cycles
Frequently Asked Questions (FAQ)
How do I choose the right plastic material for my injection-molded part?
Consider application requirements: mechanical strength (PC for high impact; PP for flexibility), heat resistance (PC for 130°C; ABS for 80–100°C), chemical exposure (PP for high chemical resistance), regulatory needs (food contact; medical), and cost. Compare properties using material datasheets and test samples when possible.
What should I do if my injection-molded parts have warping issues?
Warping is caused by uneven cooling or internal stress. Solutions: balance cooling channels to ensure uniform mold temperature; increase cooling time; adjust mold temperature (higher for amorphous plastics; lower for crystalline); optimize holding pressure to reduce over-packing; add ribs to improve part stiffness.
How can I reduce cycle time without sacrificing quality?
Focus on cooling optimization—cooling accounts for 70–80% of cycle time. Improve cooling channel design (conformal cooling reduces cycle time 20–40%); use higher coolant flow rates; ensure channels are close to cavity surface. Optimize holding time—minimize while maintaining dimensional accuracy. Avoid reducing cooling time excessively; insufficient cooling causes warpage.
What is the difference between injection pressure and holding pressure?
Injection pressure fills the mold cavity during the injection phase. It must be high enough to overcome flow resistance and fill all details. Holding pressure is applied after filling to compensate for shrinkage as the plastic cools. Holding pressure is typically 30–80% of injection pressure. Insufficient holding causes sink marks; excessive holding causes over-packing and warpage.
How does mold temperature affect part quality?
Lower mold temperature = faster cooling; shorter cycles; but higher risk of warpage, internal stress, and surface defects. Higher mold temperature = slower cooling; longer cycles; but better surface finish, lower internal stress, improved crystallinity for crystalline plastics. Optimal mold temperature balances cycle time and quality based on material and part requirements.
Contact Yigu Technology for Custom Manufacturing
At Yigu Technology, we engineer perfect injection molding parts through scientific principles and practical expertise. Our team applies material science, precision mold design, and process optimization to deliver consistent, high-quality results.
Our injection molding capabilities include:
- Material expertise – Commodity to engineering plastics
- Precision mold design – Balanced cooling; optimized gating
- Process optimization – Scientific molding; SPC monitoring
- Quality assurance – Dimensional inspection; mechanical testing
- Volume flexibility – Prototypes to high-volume production
We help clients achieve perfect parts—with consistency, efficiency, and reliability.
Contact us today to discuss your injection molding project. Let our engineering expertise help you craft perfect parts.