What is the Resin Printing Process?
Definition and Basics
The resin printing process is a type of 3D printing technology, also known as stereolithography (SLA) in a more technical sense. It operates on a unique principle compared to other 3D - printing methods like Fused Deposition Modeling (FDM). Instead of melting and extruding a filament, resin printing uses a photosensitive liquid resin. This resin undergoes a chemical reaction when exposed to a specific type of light, usually ultraviolet (UV) light. When the light hits the resin, it causes the resin molecules to bond together, or polymerize, solidifying the resin layer by layer. This allows for the creation of highly detailed three - dimensional objects. For example, a small, intricate jewelry piece with fine details like filigree patterns can be accurately reproduced using resin printing, something that would be very challenging with other 3D - printing techniques.
Key Components Involved
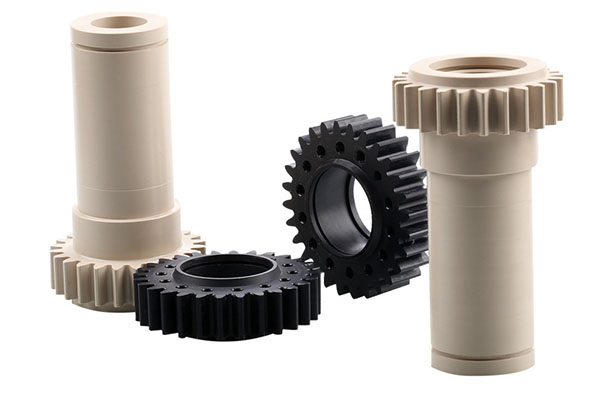
- Resin: The most crucial component, there are various types of resins available for different applications. For example, standard resins are great for general - purpose 3D printing, producing objects with good mechanical properties. Flexible resins are used when the final product needs to have some elasticity, such as in the creation of soft toys or flexible phone cases. High - temperature - resistant resins are designed for parts that will be exposed to heat, like components in some automotive or aerospace applications. Each resin has its own curing characteristics, and factors like viscosity and curing speed can affect the printing process.
- Light Source: As mentioned, UV light is commonly used in resin printing. In some printers, a laser is the light source. The laser can be precisely controlled to trace the shape of each layer of the object on the surface of the resin, curing it accurately. Other printers use Digital Light Processing (DLP), which involves a projector - like system that projects an image of the layer onto the resin all at once, curing the entire layer simultaneously. This can speed up the printing process compared to point - by - point laser curing.
- Printing Platform: This is where the printed object is built. At the start of the printing process, the platform is positioned at the surface of the resin tank. As each layer of resin is cured, the platform gradually moves downwards (in most resin printers), allowing the next layer of resin to flow in and be cured on top of the previous one. The smooth movement and precise positioning of the platform are essential for the accurate construction of the 3D object. Any misalignment or jerkiness during the platform movement can result in defects in the printed object, such as uneven layers or misprinted features.
The Step - by - Step Resin Printing Process
Pre - printing Preparation
- Model Design: The journey begins with creating or obtaining a 3D model. This can be done using 3D modeling software like Blender, Autodesk Maya, or Tinkercad. For instance, if you are printing a custom - designed figurine, you'll need to carefully sculpt the model in the software, paying attention to details such as facial expressions, body proportions, and any unique features. Once the model is complete, it should be checked for any non - manifold geometry, which are areas where the model's surface has errors like overlapping faces or open edges. These issues can cause problems during the printing process, so it's crucial to fix them using the software's repair tools.
- Slice Software Setup: Next, the 3D model is imported into a slicing software. Popular slicers for resin printing include ChiTuBox, Lychee Slicer, and PrusaSlicer. In the slicer, several settings need to be configured. Layer height is a critical setting; a smaller layer height, such as 0.05mm, will result in a smoother surface finish but will increase the printing time. For example, a detailed jewelry piece might benefit from a low layer height to capture fine details, while a less detailed prototype could use a higher layer height like 0.1mm to speed up the printing process. Exposure time also needs to be set correctly. This is the amount of time the resin is exposed to the UV light for each layer. Different resins have different recommended exposure times, which can range from a few seconds to over 10 seconds, depending on the resin's sensitivity to light and the power of the printer's light source.
- Resin and Equipment Preparation: Select the appropriate resin based on your project requirements. As mentioned before, different types of resins serve different purposes. Pour the resin into the printer's resin tank, making sure not to overfill it. Check the printer to ensure it is in good working condition. Clean the printing platform thoroughly to ensure the printed object adheres properly. Some printers may require calibration of the light source or leveling of the printing platform before starting the print. For example, if the platform is not level, the printed object may have uneven layers or may not adhere to the platform at all.
The Printing Phase
- Layer - by - Layer Curing: Once everything is set up, the printing process commences. The light source, whether it's a laser or a DLP projector, begins to trace the shape of the first layer of the object on the surface of the resin. As the light hits the resin, the resin polymerizes and solidifies, forming the first layer of the 3D object. In a DLP - based resin printer, the entire layer is cured at once as the projector projects an image of the layer onto the resin. In a laser - based printer, the laser moves point - by - point, curing the resin in a precise pattern.
- Platform Movement: After the first layer is cured, the printing platform moves downwards by a distance equal to the layer height. This allows a new layer of resin to flow in between the cured layer and the bottom of the resin tank. The recoater mechanism, which is present in most resin printers, helps to spread the resin evenly across the surface, ensuring a consistent layer thickness. This process of curing a layer and moving the platform down is repeated for each subsequent layer. For example, if a 3D model is 50mm tall and the layer height is set to 0.1mm, the printer will go through 500 such cycles to complete the printing of the object.
- Model Construction: As the layers stack up, the 3D object gradually takes shape. The printer's software precisely controls the movement of the light source and the platform to ensure that each layer is accurately positioned on top of the previous one. During this process, it's important to monitor the printer to make sure there are no issues such as resin splashing, which could affect the quality of the print. If the printer has a camera monitoring system, it can be used to keep an eye on the printing progress remotely.
Post - printing Processing
- Washing: Once the printing is complete, the object is removed from the printing platform. It is then washed to remove any uncured resin. A common method is to use isopropyl alcohol (IPA) in a wash station. The object is submerged in the IPA and agitated gently, either manually or using a mechanical stirrer. This helps to dissolve and remove the uncured resin from the surface of the object. The wash time can vary depending on the complexity of the object, but it usually ranges from 5 - 15 minutes.
- Curing: After washing, the object is still not fully cured. It needs to be further cured under a strong UV light source. There are dedicated post - curing stations available in the market that provide intense UV light. The curing time in these stations can range from 10 - 30 minutes, depending on the size and thickness of the object. For example, a thin, delicate object may require less curing time compared to a thick, bulky one.
- Finishing Touches: For a more polished look, the printed object may need to be sanded to remove any rough edges or support marks. Fine - grit sandpaper, such as 400 - 1000 grit, can be used for this purpose. If the object requires coloring, it can be painted using acrylic paints or other suitable dyes. Some objects may also be coated with a clear varnish to add a protective layer and enhance the appearance. For instance, a printed miniature for tabletop gaming may be painted with multiple layers of acrylic paint to bring out the details and then coated with a clear varnish for a glossy finish.
Yigu Technology's View
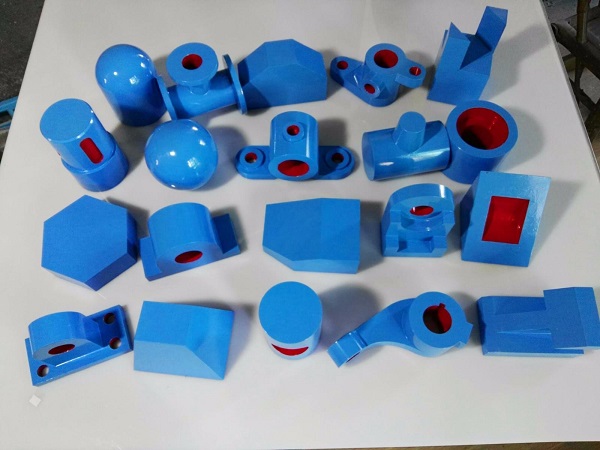
Yigu Technology, as a non - standard plastic metal products custom Supplier, firmly believes that the resin printing process holds great promise in the manufacturing of non - standard plastic and metal products. Its ability to create complex geometries with high precision makes it an ideal choice for producing custom - designed parts that have intricate details and unique shapes.
For instance, in the production of small - scale mechanical components with fine internal structures, resin printing can accurately replicate these features, which is often difficult to achieve with traditional manufacturing methods. However, we also recognize that the resin printing process has its limitations, such as relatively slow printing speed for large - scale production and potential material brittleness in some cases.
Nevertheless, through continuous technological improvements and process optimizations, we are confident that these challenges can be overcome. Our team is committed to exploring and implementing the latest advancements in resin printing technology to enhance the quality and efficiency of our custom manufacturing services. We are always ready to collaborate with our customers, providing them with professional advice and solutions to help them fully leverage the potential of the resin printing process for their projects.
FAQ
What types of resins are best for high - detail resin printing?
Resins with high - resolution capabilities are ideal for high - detail printing. For example, photopolymer resins formulated specifically for fine - detail work often have low viscosity, allowing for better flow and more accurate layer - by - layer curing. Some dental resins are designed to capture extremely fine details, with a resolution that can reproduce features as small as a few micrometers. They are used for creating dental models with intricate surface details. Additionally, some high - precision engineering resins can also be a great choice. These resins maintain their shape well during and after curing, ensuring that the detailed features of the 3D model are faithfully replicated.
How can I reduce the smell of resin during the printing process?
There are several ways to reduce the resin smell. First, ensure proper ventilation. Using an exhaust fan or working in a well - ventilated area can help to quickly remove the odorous fumes. Second, consider using a resin with a lower odor profile. Some manufacturers offer low - odor resins that still maintain good printing properties. Third, you can place activated carbon filters near the printer. These filters can adsorb the volatile organic compounds (VOCs) that cause the smell, reducing the overall odor in the workspace.
Is resin printing suitable for large - scale production?
Resin printing has some limitations for large - scale production. On the one hand, the printing speed of resin printers is generally slower compared to some other industrial manufacturing methods. For instance, a large - scale injection - molding machine can produce hundreds of parts in a short time, while a resin printer may take hours to print a single complex part. On the other hand, the cost of resin materials can be relatively high, especially for high - performance resins, which increases the production cost per unit. However, for products with complex geometries and high - precision requirements in small - to medium - scale production runs, resin printing can be a viable option. It can create parts that are difficult or impossible to make with traditional manufacturing techniques without the need for expensive molds, saving time and cost in the prototyping and low - volume production stages.