What is Hand Injection Moulding?
Hand injection moulding, also known as manual injection moulding, is a fundamental and widely - used process in the manufacturing of plastic products. It involves the manual operation of injecting molten plastic material into a pre - designed mould cavity. This process is crucial for producing a diverse range of plastic items, from small, intricate components to larger, more simple - shaped products.
The Basic Principle
At its core, the hand injection moulding process starts with the preparation of the plastic material. The plastic resin, which can come in pellet or granular form, is first heated to its melting point. This melting process is typically carried out in a heating chamber or a plastic injection unit. Once the plastic reaches a molten, viscous state, it has the fluidity necessary to be forced into the mould.
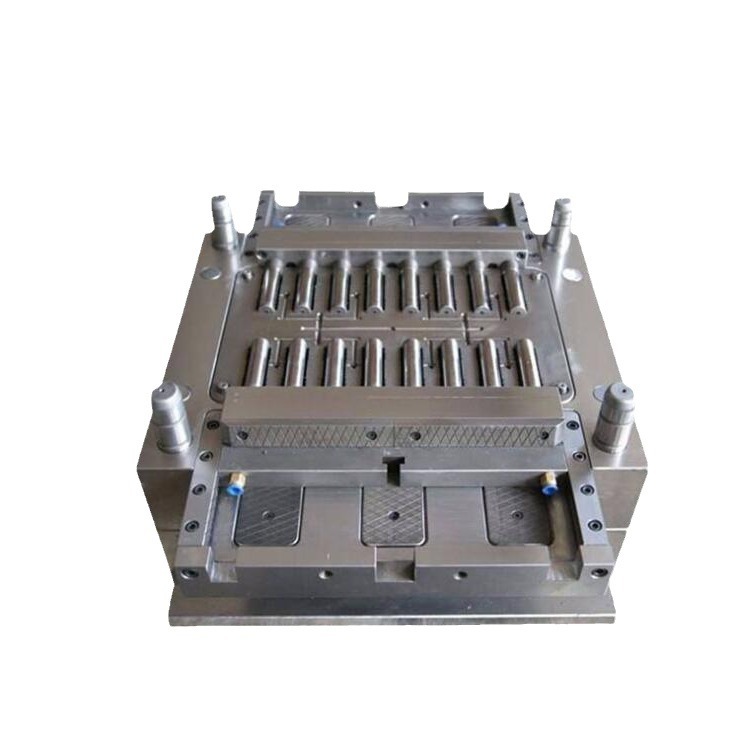
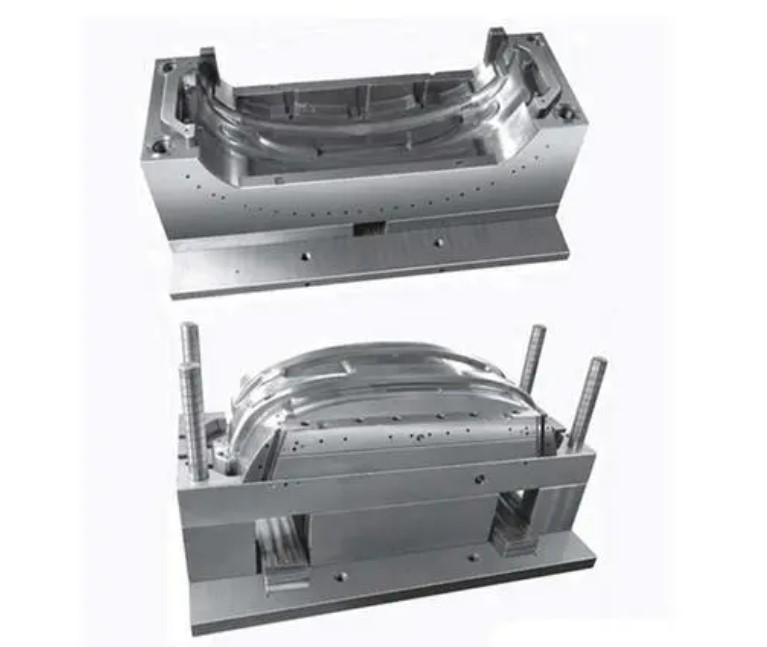
The mould itself is a precision - engineered tool, usually made of metal such as steel or aluminum. It consists of two or more parts that, when closed, form a cavity with the exact shape of the desired final product. The operator then uses a hand - held injection device, which is connected to the heating chamber, to manually push the molten plastic into the mould cavity. The pressure applied during this injection phase is carefully controlled by the operator to ensure that the plastic fills every part of the cavity evenly.
After the cavity is filled, the plastic is allowed to cool and solidify inside the mould. This cooling process can be natural, relying on the ambient air to dissipate the heat, or it can be accelerated using cooling channels within the mould that circulate a coolant, such as water. Once the plastic has fully solidified, the mould is opened, and the newly formed plastic product is ejected. This cycle of heating, injecting, cooling, and ejecting is repeated for each unit of the product to be manufactured.
Key Components of Hand Injection Moulding
Moulds
Moulds are the heart of the hand injection moulding process. They are the tools that determine the final shape and quality of the plastic product. Moulds can be made from various materials, with steel and aluminum being the most common.
- Steel Moulds: Steel moulds offer high durability and excellent dimensional stability. They can withstand high injection pressures and repeated use without significant wear and tear. For example, in the production of large - scale industrial plastic parts that require long - term production runs, steel moulds are often the top choice. Their ability to maintain precision over thousands of injection cycles makes them suitable for high - volume manufacturing. However, steel moulds are relatively expensive to manufacture and have a longer lead - time for production. They also have a higher heat capacity, which can slow down the cooling process in the injection moulding cycle.
- Aluminum Moulds: Aluminum moulds, on the other hand, are lighter in weight and have better thermal conductivity compared to steel. This means that they can heat up and cool down more quickly, reducing the overall cycle time of the injection moulding process. Aluminum moulds are more cost - effective for small to medium - scale production runs or for products where quick prototyping is required. For instance, in the development of new consumer electronics products, aluminum moulds can be used to rapidly produce sample parts for testing and design validation. But they are not as durable as steel moulds and may wear out faster, especially when dealing with abrasive plastic materials.
Moulds can also be classified based on their complexity. There are single - cavity moulds, which are designed to produce one part per injection cycle, and multi - cavity moulds, capable of producing multiple identical parts in a single cycle. Multi - cavity moulds are more efficient for high - volume production as they can significantly increase the output rate. However, they require more precise alignment and higher injection pressures to ensure that each cavity is filled evenly.
Injection Equipment
The injection equipment in hand injection moulding is what enables the operator to transfer the molten plastic into the mould cavity. The most common type of injection equipment in hand injection moulding is the manual injection gun.
Manual Injection Guns: These are hand - held devices that are designed to be easy to operate. They typically consist of a barrel, a plunger, and a nozzle. The barrel is where the molten plastic is loaded. The operator then uses the plunger to apply pressure, forcing the plastic through the nozzle and into the mould. Manual injection guns are suitable for low - volume production, small - scale workshops, or for creating prototypes. They are relatively inexpensive compared to automated injection moulding machines, making them accessible to small businesses and hobbyists. For example, in a small - scale artisanal plastic product manufacturing unit, a manual injection gun can be used to create unique, hand - crafted plastic items.
When choosing injection equipment, several factors need to be considered. The injection volume capacity is crucial. It should match the size of the parts being produced. A small injection gun with a low volume capacity may not be suitable for creating large plastic components, while a large - capacity gun may be too cumbersome and difficult to control for small, intricate parts. The ease of use and ergonomics of the equipment also matter. Operators need to be able to comfortably hold and operate the injection device for extended periods without experiencing fatigue, as this can affect the quality and consistency of the injection process. Additionally, the material compatibility of the injection equipment is important. Some plastics may be corrosive or abrasive, so the equipment needs to be made of materials that can withstand the chemical and physical properties of the plastic being processed.
The Step - by - Step Hand Injection Moulding Process
Preparation
Before starting the hand injection moulding process, meticulous preparation is essential to ensure a smooth operation and high - quality end - products.
- Mould Preparation: The mould must be thoroughly cleaned to remove any residues from previous production runs. This can be done using specialized cleaning solvents and tools such as brushes. Residues, if left behind, can affect the surface finish of the plastic product and may even cause defects. For example, small particles of old plastic can create bumps or rough spots on the new product. After cleaning, the mould is often pre - heated. Pre - heating the mould helps to reduce the thermal shock on the molten plastic when it is injected. It also promotes more even cooling, which is crucial for maintaining the dimensional stability of the product. The pre - heating temperature depends on the type of plastic being used and the material of the mould. For instance, if using a steel mould with a common thermoplastic like polyethylene, the pre - heating temperature might be set between 50 - 80°C.
- Plastic Material Preparation: The plastic raw material, usually in pellet form, needs to be dried. Moisture in the plastic can cause problems during the injection process. When the moist plastic is heated and injected, the water vaporizes, creating voids or bubbles in the final product. A desiccant dryer is commonly used to remove moisture from the plastic pellets. The drying time and temperature vary according to the plastic type. For example, nylon typically requires more extensive drying at higher temperatures (around 80 - 120°C for 2 - 4 hours) compared to polypropylene, which can be dried at lower temperatures (around 60 - 80°C for 1 - 2 hours). Selecting the right plastic material is also crucial. Factors such as the required mechanical properties (tensile strength, impact resistance), chemical resistance, and cost - effectiveness need to be considered. If the product needs to be resistant to chemicals, a material like polyvinyl chloride (PVC) might be a better choice, while for applications requiring high strength - to - weight ratio, polycarbonate could be more suitable.
Injection
The injection phase is where the molten plastic is introduced into the mould cavity. The operator uses the hand - held injection gun to perform this task.
- Melting the Plastic: The plastic pellets are fed into the heating chamber of the injection unit. The heating chamber has heating elements, usually electrical resistors, that raise the temperature of the plastic to its melting point. The temperature control is critical. If the temperature is too low, the plastic may not melt completely, leading to inconsistent injection and defects in the product such as short - shots (where the plastic does not fully fill the mould cavity). On the other hand, if the temperature is too high, the plastic may degrade, losing its mechanical properties and causing discoloration. For example, for a common plastic like acrylonitrile - butadiene - styrene (ABS), the melting temperature typically ranges from 200 - 250°C.
- Injecting the Molten Plastic: Once the plastic is molten, the operator uses the plunger of the injection gun to apply pressure. The pressure forces the plastic through the nozzle of the gun and into the mould cavity. The injection pressure and speed need to be carefully controlled. A high injection pressure can help to fill the mould quickly, especially for complex - shaped parts with thin walls. However, too high a pressure can cause the plastic to flow too fast, creating air traps, flash (excess plastic that seeps out between the mould halves), or warping of the product. The injection speed also affects the filling pattern. A slow injection speed may result in incomplete filling, while a fast speed, as mentioned, can lead to other issues. In general, for small - to - medium - sized parts, the injection pressure can range from 5 - 15 MPa, and the injection speed can be adjusted based on the specific requirements of the product and the mould design.
Cooling and Solidification
After the mould cavity is filled with molten plastic, the cooling and solidification stage begins. This stage is crucial for determining the final shape and quality of the product.
- Natural Cooling vs. Forced Cooling: In some cases, natural cooling, relying on the ambient air to dissipate heat, can be used, especially for small - scale production or when the product does not have strict dimensional requirements. However, for most industrial applications, forced cooling is preferred to reduce the cycle time. Forced cooling is achieved by using cooling channels within the mould. These channels circulate a coolant, usually water. The water absorbs the heat from the molten plastic, causing it to cool and solidify faster. The flow rate and temperature of the coolant are important parameters. A higher flow rate of coolant can increase the heat transfer rate, but it also requires more energy. The coolant temperature is typically maintained at a level that ensures efficient cooling without causing excessive thermal stress on the mould or the plastic product. For example, the coolant water temperature can be set around 15 - 25°C.
- Factors Affecting Cooling Time: The cooling time depends on several factors. The mould material plays a significant role. Aluminum moulds, with their high thermal conductivity, allow for faster cooling compared to steel moulds. For example, if using an aluminum mould, the cooling time for a particular plastic product might be 30 - 60 seconds, while with a steel mould, it could be 60 - 120 seconds. The type of plastic also affects the cooling time. Crystalline plastics, such as polyethylene and polypropylene, generally require longer cooling times compared to amorphous plastics like polystyrene. This is because crystalline plastics undergo a phase change during cooling, which releases additional heat. The thickness of the plastic part is another crucial factor. Thicker parts take longer to cool as there is more mass to dissipate heat from. A plastic part with a thickness of 5 mm may require a cooling time of 90 - 120 seconds, while a part with a thickness of 2 mm could cool in 30 - 60 seconds.
Ejection
Once the plastic has fully solidified, the mould is opened, and the product is ejected.
- Ejection Mechanisms: Most moulds are equipped with an ejection system. This can include ejector pins, which are small rods that push the product out of the mould cavity. The ejector pins are strategically placed in the mould to ensure that the product is ejected evenly without causing damage. In some cases, especially for complex - shaped products, other ejection mechanisms like ejector sleeves or stripper plates may be used. Ejector sleeves are useful for products with holes or cylindrical features, as they can provide a more even ejection force around the circumference of the part. Stripper plates are often used for products that have a large surface area in contact with the mould cavity, as they can gently push the entire product out of the mould.
- Precautions during Ejection: During the ejection process, it is essential to ensure that the product is not damaged. The ejection force needs to be carefully controlled. If the ejection force is too high, it can cause the product to crack, break, or become deformed. On the other hand, if the force is too low, the product may not be fully ejected from the mould. Additionally, the surface of the product can be easily scratched or marred during ejection. To prevent this, the ejector pins and other ejection components should have smooth surfaces, and sometimes a release agent can be applied to the mould cavity to facilitate the ejection process and protect the surface of the product. Regular maintenance of the ejection system is also crucial to ensure its proper functioning. Worn - out ejector pins or misaligned ejection components can lead to problems during ejection and affect the quality of the final product.
Yigu Technology's Perspective
As a non - standard plastic metal products custom supplier, Yigu Technology highly values the hand injection moulding process. In the realm of small - batch and customized production, hand injection moulding shines. It offers the flexibility to quickly turn around unique product designs without the high costs associated with large - scale, automated production setups.
With years of experience in the field, we have mastered the nuances of hand injection moulding. Our team can handle a wide variety of plastic materials, ensuring that the right material is selected for each client's specific needs. We understand the importance of precision in mould design and injection operation, and we use high - quality moulds and advanced injection equipment to guarantee top - notch product quality.
Whether it's creating prototypes for new product concepts or producing small - quantity, customized plastic parts, Yigu Technology is committed to providing comprehensive services. From the initial design consultation to the final product delivery, we work closely with our clients to meet their requirements and exceed their expectations.
FAQs
What are the suitable materials for hand injection moulding?
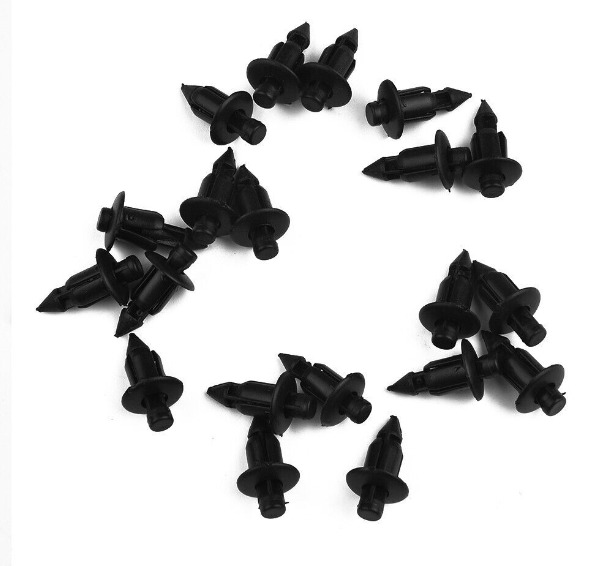
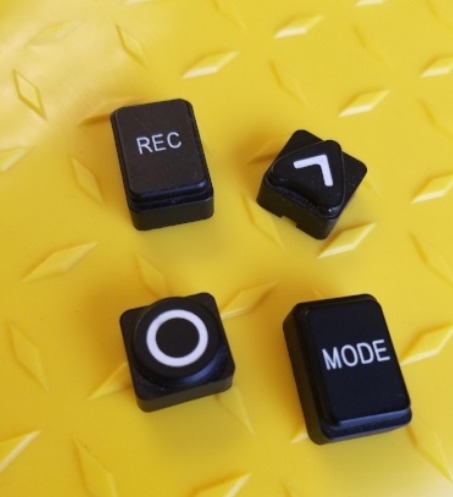
Many thermoplastic materials are suitable for hand injection moulding. Common ones include polyethylene (PE), which offers good chemical stability and is often used for making containers and simple plastic parts. Polypropylene (PP) is another popular choice. It has high strength - to - weight ratio, heat resistance, and is suitable for products like plastic cutlery and automotive interior components. Acrylonitrile - butadiene - styrene (ABS) is also frequently used due to its excellent impact resistance, dimensional stability, and surface finish, making it ideal for items such as electronic device housings.
How to reduce the occurrence of defects in hand injection moulding?
To reduce defects, first, optimize the process parameters. Ensure the plastic material is heated to the correct temperature. For example, if the temperature is too low, the plastic may not flow properly, causing incomplete filling of the mould. Adjust the injection pressure and speed according to the mould and product design. A proper injection pressure can prevent issues like short - shots and flash. Also, ensure the quality of the mould. Regularly clean and maintain the mould to prevent the build - up of residues that can cause surface defects. Check for any wear and tear in the mould components, such as ejector pins, and replace them if necessary.
Can hand injection moulding be used for large - scale production?
Hand injection moulding is not typically suitable for large - scale production. The main reason is its low efficiency. Since it is manually operated, the production rate is much slower compared to automated injection moulding processes. For instance, an automated injection moulding machine can produce hundreds of parts per hour, while a hand - injection operation may only produce a few dozen at most. Moreover, hand injection moulding has a higher labor cost per unit as it requires more operator involvement. The consistency of the products may also be an issue in large - scale production due to potential human errors during the manual injection process.