Introduction
Injection molding is a cornerstone of modern manufacturing, playing a pivotal role in producing a vast array of plastic products that surround us in daily life. From the tiny components within our electronic devices to the large parts of automotive interiors, injection molding technology enables the mass production of high - precision, complex - shaped plastic items with remarkable efficiency and cost - effectiveness.
This manufacturing process has revolutionized the way products are made, allowing for the creation of parts with tight tolerances and consistent quality. Its ability to work with a wide range of thermoplastic and some thermosetting materials makes it incredibly versatile, catering to diverse industries such as consumer goods, medical, aerospace, and more. As a result, understanding how injection molding works is essential for engineers, designers, manufacturers, and anyone interested in the world of plastic product development. In the following sections, we will take you through a step - by - step guide to the injection molding process, uncovering the secrets behind its success.
What is Injection Molding
Definition
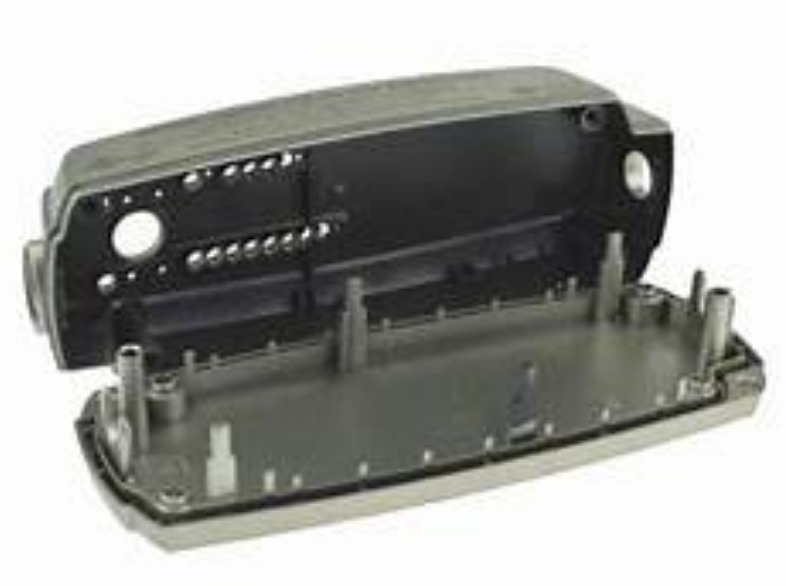
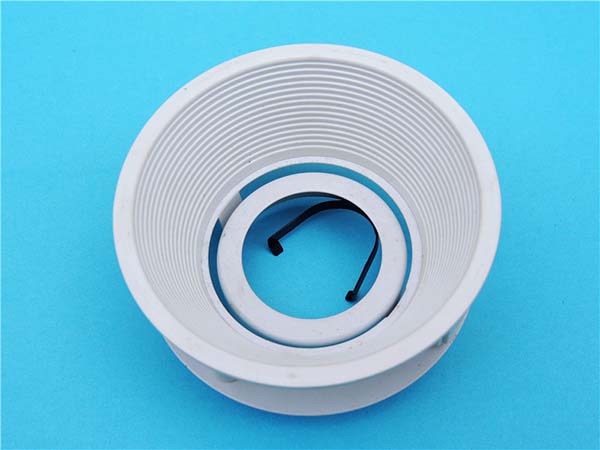
Injection molding is a manufacturing process in which a material, typically plastic, is heated to a molten state and then injected under high pressure into a mold cavity. The material cools and solidifies within the mold, taking on the precise shape of the cavity. Once solid, the mold is opened, and the finished part, known as an injection - molded part, is ejected. This process is highly versatile and can produce a wide range of products, from small and intricate components to large and complex structures. It is mainly used for thermoplastic materials, but with some modifications, it can also be applied to thermosetting plastics. For Yigu Technology example, in the production of plastic toys, the molten plastic is injected into molds with cavities shaped like various characters or objects, and after cooling, the toys are formed with detailed features.
Key Components
- Injection Machine: The injection machine is the workhorse of the injection molding process. It consists of several sub - components. The injection unit is responsible for melting the plastic material and injecting it into the mold. It typically includes a hopper for feeding the plastic pellets, a heating barrel with heating zones to melt the plastic, and a screw or a plunger mechanism. The screw, for instance, rotates to convey and mix the plastic pellets, melting them through heat generated by friction and external heating elements. The clamping unit, on the other hand, holds the mold closed during the injection and cooling stages. It generates a significant clamping force, which can range from a few tons to thousands of tons depending on the size of the mold and the requirements of the molding process. A large - scale automotive injection molding machine may have a clamping force of over 1000 tons to ensure the mold remains tightly shut during injection. The control system of the injection machine monitors and adjusts various parameters such as temperature, pressure, and injection speed to ensure consistent and high - quality production.
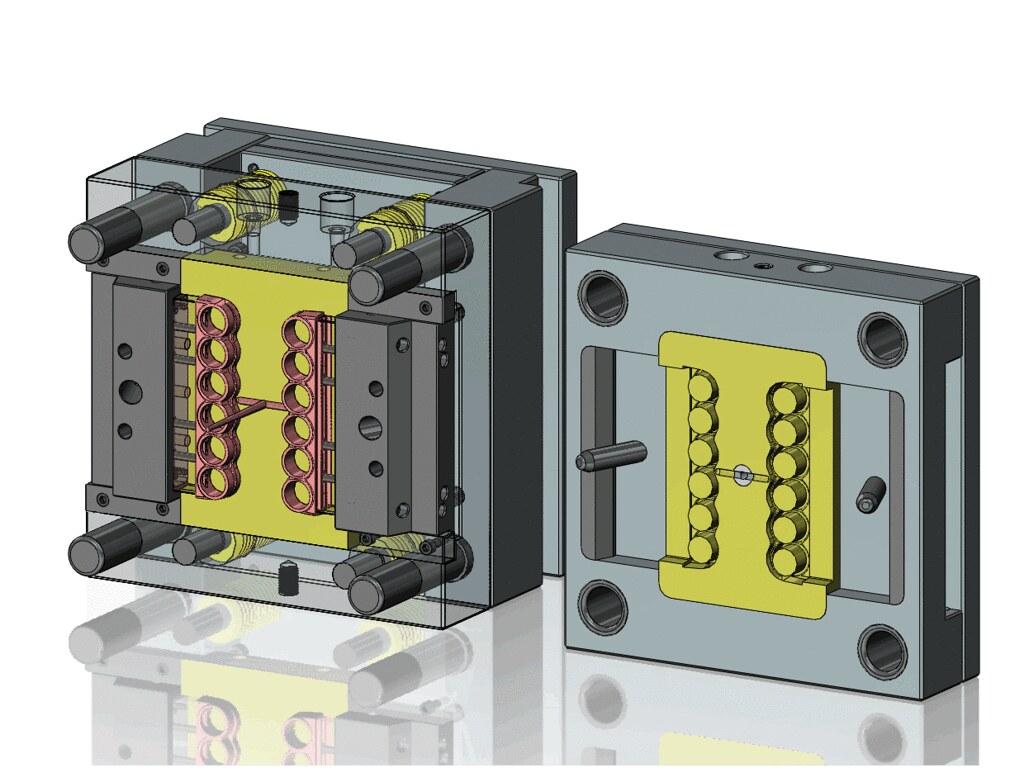
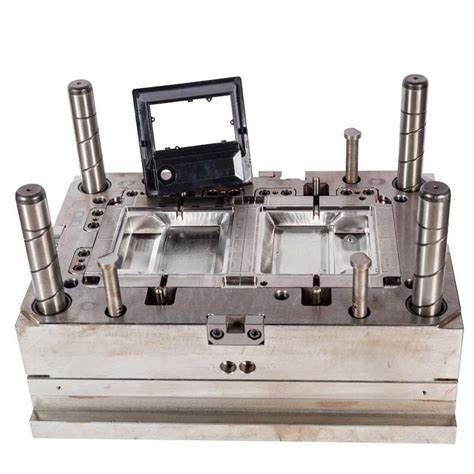
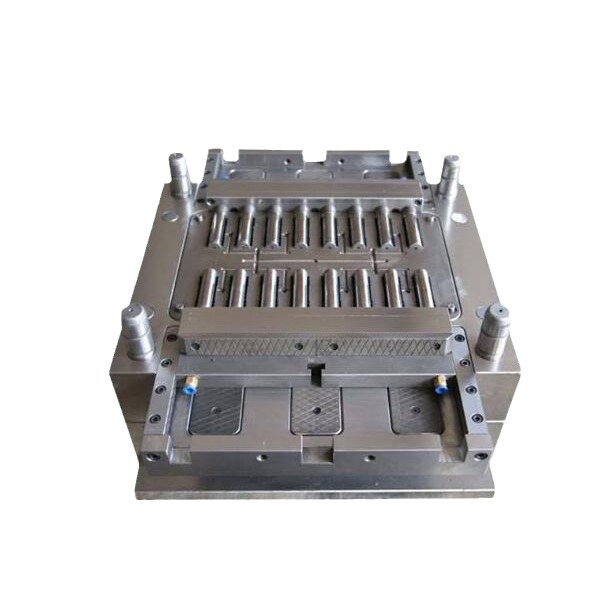
- Mold: The mold is a crucial component that determines the shape of the final product. It is usually made of high - quality steel or aluminum and consists of two halves: the cavity half and the core half. When the mold is closed, the two halves come together to form a cavity that precisely matches the shape of the desired part. Molds can be simple, for producing basic shapes like a plastic cup, or extremely complex for creating parts with intricate internal features, such as the engine covers in some high - performance cars. They often incorporate features like cooling channels to speed up the cooling process of the molten plastic, ejector pins to push the finished part out of the mold, and runners and gates to direct the flow of the molten plastic into the cavity.
Step - by - Step Injection Molding Process
1. Plastic Material Preparation
The injection molding process commences with the careful selection and preparation of the plastic material. The most common form of plastic input is in the shape of pellets or powder, which are loaded into the hopper of the injection molding machine. Different plastic materials possess unique characteristics, making them suitable for specific applications. For Yigu Technology example, polyethylene (PE) is known for its excellent chemical resistance and flexibility, which makes it ideal for producing items like plastic bags, bottles, and toys. Polypropylene (PP), on the other hand, has a higher melting point and better mechanical properties, making it a popular choice for automotive parts, appliance components, and food containers.
Before being loaded into the hopper, the plastic material might require some pre - treatment. This could involve drying the material to remove any moisture. Moisture in the plastic can cause defects such as bubbles or voids in the final product. For hygroscopic plastics like nylon, proper drying is crucial. Typically, nylon needs to be dried at a temperature of around 80 - 100°C for several hours to ensure its moisture content is below 0.2%.
2. Heating and Melting
Once in the hopper, the plastic pellets or powder are fed into the heating barrel of the injection unit. In most modern injection molding machines, a screw - type mechanism is used to move the plastic forward. As the screw rotates, it conveys the plastic along the length of the barrel. The barrel is equipped with multiple heating zones, each with its own temperature control.
The temperature in the heating zones is gradually increased from the hopper end to the nozzle end. For instance, when processing acrylonitrile - butadiene - styrene (ABS) plastic, the temperature at the hopper end might be set around 180°C, gradually increasing to 230 - 250°C near the nozzle. This temperature gradient ensures that the plastic is uniformly melted and plasticized. The heat is generated not only by the external heaters but also by the friction created as the screw rotates and compresses the plastic.
Proper temperature control is essential for the quality of the melted plastic. If the temperature is too low, the plastic may not melt completely, leading to uneven flow during injection and resulting in defects like short shots (incomplete filling of the mold). Conversely, if the temperature is too high, the plastic can degrade, losing its mechanical properties and potentially causing discoloration or charring.
3. Injection
After the plastic has been fully melted and plasticized, it is ready to be injected into the mold. The injection process is powered by a high - pressure system. The molten plastic is forced through the nozzle of the injection unit and into the mold's runner system, which directs the plastic to the mold cavity.
The injection pressure and speed are critical parameters that significantly influence the quality of the final product. Injection pressure can range from 50 to 200 MPa, depending on factors such as the type of plastic, the complexity of the mold, and the size of the part. For small and simple parts made of low - viscosity plastics like polyethylene, a relatively lower injection pressure of around 50 - 80 MPa might be sufficient. However, for large, complex parts or those made from high - viscosity plastics such as some engineering plastics, injection pressures as high as 150 - 200 MPa may be required.
The injection speed also plays a vital role. A slow injection speed may lead to incomplete filling of the mold, especially for complex geometries with thin walls. On the other hand, an overly fast injection speed can cause problems like air entrapment, which can result in voids or bubbles in the part, and high - speed flow marks on the surface. The ideal injection speed is often determined through trial - and - error or by using computer - aided engineering (CAE) software to simulate the injection process.
4. Cooling and Solidification
Once the mold cavity is filled with the molten plastic, the cooling process begins. Cooling is essential for the plastic to solidify and take on the shape of the mold. The mold is typically equipped with a cooling system, which usually consists of channels through which a cooling medium, such as water or a coolant, flows.
The cooling time is a crucial factor that affects both the quality of the product and the production efficiency. It depends on various factors, including the thickness of the part, the type of plastic, and the mold temperature. For Yigu Technology example, a thin - walled part made of a fast - cooling plastic like polypropylene may require only a few seconds of cooling time, while a thick - walled part made of a slower - cooling material like some thermosetting plastics can take several minutes.
The mold temperature also has a significant impact. A lower mold temperature generally results in faster cooling, which can increase production efficiency. However, it can also lead to higher internal stresses in the part, potentially causing warping or cracking. A higher mold temperature, on the other hand, can reduce internal stresses and improve the surface finish of the part but will increase the cooling time and thus reduce productivity. For crystalline plastics, a higher mold temperature can also promote better crystallization, resulting in improved mechanical properties.
5. Mold Opening and Part Ejection
After the plastic has cooled and solidified sufficiently, the mold is opened. The clamping unit of the injection molding machine retracts, separating the two halves of the mold.
The next step is part ejection. Most molds are equipped with an ejection system, which typically consists of ejector pins. These pins are located in strategic positions within the mold and are activated by a mechanical or hydraulic system. When the mold is opened, the ejector pins push against the part, forcing it out of the mold cavity.
During the ejection process, it's important to ensure that the part is ejected smoothly without being damaged. If the ejector pins are not properly positioned or if the ejection force is too high, the part may crack, break, or become deformed. Additionally, the part may stick to the mold due to factors such as a rough mold surface or insufficient draft angles. In such cases, additional measures like the use of release agents or modifying the mold design may be necessary.
6. Post - processing
Even after the part has been ejected from the mold, the injection molding process is not always complete. Post - processing steps are often required to enhance the quality, appearance, and functionality of the product.
One common post - processing step is the removal of flash. Flash is the thin excess plastic that forms around the edges of the part during the injection process. It can be removed manually using tools like knives or trimmers or through automated processes such as tumbling.
Trimming may also be necessary to remove any excess material from the gates or runners that were used to feed the plastic into the mold. This can be done using cutting tools or by abrasive methods.
For some products, additional finishing operations like painting, plating, or printing may be carried out to improve the appearance or add functionality. For Yigu Technology example, a plastic toy may be painted to give it a more attractive color, or a plastic electronic component may be plated with a metal to improve its conductivity or corrosion resistance. Post - processing not only improves the aesthetics and performance of the product but also helps to meet the specific requirements of different applications.
Tips for a Successful Injection Molding Process
Achieving success in injection molding requires careful attention to several key aspects. Here are some practical tips to help you optimize the process and produce high - quality parts consistently.
Material Selection
- Understand Material Properties: Thoroughly research the properties of different plastic materials before making a selection. Consider factors such as mechanical strength, heat resistance, chemical resistance, and cost. For Yigu Technology example, if you are manufacturing components for an automotive engine, you need a material with high heat resistance like polyetheretherketone (PEEK). PEEK can withstand temperatures up to 300°C, making it suitable for under - the - hood applications. On the other hand, for consumer electronics cases, materials like acrylonitrile - butadiene - styrene (ABS) are popular due to their good balance of strength, aesthetics, and relatively low cost.
- Moisture Sensitivity: As mentioned earlier, be aware of the moisture sensitivity of the plastic material. Hygroscopic materials must be dried properly before processing. Keep in mind that even a small amount of moisture can lead to significant defects in the final product. For instance, if you use a hygroscopic material like nylon without proper drying, the moisture will turn into steam during the heating process, creating voids or bubbles in the part.
- Recycled vs. Virgin Materials: Evaluate the use of recycled materials based on your product requirements. While recycled materials can be cost - effective and environmentally friendly, they may have slightly different properties compared to virgin materials. For applications where high precision and consistent quality are crucial, virgin materials might be a better choice. However, for less demanding applications like some packaging products, recycled materials can be a viable option. A study showed that recycled polyethylene terephthalate (PET) can be successfully used in making plastic bottles for non - food applications, with only a minor decrease in some mechanical properties compared to virgin PET.
Mold Design
- Draft Angles: Incorporate appropriate draft angles into the mold design. Draft angles are the angles added to the vertical surfaces of the mold cavity to facilitate the easy removal of the part after solidification. A general rule of thumb is to use a draft angle of at least 0.5 - 1 degree for most plastics. For parts with deep cavities or complex geometries, a larger draft angle may be required. Without sufficient draft angles, the part may stick to the mold during ejection, causing damage to the part or the mold.
- Cooling Channel Design: Design an efficient cooling channel system in the mold. The cooling channels should be evenly distributed around the mold cavity to ensure uniform cooling of the plastic. The layout and diameter of the channels can significantly impact the cooling time and the quality of the part. For example, using smaller diameter channels closer to the mold surface can provide more efficient cooling, but it also requires more careful design to avoid uneven cooling. Simulation software can be used to optimize the cooling channel design and predict the temperature distribution within the mold during the cooling process.
- Ejector Pin Placement: Strategically place ejector pins in the mold. The number and location of ejector pins should be determined based on the shape, size, and thickness of the part. Ejector pins should be placed in areas where they can apply sufficient force to push the part out of the mold without causing deformation. For large, flat parts, multiple ejector pins may be needed to ensure even ejection. Additionally, consider using different types of ejector systems, such as ejector sleeves or air ejection, depending on the specific requirements of the part.
Process Parameter Adjustment
- Temperature Control: Continuously monitor and adjust the temperatures in the heating barrel, nozzle, and mold. As the injection molding process progresses, the temperature may fluctuate due to factors such as changes in the ambient temperature or the wear and tear of the heating elements. Regularly check the temperature sensors and make necessary adjustments to maintain the optimal temperature range for the plastic material. For example, if you notice that the plastic is not flowing smoothly during injection, it could be a sign that the temperature is too low, and you may need to increase the barrel temperature slightly.
- Pressure and Speed Optimization: Fine - tune the injection pressure and speed based on the results of each production cycle. Start with initial settings based on the material and mold specifications, but be prepared to make adjustments. If you observe short shots or incomplete filling of the mold, you may need to increase the injection pressure or speed. Conversely, if there are issues like flash or high - speed flow marks, reduce the injection pressure or speed. Keep records of the parameter changes and the resulting part quality to identify the optimal settings for different products.
- Cycle Time Management: Optimize the cycle time to balance production efficiency and part quality. The cycle time includes the injection time, cooling time, and mold opening/ejection time. While reducing the cycle time can increase productivity, it should not be done at the expense of part quality. For example, if you shorten the cooling time too much, the part may not solidify properly, leading to warping or other defects. Analyze the cooling rate of the plastic material and adjust the cooling time accordingly to ensure that the part has sufficient strength and dimensional stability when ejected from the mold.
FAQ
Q1: What are the common problems in injection molding and how to solve them?
Common problems in injection molding include:
- Surface Defects: Such as sink marks, flow marks, and surface roughness. Sink marks often occur due to uneven cooling or insufficient packing pressure. To solve this, adjust the cooling system to ensure uniform cooling, and increase the packing pressure appropriately. Flow marks can be caused by low melt temperature or fast injection speed. You can raise the melt temperature and adjust the injection speed to a more suitable value. For surface roughness, it may be due to a rough mold surface, so polishing the mold surface can improve the situation.
- Dimensional Deviations: Parts may not meet the required dimensional specifications. This can be caused by incorrect shrinkage rate settings in the mold design, inconsistent process parameters during production, or thermal expansion and contraction issues. To address this, accurately measure and set the shrinkage rate according to the plastic material used. Regularly monitor and maintain consistent process parameters like temperature, pressure, and injection speed. Also, consider the effects of thermal expansion and contraction during the design and production process.
- Void or Bubble Formation: Voids or bubbles inside the part can be a result of trapped air during injection, moisture in the plastic material, or excessive gas generation during the melting process. To solve this, ensure proper venting in the mold to allow air to escape. Dry the plastic material thoroughly before processing to remove moisture. Adjust the injection speed and pressure to prevent air entrapment, and if necessary, use degassing equipment for the plastic material.
