Introduction
Think about the last time you held a product and wondered, "How did they even make that?" Chances are, 3D printing had something to do with it. The way we design products today looks nothing like it did ten years ago.
Here's what's changed: designers no longer ask "Can we make this?" They ask "What should we make?" That shift changes everything.
3D printing product design—building objects layer by layer from digital files—has freed creators from the straight lines, uniform walls, and simple shapes that traditional manufacturing demanded. Today, a designer in Toronto can imagine a complex organic shape in the morning and hold it in their hands by afternoon.
The numbers tell the story. The global market for 3D-printed products should hit $63.4 billion by 2026. Product design alone makes up more than a third of that growth (SmarTech Analysis, 2024). From airplane parts to custom hearing aids, this technology isn't just changing prototypes—it's changing what we believe is possible.
Let's walk through how 3D printing is rewriting the rules of design, and what that means for anyone who creates things.
How Do Different 3D Printing Technologies Shape Design?
Not all 3D printers work the same way. The technology you choose determines what you can design. Here's what actually happens inside these machines:
FDM: The Practical Choice for Testing Ideas
Fused Deposition Modeling (FDM) melts plastic filament and lays it down in thin layers. Think of it like a hot glue gun controlled by a robot.
What this means for designers:
- You can test ideas quickly and cheaply
- Parts are strong enough for functional testing
- Layer lines show, so surface finish matters less
A typical FDM printer works with layer thickness from 50 to 400 microns. Thicker layers print faster but show more texture. Thinner layers take longer but look smoother.
The sweet spot for most prototypes? Around 200 microns. Fast enough for quick iteration, smooth enough to evaluate shape and fit.
SLA: When Detail Actually Matters
Stereolithography (SLA) uses UV light to harden liquid resin. A laser traces each layer, curing the material exactly where needed.
The design advantage:
- 10 to 100 micron layers—smooth enough for jewelry patterns
- Sharp edges stay sharp
- Complex curves print without stair-stepping
If you're designing products that people will hold and judge—consumer goods, medical devices, anything with visual appeal—SLA delivers finishes that look injection-molded.
SLS: Freedom from Support Structures
Selective Laser Sintering (SLS) fuses powder particles with a laser. Unmelted powder surrounds the part, so overhangs don't need supports.
Why designers love this:
- Design anything—internal cavities, interlocking parts, organic lattices
- Parts come out strong enough for end use
- No supports means no marks to clean up
Layer thickness runs 50 to 150 microns. The surface feels slightly grainy, but the design freedom compensates.
Metal Printing: When Strength Must Match Complexity
Direct Metal Laser Sintering (DMLS) melts metal powder into fully dense parts. Titanium, stainless steel, aluminum—all print with properties matching wrought materials.
What this enables:
- Aerospace brackets with internal lattice structures
- Medical implants matching patient anatomy exactly
- Tooling with conformal cooling channels
Layer thickness ranges from 20 to 100 microns. The parts come out ready for real work.
| Technology | Layer Thickness | Best For | Design Freedom |
|---|---|---|---|
| FDM | 50–400μm | Prototypes, functional parts | Good for basic shapes |
| SLA | 10–100μm | High-detail models, jewelry | Excellent surface detail |
| SLS | 50–150μm | Durable parts, complex geometry | Maximum freedom, no supports |
| Metal | 20–100μm | Aerospace, medical, tooling | Fully dense metal parts |
What's the Journey from Digital Model to Physical Part?
Understanding the process helps designers make better choices. Here's what happens inside a 3D printing service:
Digital Modeling: Where Ideas Take Shape
Everything starts in software. Designers use CAD programs like SolidWorks for engineering work—precise dimensions, exact tolerances, parametric control. When an automotive engineer designs a cylinder head with cooling channels, SolidWorks ensures every curve matches specifications.
For organic shapes, Blender or similar sculpting tools take over. Artists model characters, jewelry designers craft flowing forms, architects explore curved surfaces. The software doesn't limit imagination.
Some designs start from the physical world. 3D scanning captures existing objects, creating digital models for modification or reproduction. Reverse engineering becomes straightforward.
Slicing: Translating Design to Machine Instructions
The 3D model alone won't print. Software like Cura or Simplify3D slices it into hundreds or thousands of thin layers, generating toolpaths for the printer.
Here's what the software decides:
- Layer height – Thinner layers mean smoother surfaces but longer prints
- Infill density – Solid parts use more material; lattice interiors save weight
- Support structures – Overhangs need temporary scaffolding
- Print orientation – How the part sits affects strength and surface finish
Good slicing makes the difference between a print that works and one that fails halfway through.
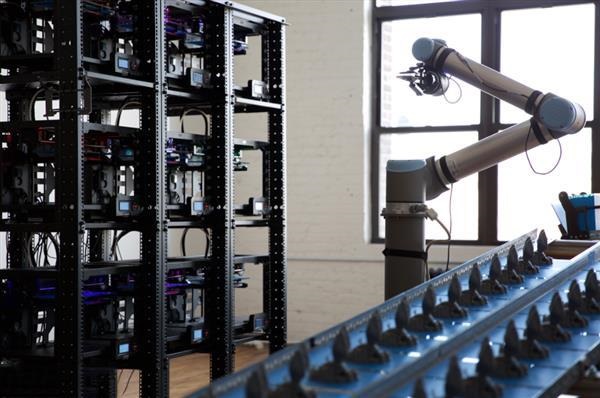
Printing: Watching Layers Become Objects
The printer follows the sliced instructions, depositing material exactly where needed. Modern industrial machines achieve build speeds up to 50mm per hour for complex geometries.
Large-format printers now construct items measured in meters. Construction companies print building components. Boat builders print hull sections. The scale keeps expanding.
Post-Processing: The Final Touch
Printed parts rarely come off the machine ready to use. Finishing steps include:
- Support removal – Breaking or dissolving temporary structures
- Sanding – Smoothing layer lines, especially on FDM prints
- Vapor smoothing – Exposing ABS parts to acetone vapor for glossy finishes
- Heat treatment – Relieving stresses in metal parts
- Polishing – Bringing surfaces to final appearance
A well-finished SLA part can go from Ra 20μm surface roughness down to Ra 1μm—smooth enough for any application.
How Is 3D Printing Transforming Manufacturing Design?
Rapid Iteration: From Weeks to Days
Here's a real example: Apple designs iPhone cases. Before 3D printing, each design iteration took about 8 weeks. Create molds, produce samples, test, find issues, modify molds, repeat. Eight weeks per cycle.
Today, Apple uses SLA-printed ABS prototypes. Design changes happen in software. New cases print overnight. Test tomorrow. Iterate again. The cycle now takes 10 days.
That speed means more design improvements before final tooling. Better products reach market faster.
On-Demand Production: Parts When You Need Them
General Electric prints fuel nozzles for LEAP jet engines. The traditional version required 20 separate parts assembled together. The printed version? One piece. And it's 25% lighter while improving fuel efficiency by 15%.
GE doesn't stockpile these nozzles. They print them as orders come in. No inventory costs. No warehouse space. No parts sitting unused for years.
This model works for spare parts too. Instead of manufacturing thousands of parts "just in case," companies print replacements when needed. Digital inventory replaces physical inventory.
How Is Healthcare Using 3D-Printed Designs?
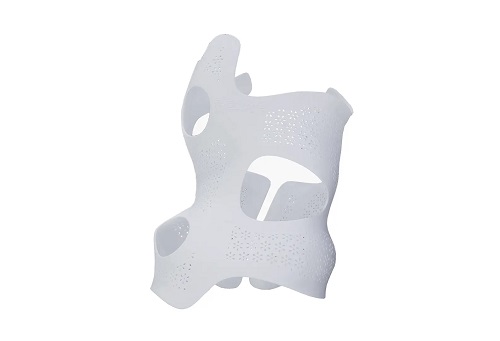
Surgical Guides: Planning Before Cutting
Johns Hopkins Hospital performs complex brain surgeries. Before 3D printing, surgeons relied on 2D images and mental visualization. Today, they print PEEK surgical guides based on each patient's scans.
The guide fits exactly over the patient's anatomy. It shows precisely where to cut, what angle to use, how deep to go. The result? 99% tumor resection accuracy in procedures where millimeters matter.
Surgeons practice on printed models before entering the operating room. They know exactly what they'll encounter. Complications drop. Outcomes improve.
Bioprinting: Living Tissues on Demand
Organovo prints liver tissue models for drug testing. Instead of animal trials—expensive, slow, and ethically complicated—pharmaceutical companies test on human-like tissue.
The impact: 80% reduction in drug development costs compared to traditional methods. More importantly, the results predict human responses more accurately.
Researchers now work toward printing functional organs. Kidney tissue, heart patches, vascular structures—all progressing toward clinical use.
How Does 3D Printing Compare to Traditional Design?
Here's the side-by-side reality:
| Factor | 3D Printing Design | Traditional Manufacturing |
|---|---|---|
| Design freedom | No geometric limits | Limited by mold access |
| Material waste | Less than 5% | 30–70% typical |
| Low-volume cost | $50–500 per part | $500–5,000+ with tooling |
| Iteration time | Hours to days | Weeks |
| Complexity cost | Linear increase | Exponential increase |
Design Freedom Changes Everything
Traditional manufacturing imposes rules: walls must have draft angles for mold release. Internal features need access for tools. Undercuts require complex mechanisms.
3D printing ignores these rules. Design internal lattice structures for weight savings. Include curved cooling channels that follow part geometry. Combine multiple components into single prints.
The question shifts from "Can we make this?" to "What design works best?"
Material Waste Nearly Disappears
Machining a titanium bracket from solid stock wastes up to 70% of expensive material. Chips pile up. Cost adds up.
Printing the same bracket uses only the material that becomes the final part. Unsintered powder in SLS and metal printing gets reused. Waste drops below 5%.
For high-cost materials like titanium, this alone justifies the switch.
Cost Structure Favors Low Volumes
Traditional manufacturing spreads tooling costs across production runs. For 1000 parts, a $10,000 mold adds $10 per part. For 100 parts, that same mold adds $100 per part.
3D printing has no tooling cost. The first part costs about the same as the hundredth. For quantities under 1000 units, printing often wins on price alone.
Iteration Speed Transforms Development
Design changes in traditional manufacturing require mold modifications—weeks of engineering and machining.
Design changes in 3D printing require software updates. Modify the CAD file, reslice, print. Next-day iteration becomes routine.
Products improve through more testing cycles. Flaws get caught earlier. Better designs reach customers faster.
Complexity No Longer Costs Extra
Traditional manufacturing penalizes complexity. Each curve, each internal feature, each unique geometry adds cost.
3D printing treats complexity as free. The machine deposits material regardless of shape. A simple cube takes about the same time as an intricate lattice structure of equal volume.
Designers optimize for performance, not manufacturability. The results outperform anything possible with conventional methods.
Conclusion: Where Does 3D Printing Product Design Go Next?
3D printing product design isn't just another tool in the box—it's changing how we think about making things. Designers who grew up with subtractive manufacturing learned to work within constraints. Designers working with additive manufacturing learn to question whether those constraints still exist.
The technology keeps advancing. Faster printers, better materials, smarter software. Each improvement expands what's possible.
For companies considering adoption, the path is clear: start with prototyping, explore tooling, then consider production parts. Each step builds understanding. Each success opens new opportunities.
The only real limit now is imagination. And that's exactly where it should be.
Frequently Asked Questions
What materials work best for 3D-printed product design?
For prototypes, PLA and ABS plastics work well and cost little. For detailed models, SLA resins deliver smooth finishes. For functional parts, nylon from SLS offers strength and durability. For demanding applications, titanium and stainless steel from metal printing match traditional material properties.
How accurate is 3D printing compared to machining?
SLA achieves layers as thin as 10 microns—smooth enough for jewelry patterns. Metal printing holds tolerances tight enough for aerospace applications. For most product design work, accuracy meets or exceeds requirements. The main difference: 3D printing maintains accuracy across complex geometries where machining might struggle.
Will 3D printing replace injection molding?
For high volumes, no. Injection molding produces parts faster and cheaper once quantities reach thousands of units. For prototyping, customization, and low volumes, 3D printing offers advantages molding can't match. The two methods complement each other—use printing for development and customization, use molding for mass production.
How do I learn 3D printing design?
Start with CAD software—plenty of free options exist. Learn the basics of modeling for additive manufacturing. Send files to printing services to see results. Join maker communities for feedback. Practice matters more than theory. Most successful designers learned by doing, failing, and trying again.
Contact Yigu Technology for Custom Manufacturing
Have a design ready to print? Or just exploring what's possible? At Yigu technology, we help turn ideas into physical products. Our team understands both design and manufacturing, so we catch issues before they become problems.
Whether you need one prototype or a thousand production parts, we deliver quality results on schedule. Contact us today to discuss your project. Let's make something great together.