Introduction
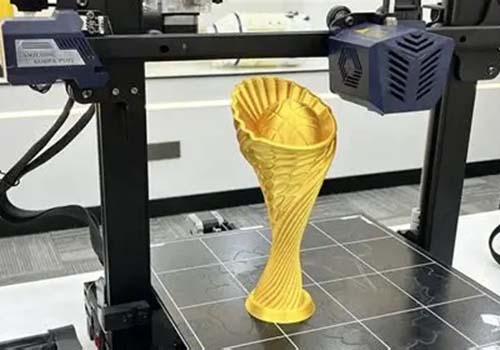
Resin 3D printing has evolved far beyond its hobbyist roots. What once produced fragile, low-quality models now creates engineering-grade parts with precision that rivals injection molding.
For engineers and product designers, the goal has shifted from "can I print this?" to "can I print this to meet strict performance standards?" The answer, with the right approach, is yes.
This guide goes beyond basic principles. We'll explore:
- The science of material selection for demanding applications
- Advanced print process optimization for tiny features
- Research-based post-curing methods for maximum performance
- Real-world applications from electronics to medical devices
At Yigu technology, we've helped clients master resin 3D printing for critical applications. This guide provides the practical techniques you need.
Why Choose Resin Printing for Demanding Applications?
The Unique Position of Resin Printing
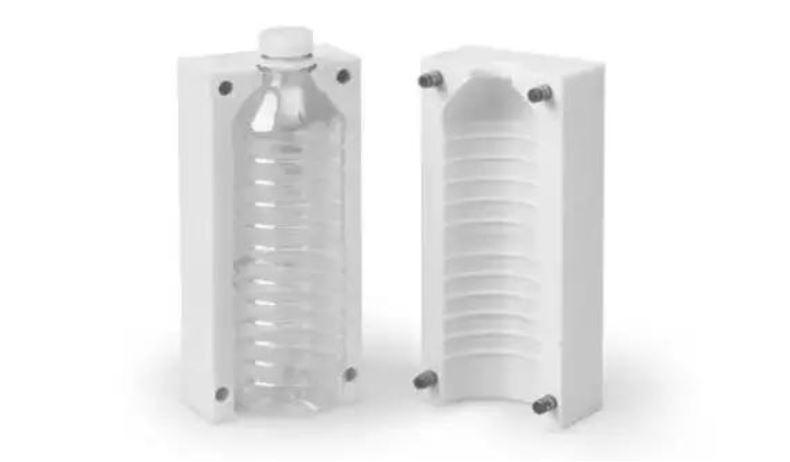
Resin printing—including SLA, DLP, and LCD—occupies a unique space in additive manufacturing. It excels where fine detail, smooth surfaces, and consistent properties are essential.
Compared to other technologies:
| Feature | Resin Printing (SLA/DLP) | FDM | SLS |
|---|---|---|---|
| Typical resolution | 25-100 microns | 100-400 microns | ~100 microns |
| Surface finish | Very smooth, injection-mold like | Visible layer lines | Granular, matte |
| Part isotropy | High (nearly isotropic) | Low (anisotropic, weaker Z-axis) | High |
| Best for | Fine details, smooth surfaces, prototypes, casting patterns | Quick, low-cost prototypes, large parts | Complex shapes, functional nylon parts |
Resin printing wins when:
- Surface finish matters—no visible layer lines
- Details are tiny—text, features under 0.2 mm
- Tolerances are tight—parts must fit together
- Transparency is needed—clear resins available
- Casting is the goal—burnout patterns
What Materials Should You Choose for Engineering Applications?
Tough vs. Castable Resins
Engineers often face a choice: create a functional, durable part or a pattern for metal casting. These require completely different material classes.
Tough Resins are designed for mechanical performance:
- High impact strength
- High tensile strength
- Good elongation at break
- Can absorb energy and bend before breaking
Ideal for: Snap-fit cases, jigs, fixtures, functional prototypes that undergo physical testing.
Castable Resins serve one purpose: clean burnout for investment casting:
- Extremely low ash content (<0.1%)
- Designed to vaporize completely at high temperatures
- Leave a clean cavity in the investment mold
- Mechanical properties are compromised—very brittle
Ideal for: Jewelry patterns, dental prosthetics, metal casting masters.
| Property | Engineering Tough Resin | Castable Wax Resin | Implication |
|---|---|---|---|
| Tensile strength | 45-60 MPa | 5-15 MPa | Tough resins withstand significant pulling forces |
| Elongation at break | 30-100% | 2-5% | Tough resins bend before breaking |
| Impact strength (Izod) | 35-100 J/m | <10 J/m | Tough resins resist sudden shocks |
| Clean burnout | Poor | Excellent (<0.1% ash) | Castable resins vaporize completely |
Biocompatible Resins (ISO 10993)
For medical applications, material safety is non-negotiable. Biocompatible resins are tested and certified according to ISO 10993, the international standard for evaluating medical device biocompatibility.
Certification classes:
- Class I: Contact with intact skin (e.g., surgical guides)
- Class IIa: Short-term mucosal or internal contact (e.g., dental devices)
Applications:
- Patient-specific surgical guides
- Dental splints, temporary crowns, try-ins
- Hearing aid shells and earmolds
- Customized prosthetics and orthotics
Critical note: Biocompatibility requires a validated workflow. Using the specific printer, resin, and prescribed post-processing steps is essential. Any deviation invalidates the certification.
Engineering Resins for Specialized Needs
High-Temperature Resins:
- High Heat Deflection Temperature (HDT)
- Withstand thermal stress under load
- For: Injection mold inserts, hot fluid flow analysis, thermal manufacturing fixtures
Flexible and Elastic Resins:
- Copy rubber properties
- Characterized by Shore Hardness (e.g., 50A, 80A)
- For: Seals, gaskets, soft-touch grips, wearables
ESD-Safe Resins:
- Dissipate static electricity
- Contain conductive additives
- For: Custom jigs, fixtures, cases for electronics assembly
How Do You Master the Print Process for High-Quality Parts?
Support Optimization for Micro-Features
Features smaller than 0.2 mm—small pins, raised text, sharp edges, textured surfaces—can be easily damaged by standard supports.
Advanced support strategy:
- Strategic orientation: Angle the part to protect delicate features. Keep them away from the build plate and direct support contact.
- "Light" support presets: Start with software's lightest preset. These use smaller touchpoints and less dense structures.
- Reduce touchpoint size: Manually edit supports near micro-features. Reduce tip diameter to 0.1-0.15 mm. This minimizes surface scarring.
- Increase support density: Compensate for weaker connections with more supports. Distribute peeling forces evenly.
- "Tree" or "organic" supports: Use advanced support types that branch from a single trunk. Minimize contact points on visible surfaces.
- Post-cure removal timing: For tough resins, remove supports after curing (part is more durable). For brittle resins, remove in "green" (pre-cured) state to prevent fracture. Test with a sample.
The Physics of Print Speed
Print speed in DLP/LCD printing is limited by viscosity—a fluid's resistance to flow, measured in centipoise (cP) .
High viscosity resins (>1000 cP) :
- Flow slowly like honey
- Longer "light-off delay" needed for resin to settle
- Higher peeling forces—slower lift speeds required
Low viscosity resins (<500 cP) :
- Flow quickly like water
- Shorter wait times between layers
- Lower peel forces—faster lift speeds possible
- Can reduce total print time by 30-50% on tall parts
Actionable strategies:
- For speed-critical applications, choose low-viscosity resins that meet mechanical requirements
- Heat the resin—warming to 25-30°C dramatically lowers viscosity, accelerating prints even with engineering materials
Fine-Tuning Software Settings
Layer height: Direct trade-off between resolution and speed
- 25 microns: Smoother surface, less visible stepping—takes twice as long as 50 microns
- 50 microns: Faster, slightly more visible layers
Exposure time: Delicate balance
- Under-curing: Weak parts, loss of detail, print failures
- Over-curing: Light bleed, dimensional inaccuracy, closed holes, swollen features
Calibration prints are essential for dialing in perfect exposure for each resin and layer height.
Lift speeds and light-off delay: Linked to resin viscosity
- High viscosity: Slow lift speed, long delay
- Low viscosity: Fast lift speed, short delay
What Advanced Post-Curing Methods Deliver Maximum Performance?
Why Post-Curing Matters
Post-curing is often misunderstood as simple hardening. For professional applications, it's an engineering process that dictates final mechanical and thermal properties.
A "green" part straight from the printer has only partially formed polymer chains. Proper post-curing completes polymerization, transforming a fragile print into a high-performance component.
How it works: UV light and heat drive completion of polymer cross-linking, locking chains into a rigid, stable network.
Critical Variables
Wavelength: Most professional resins are designed for 405nm UV light. Using the wrong wavelength (e.g., 365nm nail lamp) will be inefficient and may never achieve peak properties.
Time and temperature: Interdependent factors determining degree of cure. For many engineering resins, elevated temperature (60°C+) is required.
| Curing Condition | Relative Time to Peak Strength | Achievable Peak Tensile Strength |
|---|---|---|
| Curing at 25°C | Slower | Lower |
| Curing at 60°C | Faster | Higher (as specified on TDS) |
Professional Workflow
- Part washing: Two-stage process
- First bath ("dirty" wash): Removes bulk resin
- Second bath ("clean" wash): Removes remaining film
- Drying: Thoroughly dry with compressed air. Blow solvent out of crevices, blind holes, channels. Trapped solvent inhibits post-cure, leaving weak areas.
- Support removal: Decision based on material and desired finish—before or after curing.
- Final curing: Use dedicated curing station with precise control over time, temperature, wavelength. Follow manufacturer's Technical Data Sheet (TDS) exactly.
- Optional finishing: For A-class surfaces, wet-sand with fine-grit paper, polish with compound, or paint.
How Does High-Quality Resin Printing Work in Practice?
Case Study 1: Electronics Case
Goal: Create dimensionally accurate, snap-fit case prototype for consumer electronic device. Needed durability for functional testing and smooth surface for marketing photography. Snap-fit tabs smaller than 1mm.
Resin & Technique:
- Engineering Tough Resin selected for impact resistance and elongation
- Part oriented at 45° to minimize layer lines on cosmetic surfaces
- Advanced supports with manually edited 0.15mm touchpoints around snap-fit features
Outcome:
- Fully functional prototype printed, processed, assembled in under 24 hours
- Design team validated fit and function before injection mold tooling
- Supports removed cleanly post-cure, minimal markings easily polished away
Case Study 2: Biocompatible Surgical Guide
Goal: Manufacture patient-specific drill guide for dental implant surgery. Required extreme accuracy to match anatomy, sterile and safe for short-term oral contact.
Resin & Technique:
- ISO 10993 certified Biocompatible Resin
- Fully validated workflow followed without deviation
- Manufacturer-specified software profiles
- Two-stage IPA wash
- Precise post-curing: 20 minutes at 60°C with 405nm light
Outcome:
- Sterile, safe, highly accurate surgical guide
- Fit patient anatomy perfectly
- Surgeon performed implant procedure with greater precision and confidence
- Improved patient outcome
Yigu Technology's Perspective
At Yigu technology, we've helped clients across industries master resin 3D printing for demanding applications. Here's what we've learned:
Material science is foundational. Choose based on requirements—not just what's available. Tough for functional parts. Castable for patterns. Biocompatible for medical.
Process control separates good from great. Supports, orientation, exposure, post-curing—every variable matters. Document and repeat what works.
Post-curing is an engineering step. It's not optional. Proper protocols transform fragile "green" parts into high-performance components.
Applications we serve:
- Medical devices requiring biocompatibility
- Electronics enclosures with snap-fit features
- Investment casting patterns for jewelry and dental
- Functional prototypes for validation testing
- Custom tooling for manufacturing
Mastering resin 3D printing isn't about following a recipe—it's about understanding the science behind each step and applying it deliberately.
Conclusion
High-quality resin 3D printing for prototypes and final products requires:
- Material expertise: Choose tough, castable, biocompatible, or engineering resins based on application requirements
- Process mastery: Optimize supports for micro-features, understand viscosity's effect on speed, fine-tune software settings
- Scientific post-curing: Follow validated workflows with precise wavelength, time, and temperature control
- Real-world validation: Test parts in their intended use
The payoff:
- Functional prototypes that survive testing
- Final products ready for use
- Medical devices that meet regulatory standards
- Casting patterns with clean burnout
- Parts with injection-mold-like surface finish and detail
Resin 3D printing has matured from hobby tool to professional manufacturing solution. With the right approach, you can create parts that meet strict performance standards—every time.
FAQ
What's the difference between tough and castable resins?
Tough resins are engineered for mechanical performance—high tensile strength, impact resistance, elongation. They create functional parts that can withstand stress and bending. Castable resins are designed for one purpose: clean burnout in investment casting. They vaporize completely with <0.1% ash content but are very brittle and unsuitable for functional testing.
How do I ensure biocompatibility for medical parts?
Use ISO 10993 certified biocompatible resins and follow the manufacturer's validated workflow exactly. This includes:
- Specified printer and resin
- Prescribed software settings
- Two-stage washing process
- Precise post-curing parameters (wavelength, time, temperature)
Any deviation invalidates the certification.
How can I print tiny features without damaging them?
Advanced support strategy:
- Orient part to protect delicate features
- Use "light" support presets
- Reduce touchpoint size to 0.1-0.15 mm
- Increase support density around micro-features
- Use "tree" or "organic" supports
- Consider optimal timing for support removal (pre- or post-cure)
Why does resin viscosity affect print speed?
Viscosity determines how quickly resin flows back into the gap after each layer. High-viscosity resins (>1000 cP) flow slowly, requiring longer wait times and slower lift speeds. Low-viscosity resins (<500 cP) flow quickly, enabling faster prints—up to 30-50% time savings on tall parts. Heating resin lowers viscosity, further accelerating prints.
What post-curing conditions deliver maximum performance?
Follow the manufacturer's Technical Data Sheet (TDS) exactly. Critical variables:
- Wavelength: Usually 405nm for professional resins
- Time: As specified (varies by resin)
- Temperature: Often 60°C or higher for engineering resins
Elevated temperature accelerates cross-linking, achieving higher tensile strength and Heat Deflection Temperature (HDT).
Can resin-printed parts be used as final products?
Yes, for many applications. With proper material selection and processing, resin-printed parts can serve as:
- Medical devices (surgical guides, dental appliances)
- Functional components (snap-fit enclosures, jigs, fixtures)
- Investment casting patterns
- End-use parts where detail, surface finish, and performance matter
The key is matching material properties to application requirements and following a validated workflow.
Contact Yigu Technology for Custom Manufacturing
Ready to master resin 3D printing for your prototypes or products? Yigu technology specializes in custom manufacturing with advanced 3D printing technologies.
We offer:
- Free quotes within 24 hours—just send your CAD file
- Material expertise—tough, castable, biocompatible, engineering resins
- Process optimization—supports, orientation, exposure tuning
- Validated workflows—for medical and regulated applications
- Post-processing—washing, curing, finishing to specifications
- Production runs—from prototypes to small batches
Contact us to discuss your project. Tell us what you're making and what it needs to do. We'll help bring your design to life—with the quality and performance you demand.