Introduction
Injection molding is one of the most widely used manufacturing processes in the world. It produces billions of plastic parts annually—from the tiny components inside your smartphone to the large dashboard panels in your car. The process combines heat, pressure, and precision tooling to transform raw plastic pellets into finished products with remarkable speed and consistency.
Understanding how injection molding works is essential for engineers, designers, manufacturers, and anyone involved in product development. This guide provides a comprehensive step-by-step breakdown of the injection molding process—from material preparation to post-processing. You will learn the fundamentals, key components, and critical parameters that determine success.
What Is Injection Molding?
Injection molding is a manufacturing process where molten plastic is injected under high pressure into a mold cavity. The plastic cools and solidifies, taking the shape of the cavity. The mold opens, and the finished part is ejected.
Definition
In simple terms:
- Plastic pellets are heated until molten
- The molten plastic is forced into a precision-machined mold
- The plastic cools and hardens
- The part is ejected, and the cycle repeats
The process is highly versatile, producing parts with complex geometries, tight tolerances, and excellent surface finishes. While primarily used for thermoplastics, it can also process thermosets with appropriate modifications.
Key Components
| Component | Function |
|---|---|
| Injection unit | Melts the plastic and injects it into the mold |
| Clamping unit | Holds the mold closed during injection and cooling |
| Mold | Shapes the plastic into the final part |
| Control system | Monitors and adjusts temperature, pressure, and timing |
What Are the Key Components of an Injection Molding Machine?
Injection Unit
The injection unit melts the plastic and delivers it to the mold.
| Sub-component | Function |
|---|---|
| Hopper | Holds and feeds plastic pellets |
| Heating barrel | Contains heating zones that melt the plastic |
| Screw (or plunger) | Rotates to convey, melt, and mix the plastic; then moves forward to inject |
| Nozzle | Directs molten plastic into the mold |
The screw rotates to convey plastic pellets forward. Friction from the screw rotation and heat from barrel heaters melt the plastic. The screw then moves forward like a plunger, forcing the molten plastic through the nozzle and into the mold.
Clamping Unit
The clamping unit holds the mold closed during injection and cooling.
| Sub-component | Function |
|---|---|
| Stationary platen | Holds the fixed half of the mold |
| Moving platen | Moves to open and close the mold |
| Clamping mechanism | Generates the force to keep the mold closed (hydraulic, toggle, or electric) |
Clamping force can range from a few tons to thousands of tons. A large automotive mold may require over 1,000 tons of clamping force to withstand injection pressure.
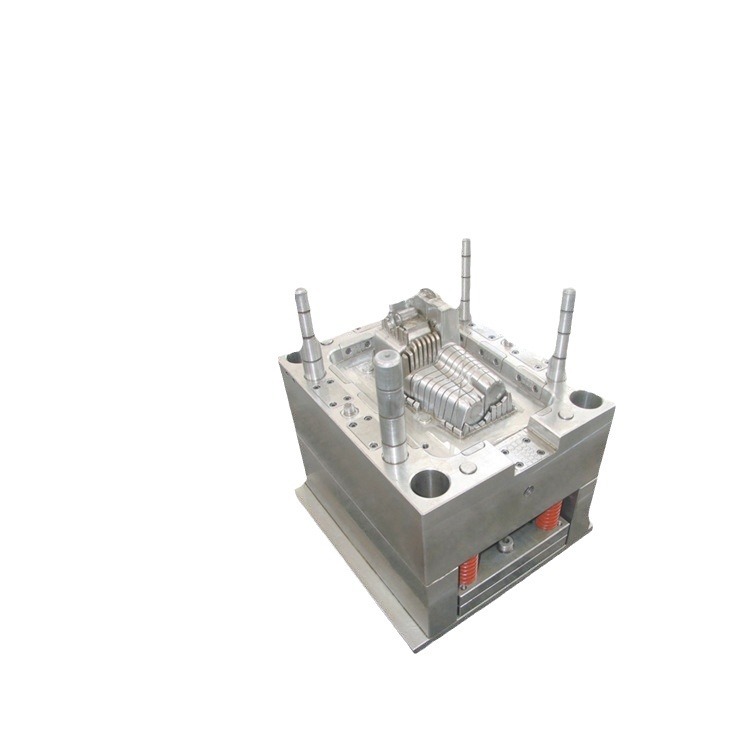
Mold
The mold determines the shape of the final product. It is typically made from hardened steel or aluminum.
| Feature | Function |
|---|---|
| Cavity and core | Form the outer and inner shapes of the part |
| Runner system | Channels that deliver plastic from the nozzle to the cavity |
| Gate | Entry point into the cavity; controls flow |
| Cooling channels | Circulate coolant to solidify the plastic |
| Ejection system | Ejector pins that push the finished part out |
Control System
The control system monitors and adjusts:
- Barrel temperatures (multiple zones)
- Injection pressure and speed
- Clamping force
- Cooling time
- Cycle time
Modern machines use closed-loop controls to maintain consistent parameters cycle after cycle.
How Does the Injection Molding Process Work Step by Step?
Step 1: Plastic Material Preparation
The process begins with selecting the appropriate plastic material. Plastics come in pellet or powder form and are loaded into the hopper.
| Material | Key Properties | Common Applications |
|---|---|---|
| Polyethylene (PE) | Chemical resistance; flexibility | Bags, bottles, toys |
| Polypropylene (PP) | Higher melting point; good mechanical properties | Automotive parts, food containers |
| ABS | Impact resistance; good surface finish | Electronics housings, toys |
| Nylon (PA) | Strong; wear-resistant | Gears, structural parts |
| Polycarbonate (PC) | High strength; transparency | Lenses, medical devices |
Drying requirements: Hygroscopic plastics (nylon, ABS, PC) absorb moisture from the air. Moisture causes voids, splay marks, and reduced strength. Nylon, for example, must be dried at 80–100°C for several hours to achieve moisture content below 0.2% .
Step 2: Heating and Melting
Plastic pellets are fed from the hopper into the heated barrel. A rotating screw conveys the plastic forward.
Temperature profile: The barrel has multiple heating zones with gradually increasing temperatures.
| Zone | ABS Example |
|---|---|
| Feed zone | 180°C |
| Compression zone | 200–220°C |
| Metering zone | 220–240°C |
| Nozzle | 230–250°C |
Heat comes from:
- External heaters around the barrel
- Shear heating from friction as the screw rotates and compresses the plastic
Critical: Too low temperature = incomplete melting; poor flow; short shots. Too high = degradation; discoloration; weakened properties.
Step 3: Injection
Once fully melted, the plastic is ready for injection. The screw moves forward like a plunger, forcing molten plastic through the nozzle and into the mold’s runner system.
| Parameter | Typical Range | Effect |
|---|---|---|
| Injection pressure | 50–200 MPa | Fills the cavity; higher for complex parts |
| Injection speed | 20–100 mm/s | Affects fill pattern; surface finish |
Example: For small, simple parts (polyethylene), injection pressure of 50–80 MPa may suffice. For large, complex parts (engineering plastics), pressures of 150–200 MPa may be required.
Injection speed considerations:
- Too slow = incomplete filling; short shots
- Too fast = air entrapment; voids; flow marks
Step 4: Cooling and Solidification
After the cavity is filled, cooling begins. The mold’s cooling system circulates water or coolant through channels to remove heat.
| Factor | Impact |
|---|---|
| Part thickness | Thicker parts require longer cooling |
| Material | Crystalline plastics (PP, PE) take longer to cool |
| Mold temperature | Lower = faster cooling; higher = better surface finish |
Cooling time examples:
- Thin-walled polypropylene part: 5–10 seconds
- Thick-walled part: 1–5 minutes
Critical: Insufficient cooling = warpage; deformation; internal stress. Uneven cooling = part distortion.
Step 5: Mold Opening and Part Ejection
Once the plastic has solidified, the clamping unit retracts, opening the mold. Ejector pins push the finished part out of the cavity.
Ejection considerations:
- Pin placement – Distribute force evenly to prevent damage
- Ejection force – Sufficient to remove part; not so high as to deform it
- Draft angles – Facilitate ejection (typically 0.5–2°)
Sticking issues: If the part sticks, causes may include:
- Insufficient draft angle
- Rough mold surface
- No release agent
- Part too hot
Step 6: Post-Processing
After ejection, parts often require additional steps:
| Operation | Purpose |
|---|---|
| Flash removal | Trim excess plastic from parting line |
| Degating | Remove runner and gate vestige |
| Trimming | Cut off excess material |
| Surface finishing | Painting, plating, printing for aesthetics or functionality |
| Assembly | Joining multiple components |
Example: A plastic toy may be painted for color; an electronic component may be plated for conductivity.
What Are the Critical Process Parameters?
Temperature Control
| Parameter | Impact |
|---|---|
| Barrel temperature | Affects melting; too low = incomplete melt; too high = degradation |
| Mold temperature | Affects cooling rate; surface finish; internal stress |
Pressure Control
| Parameter | Impact |
|---|---|
| Injection pressure | Forces plastic into cavity; insufficient = short shots; excessive = flash |
| Holding pressure | Compensates for shrinkage during cooling; insufficient = sink marks |
| Back pressure | Improves melt homogeneity; too high = overheating |
Speed Control
| Parameter | Impact |
|---|---|
| Injection speed | Affects fill pattern; too slow = freeze-off; too fast = air traps |
| Screw speed | Affects melting and mixing; too fast = shear heating |
What Are Tips for a Successful Injection Molding Process?
Material Selection
| Tip | Explanation |
|---|---|
| Understand material properties | Strength; heat resistance; chemical resistance; cost |
| Consider moisture sensitivity | Dry hygroscopic materials properly |
| Evaluate recycled content | Cost-effective for non-critical applications |
Example: For underhood automotive components, choose PEEK (resists 300°C). For consumer electronics cases, ABS offers good balance of strength, aesthetics, and cost.
Mold Design
| Tip | Explanation |
|---|---|
| Incorporate draft angles | 0.5–1° minimum for easy ejection; more for deep cavities |
| Design efficient cooling channels | Evenly distributed for uniform cooling |
| Strategically place ejector pins | Avoid deformation; even force distribution |
Cooling channel design: Use simulation software to optimize channel layout and predict temperature distribution.
Process Parameter Adjustment
| Tip | Explanation |
|---|---|
| Monitor temperature | Adjust for ambient changes; heating element wear |
| Optimize pressure and speed | Start with recommended settings; adjust based on part quality |
| Manage cycle time | Balance efficiency with quality; don’t shorten cooling excessively |
Documentation: Keep records of parameter changes and resulting part quality to identify optimal settings.
What Are Common Problems and Solutions?
| Problem | Cause | Solution |
|---|---|---|
| Short shot | Low pressure/temperature; insufficient material | Increase pressure/temperature; verify shot size |
| Flash | Excessive pressure; worn mold; low clamp force | Reduce pressure; repair mold; increase clamp force |
| Sink marks | Insufficient packing; thick sections | Increase holding pressure/time; add ribs |
| Warpage | Uneven cooling; internal stress | Balance cooling; optimize holding pressure |
| Voids/bubbles | Trapped air; moisture | Add vents; dry material; adjust injection speed |
| Surface defects | Flow marks; sink marks; roughness | Adjust speed/temperature; improve cooling; polish mold |
Conclusion
Injection molding is a sophisticated process that transforms raw plastic pellets into finished products through a carefully controlled cycle:
- Material preparation – Selecting and drying the right plastic
- Heating and melting – Uniform melting in the heated barrel
- Injection – High-pressure filling of the mold cavity
- Cooling – Solidification with uniform cooling
- Ejection – Removing the finished part
- Post-processing – Finishing operations as needed
Success depends on proper material selection, precision mold design, and careful control of temperature, pressure, and timing. When optimized, injection molding delivers high-quality, complex parts with consistent dimensions—efficiently and cost-effectively.
Frequently Asked Questions (FAQ)
What are common problems in injection molding and how do you solve them?
Common problems include short shots (increase pressure/temperature), flash (reduce pressure; repair mold; increase clamp force), sink marks (increase holding pressure/time; add ribs), warpage (balance cooling; optimize holding pressure), voids/bubbles (add vents; dry material; adjust injection speed), and surface defects (adjust speed/temperature; improve cooling; polish mold). Systematic troubleshooting identifies root causes.
How long does an injection molding cycle take?
Cycle time depends on part size, wall thickness, and material. Small, thin-walled parts (1–2 mm) cycle in 5–15 seconds. Medium parts (3–5 mm) cycle in 20–60 seconds. Large, thick-walled parts may require 2–5 minutes. Cooling accounts for 50–80% of cycle time; efficient cooling is key to cycle time reduction.
What materials are used in injection molding?
Common thermoplastics include polyethylene (PE) , polypropylene (PP) , ABS , nylon (PA) , polycarbonate (PC) , and acetal (POM) . Engineering plastics like PEEK and PEI are used for high-temperature applications. Material selection depends on mechanical, thermal, chemical, and cost requirements.
What is the difference between thermoplastic and thermoset injection molding?
Thermoplastics soften when heated and harden when cooled; the process is reversible, and scrap can be reground and reused. Thermosets undergo a chemical reaction (curing) during molding and cannot be remelted; they offer higher heat resistance but are not recyclable. Injection molding is primarily used for thermoplastics; thermosets require specialized equipment.
How do you ensure consistent part quality?
Ensure consistent quality through precise process control (monitor temperature, pressure, timing), well-designed molds (proper cooling, venting, ejection), quality materials (consistent resin; proper drying), in-process monitoring (cavity pressure sensors; SPC), and regular maintenance (clean molds; replace worn components). Document parameters and perform regular quality checks.
Contact Yigu Technology for Custom Manufacturing
At Yigu Technology, we specialize in injection molding for high-quality custom plastic parts. Our expertise spans material selection, mold design, process optimization, and quality control—delivering consistent results for automotive, medical, electronics, and consumer goods industries.
Our injection molding capabilities include:
- Precision molds – Tight tolerances; complex geometries
- Material expertise – Commodity to engineering thermoplastics
- Process optimization – Scientific molding; SPC monitoring
- Quality assurance – Dimensional inspection; mechanical testing
- Volume flexibility – Prototypes to high-volume production
We help clients bring products from concept to reality—with quality, consistency, and efficiency.
Contact us today to discuss your injection molding project. Let our expertise guide you through every step of the process.