Introduction
What is Injection Moulding?
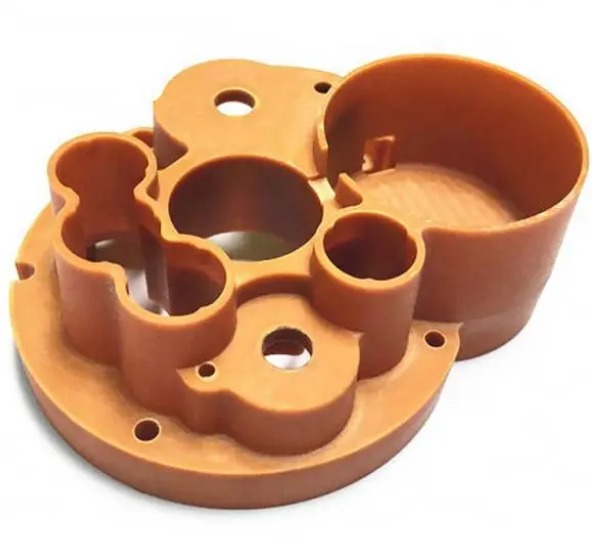
Injection moulding is a widely used manufacturing process for producing plastic parts. It involves injecting molten plastic material into a mould cavity, where it cools and solidifies to take the shape of the mould. This process is highly efficient and can produce a large number of parts with high precision and consistency. Injection moulding is used in a variety of industries, including automotive, aerospace, electronics, medical, and consumer goods.
The injection moulding process begins with the preparation of the plastic material. The plastic pellets are typically fed into a hopper and then into a heated barrel, where they are melted by a rotating screw. The molten plastic is then forced through a nozzle and into the mould cavity under high pressure. Once the mould cavity is filled, the plastic is allowed to cool and solidify. The mould is then opened, and the finished part is ejected.
Injection moulding offers several advantages over other manufacturing processes. It is a highly automated process, which reduces labour costs and increases production efficiency. It can also produce parts with complex shapes and tight tolerances, making it ideal for applications where precision is critical. Additionally, injection moulding can use a wide range of plastic materials, allowing manufacturers to choose the material that best suits their application.
However, injection moulding also has some limitations. It requires the use of expensive moulds, which can be a significant investment for small production runs. The process is also limited to producing parts that are made of plastic, and it may not be suitable for parts that require high strength or heat resistance.
In the following sections, we will take a closer look at the injection moulding process steps, including mould preparation, plastic material preparation, injection, cooling, and ejection. We will also discuss some of the factors that can affect the quality of the finished parts, such as mould design, plastic material selection, and processing parameters.
The Key Injection Moulding Process Steps
Step 1: Material Preparation
Plastic Material Selection: The choice of plastic material is crucial as it determines the final properties of the product. Consider factors like mechanical strength, chemical resistance, thermal stability, and cost. For example, ABS (Acrylonitrile Butadiene Styrene) is popular for its good impact resistance and surface finish, making it suitable for consumer electronics housings. On the other hand, PEEK (Polyether Ether Ketone) is known for its high - temperature resistance and excellent mechanical properties, often used in aerospace and medical applications.
Pre - treatment:
- Drying: Many plastics absorb moisture from the air. Moisture in the plastic can cause defects such as bubbles and voids in the final product during the injection moulding process. For instance, nylon is highly hygroscopic. To dry the plastic, it is usually placed in a drying hopper at a specific temperature (e.g., around 80 - 100°C for nylon) for a certain period, typically a few hours, until the moisture content is reduced to an acceptable level (usually below 0.1%).
- Mixing Additives: Additives like colorants, UV stabilizers, and flame retardants are often mixed with the base plastic resin. Colorants can be in the form of masterbatches, which are concentrated mixtures of pigments or dyes with a carrier resin. The amount of colorant added depends on the desired color intensity. UV stabilizers are added to protect the product from degradation due to ultraviolet light exposure, especially for products that will be used outdoors. Flame retardants are crucial for applications where fire safety is a concern, such as in electrical components. They are added in specific percentages, often between 5 - 30% depending on the plastic material and the required fire - resistance rating.
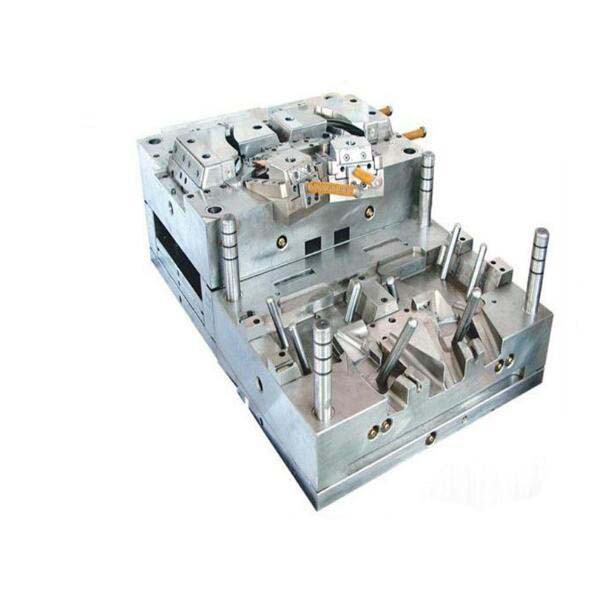
Step 2: Mould Preparation
Mould Design Considerations:
- Product Shape: Complex product shapes may require more intricate mould designs. For example, a product with undercuts (regions that cannot be easily removed from the mould in a straight - line motion) will need additional mechanisms like slides or lifters in the mould.
- Dimensional accuracy:Tight dimensional tolerances are essential for parts that need to fit together precisely. In the automotive industry, components such as engine parts or interior trim pieces often have tolerances in the range of ±0.05 - ±0.1mm.
- Demolding method:The ejection method depends on the product's shape and size. Small and simple parts may be ejected using standard ejector pins, while larger or more delicate parts might require a more evenly distributed ejection system, such as an ejector plate.
Mould Preparation Process:
- Cleaning: Before each use, the mould must be thoroughly cleaned to remove any residue from previous moulding cycles. This can be done using solvents, ultrasonic cleaners, or high - pressure air. Residue left on the mould can affect the surface finish of the product and potentially cause defects.
- Lubrication: A suitable mould release agent is applied to the mould surfaces to facilitate the easy removal of the finished product. This can be a chemical - based release agent or a dry - film lubricant. Over - lubrication should be avoided as it can contaminate the product.
- Installation and Debugging: The mould is carefully installed onto the injection moulding machine. The alignment of the mould halves and the connection to the machine's hydraulic and electrical systems are checked. A test run is then carried out to ensure that the mould closes and opens smoothly, and that the ejection system functions properly.
Step 3: Injection
Melting Process: Plastic pellets are fed into the heated barrel of the injection moulding machine. The barrel is equipped with heating zones, and the temperature gradually increases along the length of the barrel. For example, for polyethylene, the temperature in the feed zone may be around 150 - 180°C, while in the metering zone, it can reach 200 - 250°C. The rotating screw inside the barrel not only conveys the plastic forward but also shears and mixes it, which helps in uniform melting.
Injection Process: Once melted, the plastic is pushed by the screw through the nozzle and into the mould cavity. The injection pressure, speed, and time are critical parameters.
- Injection Pressure: High injection pressure can ensure complete filling of the mould cavity, especially for complex - shaped parts or those with thin walls. However, excessive pressure can cause flash (thin layers of plastic that seep out between the mould halves), over - packing (resulting in high internal stresses in the product), and damage to the mould. Typical injection pressures range from 50 - 200 MPa, depending on the plastic material and the mould design.
- Injection Speed: A fast injection speed can reduce the cycle time, but it may also cause air entrapment (trapped air bubbles in the product) and flow marks on the surface. Slower injection speeds are often used for products that require a high - quality surface finish.
- Injection Time: This is the duration for which the plastic is being injected into the mould. It is carefully controlled to ensure that the cavity is filled to the correct volume. If the injection time is too short, the part may be under - filled; if it is too long, it can lead to over - packing.
Step 4: Cooling
Cooling Principle: After the mould cavity is filled with molten plastic, the plastic needs to cool and solidify to maintain its shape. Heat is transferred from the hot plastic to the cooler mould walls. The rate of heat transfer affects the quality of the final product.
Cooling System Design: Moulds are equipped with cooling channels, which are usually drilled into the mould plates. These channels are connected to a cooling medium, typically water or a water - glycol mixture. The temperature of the cooling medium is carefully controlled. For example, for most common plastics, the cooling water temperature is maintained in the range of 20 - 40°C. The flow rate of the cooling medium through the channels also affects the cooling efficiency. A higher flow rate can provide more efficient heat transfer.
Impact of Cooling Time: The cooling time is a significant factor in the injection moulding cycle. Insufficient cooling time can result in a product that is not fully solidified, leading to deformation during ejection. On the other hand, overly long cooling times can increase the production cycle time and reduce productivity. The cooling time is determined by factors such as the thickness of the product, the plastic material used, and the cooling system efficiency. Thicker - walled parts generally require longer cooling times. For a 3 - 5mm thick plastic part made of polypropylene, the cooling time may be around 10 - 20 seconds.
Step 5: Ejection
Ejection Principle: Once the plastic part has cooled and solidified, the mould is opened, and the ejection system is activated. The ejection system uses components like ejector pins, ejector plates, or air ejection to push the finished product out of the mould. Ejector pins are the most commonly used method. They are located at strategic positions in the mould, usually at the thickest parts of the product or areas where there is sufficient strength to withstand the ejection force.
Impact of Ejection Parameters:
- Ejection Location: The location of the ejector pins is crucial. If they are placed inappropriately, it can cause cosmetic defects such as marks on the surface of the product or even damage to the product. For example, placing ejector pins too close to a thin - walled section can cause the wall to crack during ejection.
- Ejection Force: The force applied during ejection must be carefully controlled. Too little force may not be sufficient to eject the product, while excessive force can deform or break the product. The ejection force is determined by factors such as the size and shape of the product, the adhesion between the product and the mould, and the material properties of the product.
Yigu Technology's Perspective
As a non - standard plastic metal products custom Supplier, Yigu Technology has rich experience in the injection moulding process. We understand that each step in the injection moulding process is crucial and requires strict control.
In material preparation, we have a deep understanding of various plastic materials. Our team of experts can help customers select the most suitable plastic material according to their product requirements. We also have advanced drying and mixing equipment to ensure that the plastic material is in the best state before injection.
When it comes to mould preparation, we have a professional mould design and manufacturing team. Our moulds are designed with high precision and durability, taking into account factors such as product shape, dimensional accuracy, and ejection method. Before each production run, we carefully clean, lubricate, and debug the moulds to ensure smooth operation.
During the injection and cooling steps, we use advanced injection moulding machines and cooling systems. Our technicians closely monitor and adjust the injection pressure, speed, time, and cooling parameters to ensure high - quality product formation.
In the ejection stage, we design the ejection system based on the characteristics of the product to ensure that the product can be ejected smoothly without damage. With our strict control over each step of the injection moulding process, we can provide customers with high - quality non - standard plastic metal products that meet their specific needs.
FAQ
Q1: How to choose the right plastic material for injection moulding?
When choosing a plastic material for injection moulding, first consider the product's performance requirements. If the product needs to withstand impacts, materials like ABS are great. For high - temperature applications, PEEK or PPS (Polyphenylene Sulfide) could be suitable. Cost is another factor. Commodity plastics such as polyethylene and polypropylene are generally more affordable, making them ideal for large - scale production of low - cost items. Also, think about the processing performance. Some plastics are easier to melt and inject, reducing production difficulties. For example, polystyrene has a relatively low melting point and good flowability, which simplifies the injection process.
Q2: What are the common problems in injection moulding and how to solve them?
Common problems include product defects and equipment - related issues. Product defects such as flash occur when plastic leaks between the mould halves. This can be fixed by checking and adjusting the mould closing force, and ensuring proper mould alignment. Shrink marks, which are depressions on the product surface, often result from uneven cooling. Improving the cooling system design, such as optimizing the layout of cooling channels, can solve this. Equipment - related problems like a blocked nozzle can be resolved by cleaning the nozzle regularly. If the screw in the injection barrel is worn out, it needs to be replaced to ensure smooth plastic melting and injection.
Q3: How can I improve the efficiency of the injection moulding process?
To enhance the efficiency of the injection moulding process, start by optimizing process parameters. Adjust the injection pressure, speed, and time to the optimal values for your product and material. For example, finding the right balance between injection speed and pressure can reduce cycle time without sacrificing product quality. Regular equipment maintenance is crucial. Keep the injection moulding machine in good condition, check for leaks in the hydraulic system, and ensure the heating elements are working properly. A well - maintained machine is less likely to break down, thus reducing production downtime. Also, invest in a well - designed mould. A mould with efficient cooling channels and proper ejection systems can significantly shorten the cycle time, increasing overall production efficiency.