Introduction
You designed a perfect part. The dimensions are exact. The geometry is complex. But when you try to remove it from the die, it sticks. You pull harder. The part bends. The die surface gets scratched. Now you have scrap parts and lost time.
This happens when draft angle is overlooked.
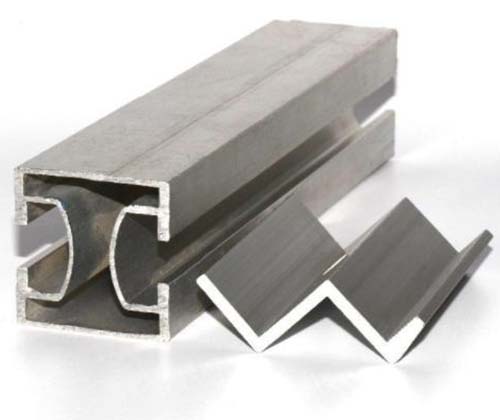
In die casting, draft angle is a small taper on vertical surfaces. It usually measures between 0.5 and 3 degrees. Its job is simple: let parts come out of the die without damage.
Think of a baking pan. If the sides were straight up, your cake would never come out. The slight slope in the pan lets it release cleanly. Die casting works the same way.
This guide explains why draft angle matters. You will learn how to choose the right angle for your material and part shape. You will see real examples of what happens when angles are wrong. And you will get practical rules you can use today.
What Exactly Is Draft Angle?
The Simple Definition
Draft angle is the slope added to vertical walls of a die casting part. It creates a slight taper from the parting line to the deepest point of the cavity.
Without this slope, the part would have parallel walls. When the metal cools and shrinks, it grips the die tightly. Removing it requires force. That force can:
- Scratch the die surface
- Distort the part shape
- Crack thin sections
- Wear out ejection pins
With the right draft, the part slides out smoothly. The friction drops. The die lasts longer. Your rejection rate falls.
How Draft Angle Works
When you add draft, you create a gap. As the ejector pins push the part, one side releases first. The part tilts slightly, breaking the vacuum and reducing contact area.
Here is a simple comparison:
| Without Draft | With Draft |
|---|---|
| Full surface contact | Reduced contact area |
| High friction force | Low friction force |
| Risk of sticking | Smooth ejection |
| Potential part damage | Clean part release |
What Happens When You Get Draft Angle Wrong?
The Sticking Problem
A manufacturer made aluminum housings with zero draft on a 50 mm deep wall. Every cycle, the part stuck. Operators increased ejector pin force. The pins broke. Then the die surface scratched.
They added 1.5 degrees of draft. The sticking stopped. Ejector pin life increased by 300%. Scrap rate dropped from 8% to under 1%.
When your part sticks, you lose more than time. You lose die life, tooling reliability, and production consistency.
The Dimensional Failure
Draft affects dimensions. If you design without considering it, your finished part may not fit assembly.
Real example: An automotive supplier made a steering knuckle with 0.5 degrees of draft on a critical mounting surface. The mating part required a flat surface. The draft caused a gap. Assemblies failed.
They had to recut the die at a cost of $15,000 and lost 3 weeks of production.
Draft must be planned from the start. Adding it later is expensive.
The Surface Damage
Too little draft creates drag marks. As the part slides out, sharp edges of the die scrape the surface. This is visible on cosmetic parts.
A consumer electronics company made handheld device housings. With 0.5 degrees of draft, they saw visible drag lines. Increasing to 1 degree eliminated the marks. They saved $2 per part in secondary finishing.
How to Choose the Right Draft Angle?
Material Matters Most
Different metals behave differently in the die. Some stick more. Some shrink more. Each needs its own approach.
| Material | Recommended Draft (per side) | Why |
|---|---|---|
| Zinc Alloys | 0.5° | Low adhesion to die; excellent fluidity |
| Aluminum Alloys | 1° | Higher adhesion; more shrinkage |
| Magnesium Alloys | 1° | Similar to aluminum; reactive with dies |
Zinc: Zinc flows easily and does not grip the die tightly. Small draft angles work well. For simple zinc parts, 0.5 degrees often suffices.
Aluminum: Aluminum alloys like A380 and A356 have higher adhesion. They also shrink more during cooling. A minimum of 1 degree is standard. For deeper cavities, go to 1.5-2 degrees.
Magnesium: Magnesium behaves much like aluminum. Start with 1 degree. For thin walls or tall features, increase to 2 degrees.
Geometry Determines the Need
Not every surface needs the same draft. Complex features require more angle.
| Feature | Recommended Draft | Reasoning |
|---|---|---|
| Shallow walls (under 15 mm) | 0.5° - 1° | Short engagement means less sticking risk |
| Deep walls (over 30 mm) | 1.5° - 2.5° | More surface contact requires more relief |
| Small ribs (under 10 mm tall) | 0.5° - 1° | Thin sections cool fast; minimal draft needed |
| Tall ribs (over 20 mm) | 2° - 3° | High aspect ratio increases friction |
| Holes under 5 mm diameter | 1° - 2° | Core pins need clearance |
| Holes over 10 mm diameter | 2° - 3° | Larger cores have more surface contact |
Real example: A manufacturer made a part with a 40 mm deep rib. They used 1 degree of draft. The rib always stuck. Ejector pins bent. They increased draft to 2.5 degrees. The rib released cleanly. Cycle time improved by 15% because they no longer manually freed stuck parts.
Surface Finish Affects Draft
Smooth surfaces need less draft. Rough surfaces need more.
If your die has a polished finish (Ra 0.2-0.4 μm), friction is lower. You can use 0.5 degrees less than standard.
If the die has a textured finish for cosmetic appearance, friction increases. Add 0.5-1 degree extra draft to compensate.
What Are the Industry Standards?
General Guidelines
Most die casters follow these rules:
- Minimum draft: 1 degree per side for aluminum
- Typical range: 1-3 degrees for most parts
- Cosmetic surfaces: 2-3 degrees to avoid drag marks
- Internal surfaces: 1-2 degrees for cores
These numbers work for 80% of applications. But your part may need more.
When to Use More Draft
Some situations demand larger angles:
Deep cavities: For depths over 75 mm, use 2-3 degrees. The deeper the cavity, the more room you need for release.
Complex geometry: Parts with multiple undercuts or intersecting walls need 2-4 degrees to ensure all features release.
High adhesion materials: Aluminum and magnesium at 1.5-2 degrees minimum for tall features.
Large parts: Big parts shrink more. A 500 mm long part may need 2-3 degrees to compensate for uneven cooling.
When to Use Less Draft
Smaller draft angles are possible in specific cases:
Simple shapes: A basic box with short walls can use 0.5 degrees if the material is zinc.
Precision features: Some mating surfaces require near-zero draft. In these cases, add draft only on non-critical sides. Use 0.25-0.5 degrees and polish the die to a mirror finish.
High-tolerance parts: Medical or aerospace parts may limit draft to 0.5 degrees on critical dimensions. This requires precise die making and careful process control.
How Does Yigu Technology Handle Draft Angle?
Our Approach to Die Design
At Yigu Technology, we treat draft angle as a design priority, not an afterthought.
Every project starts with a DFM (Design for Manufacturability) review. We analyze:
- Material selection: We match draft to the specific alloy
- Part geometry: We identify deep walls, ribs, and cores
- Cosmetic requirements: We adjust draft to avoid visible marks
- Tolerance needs: We balance draft with dimensional precision
Simulation Before Cutting Steel
We use die casting simulation software for every new tool. This shows us:
- Where metal flows during fill
- How parts will release from the die
- Where friction is highest
One client came with a complex automotive bracket. Their previous supplier had 15% scrap due to sticking. We simulated the process, increased draft on three deep ribs from 1 to 2 degrees, and added a polished coating to the die. Scrap dropped to 3%. The client saved $40,000 annually in rejected parts.
Real Results from Real Projects
Case 1: Aerospace component
- Material: A356 aluminum
- Depth: 65 mm cavity
- Initial draft: 1 degree
- Problem: Part stuck, damaged ejection pins
- Solution: Increased to 2 degrees on deep walls
- Result: Zero sticking, pin life doubled
Case 2: Consumer electronics housing
- Material: Zamak zinc
- Cosmetic: Class A surface
- Initial draft: 0.5 degrees
- Problem: Drag lines visible after plating
- Solution: Increased to 1.5 degrees on exterior walls
- Result: Eliminated buffing step, saved $0.80 per part
Case 3: Industrial pump housing
- Material: A380 aluminum
- Features: Multiple internal cores
- Initial draft: 1 degree on all surfaces
- Problem: Core pins wore out after 5,000 cycles
- Solution: Increased core draft to 2 degrees, added cooling lines
- Result: Core pin life extended to 25,000 cycles
Conclusion
Die casting draft angle is not a design detail you can ignore. It directly affects your production cost, part quality, and tool life. Too little draft means sticking, scrap, and downtime. Too much draft may affect assembly fit or increase material use.
The right draft depends on three things:
- Your material (zinc needs less, aluminum needs more)
- Your geometry (deep walls need more draft)
- Your finish requirements (cosmetic parts need extra angle)
Start with industry standards: 1 degree for aluminum, 0.5 degree for zinc. Then adjust based on depth and complexity. When in doubt, add a little more draft. The cost of extra angle in the design phase is small. The cost of fixing a sticking die in production is large.
Get draft angle right from the start. Your dies will last longer. Your parts will be more consistent. And your production will run smoothly.
Frequently Asked Questions (FAQ)
Why is die casting draft angle important?
Draft angle reduces friction during part ejection. Without it, parts stick to the die. This causes surface damage, dimensional distortion, and premature die wear. Proper draft ensures smooth removal and consistent part quality.
Can I use the same draft angle for all die casting parts?
No. Draft angle depends on material, geometry, and surface finish. Zinc alloys need about 0.5 degrees. Aluminum and magnesium need 1 degree or more. Deep walls, tall ribs, and large holes require larger angles than shallow features.
What happens if my draft angle is too small?
Too little draft causes sticking. Parts may require excessive ejection force, leading to bent ejector pins, scratched die surfaces, and distorted parts. Scrap rates increase. Die life decreases. Production slows down.
What happens if my draft angle is too large?
Excessive draft adds material to your part. This increases weight and material cost. It may also affect assembly if the draft creates a poor fit with mating parts. For cosmetic parts, large draft may be visible as a sloped surface.
How do I determine the right draft angle for my part?
Start with material-based recommendations: 0.5° for zinc, 1° for aluminum and magnesium. Then consider feature depth. Add 0.5° for every 25 mm of depth beyond 25 mm. Add extra angle for textured surfaces or complex geometry. Run simulation to verify ejection forces before building the die.
Contact Yigu Technology for Custom Manufacturing
At Yigu Technology, we bring 15 years of die casting experience to every project. We do not just build dies. We design them for reliability, efficiency, and long life.
Our DFM process catches draft angle issues before steel is cut. We use simulation to predict ejection forces. We adjust designs to balance manufacturability with your dimensional requirements.
Whether you need zinc, aluminum, or magnesium die castings, we deliver parts that release cleanly and consistently. Contact us to discuss your project. Let us show you how the right draft angle saves time and money.