Introduction
If you have ever wondered how manufacturers produce complex aerospace parts in record time or achieve mirror-like finishes on mold components, the answer often lies in High Speed Machining (HSM) . Unlike traditional machining, HSM is not just about “going fast”—it is a precise, science-backed process that balances speed, tooling, and control to boost productivity and quality. Whether you are a CNC operator looking to optimize your workflow, a shop owner considering equipment upgrades, or an engineer designing parts for high-performance industries, this guide breaks down everything you need to know about HSM—from fundamentals and benefits to equipment, tooling, and real-world problem-solving.
What Makes HSM Different from Traditional Machining?
At its core, HSM relies on interrelated principles that work together to overcome conventional method limitations. It is not about cranking up spindle speed alone—it is about reducing cutting forces while maintaining (or increasing) material removal rates.
Key Principles of HSM
| Principle | Traditional Machining | High Speed Machining (HSM) |
|---|---|---|
| Spindle speed | 5,000 – 10,000 RPM | 15,000 – 60,000 RPM |
| Feed rate | 50 – 150 IPM | 200 – 800 IPM |
| Depth of cut | 1 – 5 mm per pass | 0.1 – 0.5 mm per pass |
| Cutting forces | High (leads to tool deflection) | Low (reduces part distortion) |
| Chip formation | Thick, uneven chips | Thin, consistent chips (via chip thinning) |
High spindle speeds and high feed rates: HSM typically uses speeds between 15,000 and 60,000 RPM with feed rates 2–5× faster. Example: Machining aluminum—traditional end mill at 8,000 RPM and 100 IPM; HSM at 25,000 RPM and 350 IPM cuts cycle time from 12 minutes to 4 minutes.
Light depth of cuts and chip thinning: Shallow cuts (0.1–0.5 mm per pass) reduce tool stress. Chip thinning—faster feeds make chips thinner than cut depth—prevents tool clogging. Medical device manufacturer machining titanium bone screws: switched from 2 mm deep cut (traditional) to 0.5 mm (HSM) with chip thinning, eliminating tool breakage and reducing scrap from 15% to 3%.
Smoother toolpaths and trochoidal milling: HSM uses continuous, curved toolpaths (no sharp corners) to minimize vibration. Trochoidal milling—tool moves in circular pattern while cutting slots—ideal for hard materials like Inconel. Aerospace client: trochoidal milling for turbine blades reduced tool wear 40% and improved surface finish.
Thermal management: HSM controls heat through coolant systems and tool materials. Mold shop machining hardened steel (50 HRC): combining HSM with through-spindle coolant kept tool temperatures 200°F lower than traditional machining, extending tool life from 2 hours to 8 hours.
What Are the Key Benefits and Applications of HSM?
Core Benefits of HSM
| Benefit | Impact |
|---|---|
| Improved surface finish | Smoother toolpaths + lighter cuts often eliminate secondary finishing (grinding, polishing). Furniture manufacturer switched to HSM for aluminum chair frames: surface finish from 125 Ra (rough, required sanding) to 32 Ra (smooth, ready for painting)—cutting 2 hours labor per frame. |
| Reduced cycle times | SME study: HSM reduces cycle times 30–70% for most materials. Automotive cylinder heads: 45 minutes (traditional) to 18 minutes (HSM)—allowing 2× more orders without adding machines. |
| Increased productivity | Faster cycle times + longer tool life = more parts per shift. Ohio machine shop: 55% increase in monthly output for stainless steel parts after adopting HSM. |
Top Applications of HSM
| Application | Example |
|---|---|
| Hard material machining | Hardened steel (50+ HRC), titanium, Inconel—defense contractor machines armor plates from AR500 steel: 10 plates/day (vs. 3 with traditional) with minimal tool changes. |
| Thin-wall machining | Aircraft fuel tanks, medical device housings (<1 mm walls) distort under high cutting forces. HSM’s low forces reduce thin-wall part rejection from 22% to 4%. |
| Mold and die making | Intricate details, smooth surfaces. HSM machines mold cavities directly from hardened steel—cutting lead time from weeks to days. Smartphone case molds: 60% faster turnaround. |
| Aerospace and medical components | High precision, repeatability. Aerospace supplier machines turbine blades with tolerances ±0.0005 inches—achievable only with HSM. |
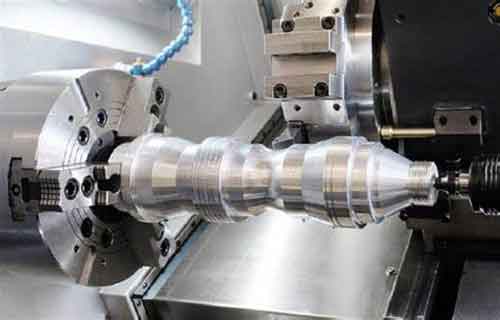
What Equipment and Technology Are Required for HSM?
Critical HSM Equipment
| Equipment | Specification | Impact |
|---|---|---|
| High-frequency spindles | 15,000+ RPM; air/oil lubrication; 20–40 HP for metalworking | Michigan shop upgraded to 40,000 RPM spindle for aluminum: 3× increase in feed rates without sacrificing precision. |
| High-feed CNC machines | Rigid frame; axis speeds >1,000 IPM; linear guides (vs. ball screws) | Texas shop invested in high-feed CNC: cycle time for valve body from 30 minutes to 11 minutes. |
| Balanced toolholders | ISO G2.5 or better at 25,000 RPM | California mold shop: balanced toolholders reduced tool wear 50% and eliminated chatter marks. |
| Vibration damping | Damped machine bases (concrete/polymer); anti-vibration toolholders | Titanium machining: damped toolholder reduced vibration 70%; allowed speeds 20% higher. |
| Coolant systems | Through-spindle coolant; high-pressure (1,000+ PSI) | Through-spindle coolant: 35% reduction in tool temperature. 3,000 PSI coolant: eliminated chip clogging; tool changes from 8 per shift to 2. |
Essential Software for HSM
| Software | Function | Example |
|---|---|---|
| Advanced CAM | Generates trochoidal, adaptive milling toolpaths (Mastercam, Fusion 360, SolidWorks CAM) | Oregon shop: Fusion 360 adaptive milling reduced programming time for custom bracket from 4 hours to 30 minutes. |
| Process monitoring | Tracks spindle load, vibration, tool temperature in real time | Aerospace supplier detects tool wear early—scrap reduced from 10% to 2%. |
HSM Readiness Checklist
| Component | Traditional Setup | HSM-Ready Setup |
|---|---|---|
| Spindle speed | <10,000 RPM | 15,000–60,000 RPM |
| Toolholder balance | ISO G6.3 or lower | ISO G2.5 or higher |
| CNC axis speed | <500 IPM | >1,000 IPM |
| Coolant pressure | <500 PSI | >1,000 PSI (high-pressure) |
| CAM software | Basic 2D/3D paths | Adaptive/trochoidal paths |
What Tooling Is Best for HSM?
Even the best HSM machine will fail with wrong tooling. HSM tools are designed for high speeds, heat, and low cutting forces.
Key Features of HSM Tooling
| Feature | Recommendation | Benefit |
|---|---|---|
| Solid carbide end mills | Ultra-fine grain; designs optimized for specific materials | Aluminum shop: solid carbide 4-flute end mill with polished flute surface—500 parts/tool (vs. 150 with HSS). |
| Specialized coatings | TiAlN (steel, stainless—resists 1,100°C); AlTiN (titanium, Inconel—2× longer life); DLC (aluminum—prevents built-up edge) | Automotive parts manufacturer: DLC-coated tools cut tool changes by 60%. |
| Reduced neck tools | Thinner shank near cutting edge for deep cavities | Mold shop: reduced neck end mill machined 2-inch deep cavity in hardened steel—impossible with standard tool. |
| High helix angles | 35–45° (vs. 20–30° traditional) | Plastic machining: 40° helix end mill eliminated chip jamming—reduced scrap from 10% to 0%. |
| Sharp cutting edges | Edge honing (slight radius) to prevent chipping | Medical device shop: honed edges extended tool life 30% for titanium. |
Tool selection tip: Start with general-purpose solid carbide end mill (4-flute, TiAlN-coated) for aluminum or steel. Test at moderate speeds (15,000–20,000 RPM); adjust feed rates based on chip quality—thick chips: increase feed; thin chips or chatter: decrease feed.
How Do You Overcome Common HSM Challenges?
| Challenge | Solution | Example |
|---|---|---|
| Tool wear | Coated tools (AlTiN); optimize coolant flow; monitor wear with sensors | Inconel 718 shop: through-spindle coolant + AlTiN-coated tools extended tool life from 30 minutes to 2 hours. |
| Chatter (vibration) | Increase rigidity (balanced toolholders, damped machines); adjust speeds/feeds | Thin-wall aluminum: reduced spindle speed from 30,000 to 25,000 RPM; increased feed from 200 to 300 IPM—shifted vibration outside resonant range. |
| Programming complexity | CAM software with HSM features (adaptive milling); operator training | Colorado shop: 2-day CAM specialist training—programming time dropped from 8 hours to 2 hours; eliminated $5,000 scrap. |
| Machine rigidity | Upgrade to rigid HSM machine (cast iron base); regular maintenance | Florida shop: monthly spindle alignment reduced chatter 40%; improved part precision. |
| Optimal feeds/speeds | Use cutting data libraries (Sandvik, Kennametal); start conservative | Texas shop: used Kennametal’s HSM library (25,000 RPM, 350 IPM for ½" carbide end mill in aluminum)—setup time from 4 hours to 1 hour. |
Process Control Checklist
- Check toolholder balance (balancing machine)
- Verify coolant pressure and flow
- Inspect tools for wear (chipped edges, coating damage)
- Test spindle runout (dial indicator; <0.0001 inches)
- Review CAM toolpaths for smooth transitions (no sharp corners)
What Is Yigu Technology’s Perspective on HSM?
At Yigu Technology , we have supported manufacturers in adopting HSM for over a decade. One key insight: HSM is not just an upgrade for “big players”—with entry-level equipment (20,000 RPM spindle, basic CAM software), even small shops can see 30–40% faster cycle times. HSM success depends on more than hardware: operator training and process monitoring are equally critical.
Conclusion
High Speed Machining (HSM) transforms manufacturing through interrelated principles: spindle speeds 15,000–60,000 RPM (vs. 5,000–10,000 RPM traditional), feed rates 200–800 IPM (2–5× faster), light depth of cuts (0.1–0.5 mm) , and chip thinning to prevent tool clogging. Benefits include improved surface finish (125 Ra → 32 Ra, eliminating sanding), reduced cycle times (45 min → 18 min for automotive cylinder heads), and increased productivity (55% output increase for stainless steel parts). Applications span hard materials (Inconel, hardened steel), thin-wall parts (<1 mm walls—rejection 22% → 4%), mold and die making (60% faster turnaround), and aerospace components (±0.0005 inch tolerances). Required equipment includes **high-frequency spindles (15,000–60,000 RPM)** , **high-feed CNC machines (>1,000 IPM)** , balanced toolholders (ISO G2.5) , and high-pressure coolant (>1,000 PSI) . Tooling requires solid carbide end mills with specialized coatings (TiAlN, AlTiN, DLC), high helix angles (35–45°) , and sharp cutting edges. Challenges—tool wear, chatter, programming complexity—are manageable with coated tools, rigid setups, CAM software, and cutting data libraries. With proper equipment, tooling, and process control, HSM delivers faster cycle times, better surface finishes, and increased productivity across demanding industries.
FAQs
What is the main difference between HSM and traditional machining?
HSM uses higher spindle speeds (15,000–60,000 RPM vs. 5,000–10,000 RPM) , higher feed rates (200–800 IPM vs. 50–150 IPM) , and lighter depth of cuts (0.1–0.5 mm vs. 1–5 mm) . This reduces cutting forces, prevents part distortion, and enables chip thinning —faster feeds make chips thinner than cut depth, preventing tool clogging.
What materials are best suited for HSM?
HSM excels with hard materials (hardened steel 50+ HRC, titanium, Inconel), thin-wall parts (<1 mm walls), and applications requiring tight tolerances (±0.0005 inches) and smooth surface finishes (32 Ra or better). Aerospace, medical, and mold/die industries benefit most.
What equipment do I need to start HSM?
Essential equipment includes: high-frequency spindle (15,000–60,000 RPM) , high-feed CNC machine (>1,000 IPM axis speed) , balanced toolholders (ISO G2.5 or better) , high-pressure coolant (>1,000 PSI) , and CAM software with adaptive/trochoidal toolpath capabilities.
Contact Yigu Technology for Custom Manufacturing
At Yigu Technology , we leverage High Speed Machining (HSM) to deliver precision components for demanding industries. Our 5-axis CNC machines with 40,000 RPM spindles , high-pressure coolant systems (>1,000 PSI) , and balanced toolholders achieve tolerances as tight as ±0.0005 inches and surface finishes Ra 32 . From aerospace turbine blades to medical device components, we provide DFM feedback to optimize your designs for manufacturability.
Ready to transform your manufacturing with High Speed Machining? Contact Yigu Technology today for a free consultation and quote. Let us help you achieve faster cycle times, better finishes, and higher productivity in every component.