In high-end manufacturing industries such as aerospace, automobile manufacturing, and rail transit, machining and welding are the most important technologies These are two indispensable core processes that directly determine the precision, strength and service life of the product. Whether it is a complex aero engine blade or a high-speed rail bogie that daily travel relies on, it is inseparable from the perfect cooperation of these two technologies. But for industry practitioners, technical selectors or related professional learners, how to systematically master the principles, equipment selection, material adaptation and quality control of these two processes? This article will start from practical applications, use popular language and real cases to take you to fully unlock the core password of machining and welding.
1. Process foundation: What is the core principle of machining and welding?
To use a technology skillfully, you must first understand its underlying logic. Although machining and welding belong to different process categories, they both follow the core goal of "precise control of material form and properties", and their basic principles directly affect the subsequent process effect.
Machining: The "art of shaping" dominated by the principle of cutting
At its core, machining is the principle of cutting – the relative movement of the tool to the workpiece removes excess material to achieve the size, shape, and surface quality that meets the design requirements. Among them, turning, milling, and grinding are the four most basic and widely used processing methods:
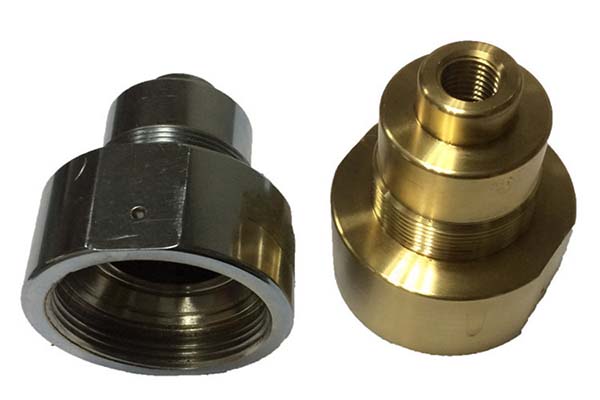
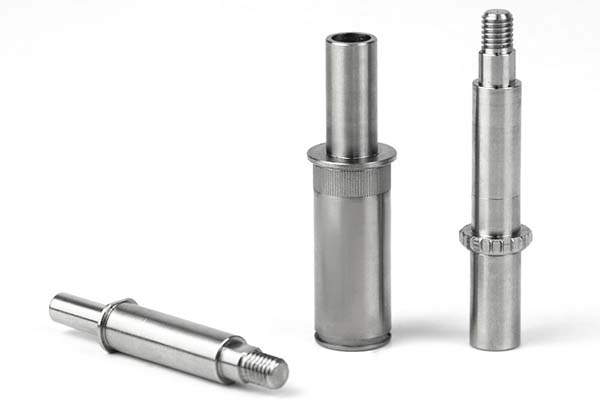
- Turning: workpiece rotation, tool linear feeding, suitable for machining shaft and disc parts (such as motor shafts, flanges);
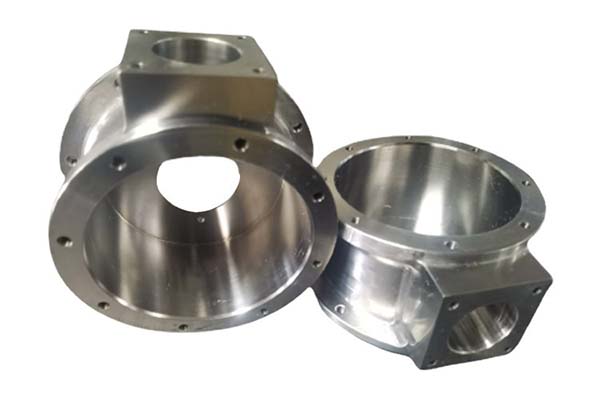
- Milling: tool rotation, workpiece movement, can process flat surfaces, grooves, complex surfaces (such as the cavity of the gearbox box);
- Planing: The tool moves in a reciprocating straight line, mostly used for machining large flat surfaces (such as machine tool beds);
- Grinding: High-speed rotating grinding wheels are used as tools to achieve high-precision, low-roughness machining (such as the inner and outer rings of bearings).
Work hardening is an inevitable phenomenon during the processing process - after the metal material is cut, the surface grain is flattened and refined, and the hardness and strength are increased, but the toughness decreases, which may lead to an increase in the difficulty of subsequent processing. At the same time, cutting force and cutting heat will cause residual stress, which may lead to deformation and cracking of the workpiece if not treated in time (such as aging treatment).
Welding: The "Connection Magic" of Base Metal Melting and Weld Forming
The essence of welding is to melt the base metal and fuse it with the filler material through heating or pressurization, forming a strong weld after cooling, achieving a permanent connection of the workpiece. According to the heat source and process characteristics, the mainstream welding methods can be divided into three categories, and the core differences are shown in the table below:
| Welding method | Representative type | Core principles | Applicable materials: | advantage | Notes: |
| arc welding | Manual arc welding, TIG/MIG/MAG | Arc hot melting of the base metal and welding wire | Carbon steel, stainless steel, low-alloy steel | The equipment is simple, low cost and adaptable | It is easy to produce pores and undercuts, and the heat-affected zone needs to be controlled |
| Laser welding | Fiber laser welding, CO₂ laser welding | The high-energy laser beam is focused and heated, and the weld seam is narrow | Aluminum alloys, titanium alloys, dissimilar metals | Fast welding speed, small deformation and high precision | Strict requirements for workpiece assembly clearance |
| Other special welding | Resistance welding, brazing | Resistive heat or brazing wetted connections | Thin plates, electronic components | High efficiency and no weld defects | The strength of the joint is lower than that of fusion welding |
Key reminder: The heat-affected zone is the area where the base metal is not melted but the properties change during welding, and its width and structure changes directly affect the strength and toughness of the welded joint - for example, in high-strength steel welding, if the heat-affected zone has hardened structure, it is easy to lead to cold cracks.
2. Hardware support: What equipment and tools can ensure the process effect?
The implementation of the process is inseparable from reliable equipment and tools, and the selection of adapted "hardware" is the key to improving processing/welding efficiency and ensuring quality.
Machining equipment: from ordinary machine tools to intelligent machining centers
With the development of automation and high precision in the manufacturing industry, processing equipment has been upgraded from traditional ordinary machine tools to intelligent equipment with CNC machining centers as the core:
- CNC machining center: integrates various functions such as milling, drilling, boring, etc., and cooperates with tool magazine and tool holder to achieve automatic tool change, suitable for batch machining of complex parts (such as deep holes in hydraulic valve blocks);
- Five-axis machine tool: It can realize five-direction linkage machining, solve the machining problems of complex curved surfaces (such as aero engine blades), and the accuracy can reach ±0.005mm;
- Auxiliary tools: chuck clamp is used to fix the workpiece and ensure stability during the machining process; The choice of tool directly affects the cutting efficiency – for example, when machining stainless steel, it is necessary to choose cobalt-containing high-speed steel or carbide tools with tool coatings (such as TiN, AlTiN coatings) to improve wear resistance.
Case sharing: After upgrading the traditional milling machine to a five-axis CNC machining center, a new energy auto parts factory upgraded the machining efficiency of complex cavity parts by 40%, and the scrap rate was reduced from 3.2% to 0.8%.
Welding equipment: from manual operation to automated systems
The selection of welding equipment should match the welding method and production needs, and the core equipment and tools are as follows:
- Core equipment: welding power supply provides stable arc or laser energy (e.g. MIG welding power supply needs to have a pulse function to reduce spatter); Wire feeder ensures uniform feeding of filling welding wire;
- Auxiliary tools: welding torch nozzle to control the spray range of protective gas to avoid weld oxidation; Shielding gas (such as argon gas, carbon dioxide mixture) is used to isolate the air, and is commonly used in TIG welding and MIG welding. Ceramic liner can ensure single-sided welding and double-sided forming, improving the quality of the back of the weld; Automatic dimming mask protects the welder's eyes from arc damage.
Industry trends: At present, automated welding systems (such as robotic welding workstations) have been widely used in automobile manufacturing, shipbuilding and other industries, achieving high-precision and high-efficiency welding through preset programs, especially suitable for mass-produced standardized parts (such as automotive chassis supports).
3. Material adaptation: How to solve the problem of "incompatibility between process and material"?
The physical and chemical properties of different materials vary greatly, and if the machining/welding process does not match the material, it is very easy to cause quality problems (such as too fast tool wear during machining and cracks during welding). Mastering material adaptation skills is the core key to process implementation.
Processing and welding characteristics of common materials
| Material type | Processing characteristics | Welding characteristics | Core adaptation solutions |
| carbon steel | Carbon steel has good machinability and low tool wear | Excellent weldability, arc welding can meet the needs | Processing: Ordinary high-speed steel tools are selected; Soldering: No preheating required (plate thickness< 20mm) |
| stainless steel | Easy to stick to the knife and poor heat dissipation during cutting | Stainless steel has medium weldability and is prone to intergranular corrosion | Machining: use carbide tools to increase the cutting speed; Welding: Argon arc welding is used to control the welding temperature < 600°C |
| Aluminum alloy | Aluminum alloy has a large deformation and is easy to break when cutting | Welding is easy to oxidize, and the weld is poorly formed | Processing: with diamond cutter, cooling with emulsion; Welding: Laser welding or argon arc welding, with high-purity argon gas protection |
| Titanium alloy | It is easy to oxidize at high temperature and has low cutting efficiency | Titanium alloy has serious high-temperature oxidation, and welded joints are prone to embrittlement | Machining: use tungsten and cobalt carbide tools, dry cutting; Welding: Vacuum electron beam welding, stress relief annealing after welding |
| Dissimilar metals | The physical properties are very different (such as steel and aluminum), and welding is prone to brittle phases | The joint has low strength and is easy to crack | Brazing or diffusion welding with a special interlayer material (e.g., copper foil) |
Adjustment tips for key process parameters
- Machining side: cutting fluid compatibility needs to be adjusted according to the material - emulsion for processing carbon steel, extreme pressure cutting oil for processing stainless steel, synthetic cutting fluid for processing superalloys, which can reduce tool wear and workpiece deformation;
- Welding side: Preheating temperature and post-weld heat treatment are the keys to ensuring the quality of dissimilar metal joints - for example, when welding carbon steel and stainless steel, the preheating temperature is controlled at 100-150°C, and the tempering treatment is carried out at 300-400°C after welding, which can reduce residual stress. The choice of filler wire should match the composition of the base metal, such as ER308L wire when welding 304 stainless steel.
Case: When welding a titanium alloy skeleton, an aerospace company used ordinary argon arc welding in the early stage, and the weld seam was embrittlement and cracking. Post-adjustment process: Vacuum laser welding is used, the workpiece is preheated to 80°C before welding, and the stress relief treatment is carried out at 550°C for 2 hours after welding, and Ti-6Al-4V special welding wire is selected, and the final welding joint strength reaches 92% of the base metal, meeting aerospace standards.
4. Quality control: How to accurately detect processing and welding defects?
Machining accuracy and welding quality directly determine the safety of the product, especially in key fields such as aerospace and rail transit, where the slightest defect can cause serious consequences. Mastering scientific quality control and testing methods is the last line of defense to prevent unqualified products from entering the market.
Quality inspection indicators and methods of machining
The core indicators of machining quality are dimensional tolerance and surface roughness Ra:
- Dimensional tolerance: refers to the allowable deviation between the actual size of the workpiece and the design size, such as the tolerance requirement of precision parts may reach ±0.001mm, which needs to be accurately detected by CMM coordinate measuring instrument;
- Surface roughness Ra: reflects the smoothness of the surface of the workpiece, the smaller the Ra value, the smoother the surface (such as the Ra of grinding can reach 0.025μm), and the roughness meter is commonly used for contact measurement.
In addition, the processed parts need to be checked for defects such as burrs, chips, and internal cracks, which can be detected through visual inspection or ultrasonic flaw detection.
Quality inspection methods and defect judgment of welding
Welding defects mainly include porosity, unfused, undercut, cracks, etc., and the corresponding detection method should be selected according to the type of defect:
- Appearance inspection: visually or with the help of a magnifying glass to inspect surface defects such as weld underlays and poor forming;
- Non-Destructive Testing (NDT):
- UT ultrasonic flaw detection: uses ultrasonic waves to penetrate the weld to detect internal porosity, non-fusion and other defects, suitable for thick plate welded parts (such as ship plate patchwork);
- RT Ray Inspection: Through X-ray or γ-ray imaging, the location and size of defects inside the weld are visually displayed, and are often used for high-pressure vessel welding inspection;
- PT penetrant detection: suitable for detecting surface opening defects (such as microcracks), simple operation and low cost;
- Destructive testing: Tensile, bending, and impact tests are conducted on the specimen to verify the mechanical properties of the welded joint, such as penetration depth measurement to determine the effective connection thickness of the weld.
Practical suggestion: In mass production, the three-level inspection system of "first article inspection + process sampling inspection + finished product full inspection" can be adopted, combined with laser tracker to monitor the deformation during the welding process in real time to avoid quality risks in advance.
5. Industry applications: What are the typical cases of machining and welding?
Theory must eventually be implemented in practical application, and technological innovation in machining and welding is promoting the high-quality development of various industries. Here are a few typical application cases to give you an intuitive feel of the core values of the two processes:
Aerospace field: aero engine blades
Aero engine blades are typical "high-precision, difficult" parts, and their machining and welding processes are extremely demanding: the blades are made of titanium alloy or superalloy materials, and complex surfaces are milled by a five-axis CNC machining center, and the surface roughness needs to be controlled below Ra 0.05μm; The connection between the blade and the hub adopts vacuum electron beam welding, and the weld penetration error ≤ 0.1mm, ensuring stability in high-temperature and high-pressure environments.
New energy vehicle field: battery tray
The battery tray is the core load-bearing component of new energy vehicles, which needs to be both lightweight and high-strength: aluminum alloy material is used to drill and mill grooves through CNC machining centers to ensure the position accuracy of the mounting holes; The splicing of the pallet adopts laser welding, the welding speed is up to 3m/min, the deformation < 0.5mm, and the weld seam needs to be inspected by UT ultrasonic without any internal defects.
Rail transit field: high-speed rail bogie
The high-speed rail bogie is directly related to driving safety, and its welding process is particularly critical: the frame of the bogie is welded with high-strength steel, which needs to be preheated to 150°C during welding, MIG welding is used for priming, submerged arc welding filling, and the weld seam has passed the dual verification of RT ray detection and penetrant detection; The gearbox box on the bogie is machined by a CNC machining center with a dimensional tolerance of ±0.01mm, ensuring a precise fit with other components.
Remanufacturing Field: Equipment Repair
In industrial equipment remanufacturing, machining and welding are the core repair technologies: for example, the rolls of a steel mill fail due to wear, the wear layer is removed by turning, and then the surface is repaired by surfacing technology (such as submerged arc surfacing welding), and finally the dimensional accuracy is restored by grinding processing, and the service life of the repaired rolls can reach 80% of the new parts, greatly reducing production costs.
6. Yigu Technology's views
As the "cornerstone technology" of modern manufacturing, machining and welding directly determine the competitiveness of a country's manufacturing industry. Under the development trend of intelligence and greening, two processes are upgrading in the direction of "high precision, high efficiency, and low energy consumption" - such as the linkage between CNC machining centers and industrial robots, and the combination of laser welding and artificial intelligence, all of which are promoting the transformation of production models. For enterprises, mastering the core skills of material adaptation, equipment selection and quality control is the key to reducing costs and enhancing product competitiveness. For practitioners, only by deeply cultivating process principles and accumulating practical experience can they gain a foothold in the industry. In the future, with the continuous emergence of new materials and new equipment, the application scenarios of machining and welding will be more extensive, and technological innovation will never end.
7. FAQ FAQ
- Q: How can I avoid knife sticking when machining stainless steel?
A: Carbide or diamond-coated tools can be used to increase the cutting speed (100-150m/min recommended), and at the same time, use extreme pressure cutting oil to cool and lubricate to reduce the friction between the tool and the workpiece.
- Q: Which process is the most reliable for welding dissimilar metals (such as steel and aluminum)?
A: It is recommended to use brazing or diffusion welding, combined with special intermediate layer materials (such as copper and nickel), which can effectively alleviate the physical properties of the two materials, avoid brittle phases, and improve joint strength.
- Q: How to solve the deformation of the workpiece after welding?
Answer: It can be started from three aspects: (1) Preheating before welding to reduce the temperature gradient; (2) Symmetrical welding, segmented welding and other processes are used to disperse the welding stress; (3) Stress relief annealing after welding, or adjusting the deformation through mechanical correction.
- Q: What is the core difference between a CNC machining center and a 5-axis machine?
A: CNC machining centers are usually linked in three axes (X, Y, Z axes), suitable for machining simple surfaces and cavities; The addition of two rotary axes (A, B, or C axes) enables one-time machining of complex surfaces with greater precision and efficiency, making them suitable for high-end manufacturing applications such as aerospace.
- Q: How can I tell if there are internal defects in a weld joint?
A: Non-destructive testing methods are preferred, such as UT ultrasonic flaw detection (detecting internal defects in thick plates), RT ray detection (visually displaying defect locations), and PT penetrant testing (detecting surface opening defects). Destructive tests (e.g., tensile and bending tests) can be performed to verify mechanical properties.
