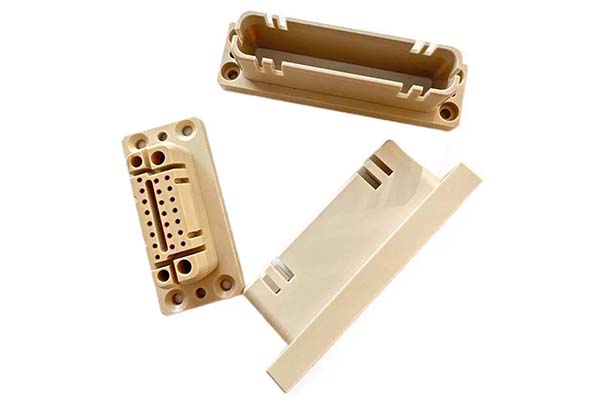
Imagine a medical device manufacturer struggling to machine a 0.1 mm diameter hole in a titanium implant with a tolerance of ±0.001 mm—any error could risk patient safety. Or an aerospace engineer needing a turbine blade with a surface finish of Ra 0.02 μm to reduce air resistance, but traditional machining can’t achieve the required smoothness. These are the challenges that precision advanced machining was designed to solve. This specialized field combines cutting-edge technologies with expert craftsmanship to produce parts with micron-level accuracy, pushing the boundaries of what’s possible in manufacturing. In this guide, we’ll explore the basics of precision advanced machining, the technologies involved, and how to overcome its unique challenges.
Precision Advanced Machining Basics: The Foundation of Ultra-Precision
Precision advanced machining goes beyond conventional manufacturing, focusing on creating parts with high-tolerance machining (often ±0.1 μm or better) and intricate details. At its core is precision engineering—a discipline that demands strict control over every aspect of the process, from material selection to tool movement.
- Ultra-Precision Machining: This subset targets tolerances as tight as ±0.01 μm, equivalent to 1/100th the width of a human hair. It’s used for components like optical lenses or microelectronics, where even minor deviations affect performance.
- Micro Machining: Deals with features smaller than 1 mm, such as 50 μm gears in watches or 10 μm channels in microfluidic devices. Micro machining requires tools as small as 0.01 mm and spindles running at 100,000+ RPM.
- Machining Fundamentals: Unlike standard machining, precision advanced machining accounts for factors like thermal expansion (even 0.1°C temperature changes can alter part dimensions) and tool deflection (a 0.1 mm diameter tool can bend 5 μm under light cutting forces).
- Tool Path Programming: Uses advanced CAM software with sub-micron resolution. A single program for a complex optical part might include 10,000+ tool paths, each optimized to minimize vibration and tool wear.
A study by the Precision Machining Association found that 80% of failures in high-precision parts stem from inadequate attention to these basics, highlighting the need for specialized expertise.
Technologies in Precision Advanced Machining: Tools for Ultra-Accuracy
Precision advanced machining relies on a suite of technologies designed to achieve unprecedented accuracy:
- CNC (Computer Numerical Control) Machines: High-end CNC machines with linear encoders (0.01 μm resolution) and thermal compensation systems. A 5-axis CNC mill can machine a complex aerospace component with ±0.5 μm tolerance, adjusting for temperature changes in real time.
- Multi-Axis Machining: 4- and 5-axis machines eliminate the need for multiple setups, reducing errors. A 5-axis machine machining a turbine blade can maintain a constant tool angle, improving surface finish by 30% compared to 3-axis machining.
- Electrical Discharge Machining (EDM): Uses controlled sparks to erode material, ideal for hard metals like tungsten (65 HRC). Wire EDM with 0.02 mm diameter wire can cut 0.03 mm slots in medical implants without mechanical stress.
- Laser Machining: Femtosecond lasers (pulse durations of 10–15 seconds) ablate material with sub-micron precision, perfect for micro holes in ceramics or polymers. A laser can drill 1 μm diameter holes in a fuel injector, with 100% consistency across 10,000+ parts.
- Electrochemical Machining (ECM): Uses electrolysis to dissolve material, leaving a stress-free surface. ECM is used for aerospace parts like turbine disks, achieving Ra 0.05 μm finishes without tool wear.
- Abrasive Waterjet Cutting: Uses a high-pressure stream (300–900 MPa) of water and abrasives to cut materials from metals to composites. It’s ideal for heat-sensitive materials like titanium, as it produces no thermal distortion.
- Additive Manufacturing (3D Printing): Precision 3D printers (like those using stereolithography) can produce parts with ±25 μm tolerance, complementing subtractive machining for complex geometries. A medical device company combined 3D printing and CNC machining to create a custom implant with internal channels 0.5 mm in diameter.
Applications of Precision Advanced Machining: Where Accuracy Matters Most
Precision advanced machining enables innovations in industries where even the smallest error can have major consequences:
- Aerospace Components: Machining turbine blades, fuel nozzles, and structural parts with tolerances of ±1 μm. A jet engine turbine blade machined with 5-axis CNC and EDM can withstand 1,000°C temperatures and 10,000 RPM rotation.
- Medical Devices: Producing surgical tools (0.1 mm sharp edges), implants (titanium hip stems with Ra 0.05 μm finishes), and micro sensors (50 μm diameter probes). Precision ensures biocompatibility and functionality.
- Micro Electronics: Creating components like 10 μm thick connectors and 5 μm wide circuit traces. A smartphone camera’s image sensor relies on precision-machined components to focus light accurately.
- Optics and Photonics: Machining lenses, mirrors, and prisms with surface finishes of Ra 0.01 μm. A telescope mirror machined with ultra-precision grinding can focus light from distant galaxies with minimal distortion.
- Mold and Die Making: Producing injection molds with 0.5 μm tolerance for plastic parts like smartphone cases. Precision molds reduce post-processing, cutting production time by 20%.
Challenges in Precision Advanced Machining: Overcoming the Hurdles
Achieving ultra-precision comes with significant challenges, requiring specialized solutions:
- Tool Wear and Breakage: Micro tools (0.01–0.1 mm) wear quickly, with a 0.1 mm carbide end mill lasting only 1–2 hours on hardened steel. Using diamond-coated tools and adaptive machining (adjusting feed rates as tools wear) extends life by 50%.
- Heat Generation: Even small amounts of heat can distort parts. Cooling systems with ±0.1°C temperature control and cryogenic machining (using liquid nitrogen) keep temperatures stable, reducing thermal errors by 70%.
- Surface Integrity: High-precision parts often require Ra < 0.1 μm finishes. Post-machining processes like superfinishing or chemical polishing can achieve this, but add 10–15% to production costs.
- Material Hardness and Brittleness: Machining hard materials (like ceramics or carbide) increases tool wear. Ultrasonic-assisted machining (vibrating the tool at 20 kHz) reduces cutting forces by 30%, improving tool life.
- High Production Costs: Precision advanced machining can cost 5–10× more than conventional methods. However, for critical parts (like aerospace components), the cost is justified by reduced failure rates—down from 5% to 0.1% in many cases.
Quality Control in Precision Advanced Machining: Ensuring Perfection
Quality control in precision advanced machining requires tools and processes that can measure at the micron level:
- Inspection Techniques: Coordinate Measuring Machines (CMM) with micro probes (0.1 mm diameter) verify dimensions to ±0.1 μm. A CMM can check 100+ features on a 10 mm × 10 mm part in under 5 minutes.
- Surface Roughness Measurement: Profilometers with 0.001 μm resolution ensure finishes meet specs. For optical parts, interferometers detect surface irregularities as small as 0.01 μm.
- Non-Destructive Testing (NDT): Ultrasonic testing and X-ray imaging detect internal flaws, while laser scanning checks for subsurface defects. A medical implant manufacturer uses NDT to ensure 100% defect-free parts.
- In-Process Monitoring: Sensors track cutting forces, vibration, and temperature, adjusting machine parameters in real time. A CNC mill with in-process monitoring reduces scrap rates by 40% compared to manual inspection.
- Regulatory Compliance: Industries like aerospace (AS9100) and medical (ISO 13485) require strict documentation, including material certificates, inspection reports, and process validation data.
Yigu Technology’s Perspective: Expertise in Precision Advanced Machining
At Yigu Technology, we specialize in precision advanced machining for industries demanding the highest accuracy. Our facility features 5-axis CNC machines, EDM systems, and laser machining centers, all calibrated to achieve ±0.5 μm tolerances. We use advanced inspection tools (including a high-precision CMM and profilometer) for 100% quality checks. Whether machining aerospace components, medical devices, or micro electronics, our team combines technical expertise with rigorous quality control to deliver parts that meet the most stringent standards. We understand that in precision manufacturing, perfection isn’t just a goal—it’s a requirement.
FAQs
- What’s the smallest tolerance achievable with precision advanced machining?
Ultra-precision machining can achieve tolerances as tight as ±0.01 μm for small parts (under 10 mm), while larger components (100+ mm) typically hold ±0.5 μm. These tolerances are 10–100× tighter than conventional machining.
- How long does it take to machine a high-precision part?
Cycle times vary by complexity: a simple micro hole (0.1 mm diameter) takes 1–2 minutes, while a complex 5-axis aerospace part can take 1–2 hours. Small batches (1–100 parts) are standard, as high precision limits production speed.
- What materials are most challenging to machine with precision?
Hard, brittle materials like ceramics, carbide, and titanium alloys are toughest, requiring specialized tools (diamond or CBN) and slow feed rates. Heat-sensitive materials (like polymers) also pose challenges, often requiring cryogenic or laser machining.
