Rapid Tooling Prototyping (RTP) combines agile prototyping and short-run production tooling to create functional, production-grade parts in weeks, not months, enabling designers to de-risk designs and accelerate market entry.
For designers, the gap between a validated prototype and a market-ready product can be a frustrating and costly chasm. Rapid Tooling Prototyping (RTP) is a methodology that bridges this gap by enabling the quick fabrication of prototype molds, which are then used to produce small batches of functional parts. This guide is specifically crafted to empower designers with the knowledge to effectively leverage RTP. We'll demystify the technologies, explain material choices, and provide a framework for making intelligent design decisions that optimize cost, lead time, and part quality. By understanding how to select the right RTP process and partner, you can transform your role from a creator of concepts to a driver of manufacturable, successful products.
Introduction
Navigating the transition from digital model to physical product is a critical phase for any designer. Rapid Tooling Prototyping offers a powerful solution that sits between one-off 3D printing and full-scale, high-volume injection molding. It allows you to produce 50 to 5,000+ parts that are true injection-molded components, made from your final production material. This capability is transformative: you can conduct real-world functional testing, user trials, and even a soft market launch with parts that are virtually indistinguishable from the final product. This article provides a designer-centric guide to RTP. We will focus on practical knowledge: how the process differs from traditional tooling, what technologies are available, how your design choices directly impact success, and how to select a manufacturing partner who can translate your vision into reality efficiently and reliably.
What Is Rapid Tooling Prototyping?
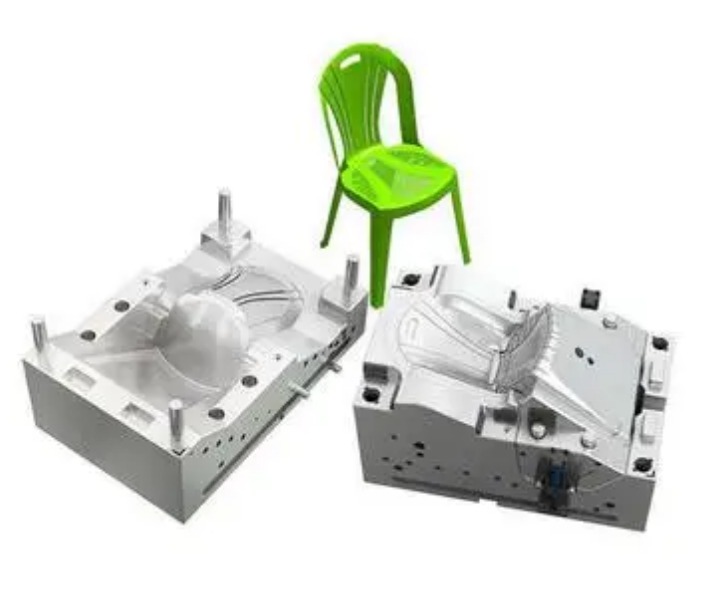
Rapid Tooling Prototyping is an integrated approach that uses faster, more agile methods to create prototype-grade tooling (molds). These tools are then used on standard injection molding machines to produce low to medium volumes of functional prototype or pre-production parts.
The core value proposition is speed and flexibility. While a traditional production steel mold can take 12-20 weeks to fabricate, a rapid tool can be ready in 2-6 weeks. This compressed timeline allows for:
- Design Validation: Testing the part in its true form, fit, and function.
- Market Testing: Launching a limited product run to gauge customer interest.
- Bridge Production: Supplying parts while the final, high-volume production tool is being built.
How Does It Differ from Conventional Mold Making?
Understanding this distinction is key to setting realistic expectations and leveraging RTP's strengths.
| Aspect | Conventional Production Tooling | Rapid Tooling Prototyping |
|---|---|---|
| Primary Goal | Maximize durability for millions of cycles. | Minimize time-to-first-part for hundreds or thousands of cycles. |
| Typical Material | Hardened tool steels (H13, P20). | Aluminum, soft steel, 3D-printed metals, or high-temp resins. |
| Lead Time | 12 - 20+ weeks | 2 - 6 weeks |
| Tool Cost | Very High ($30,000 - $150,000+) | Moderate ($3,000 - $25,000) |
| Tool Life | 1,000,000+ shots | 100 - 10,000 shots (material dependent) |
| Modifications | Extremely difficult, slow, and expensive. | Relatively easier and more cost-effective. |
| Best For | Final, high-volume mass production. | Prototyping, pilot runs, bridge production, and low-volume manufacturing. |
Which Rapid Technologies Are Available?
RTP leverages a range of technologies to build tools quickly. The choice depends on your part's complexity, required material, and volume.
| Technology | Description | Best Application for Designers |
|---|---|---|
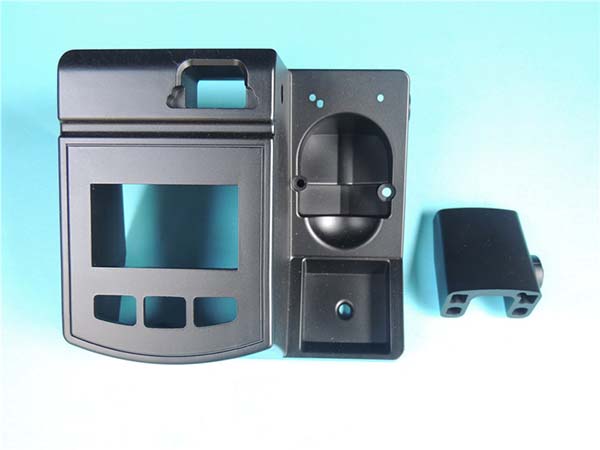
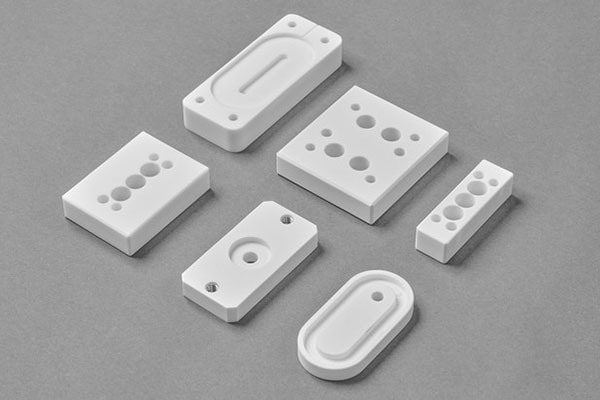
| High-Speed CNC Machining (Aluminum) | The most common RTP method. Soft aluminum blocks are machined into mold cores and cavities. | Default choice for most projects. Excellent for parts requiring good surface finish and tolerances. Ideal for 50 - 5,000 parts. |
| Direct Metal Laser Sintering (DMLS) | A metal 3D printing process that fuses powder layer-by-layer. | Complex geometries with internal features or conformal cooling channels that are impossible to machine. Ideal for complex cores or inserts. |
| Vacuum Casting (Urethane Molding) | A master pattern (3D printed) is used to create a silicone mold, into which urethane resin is poured. | Very low volumes (10-50) where cost is the absolute primary constraint and material properties of engineering-grade resins are sufficient. |
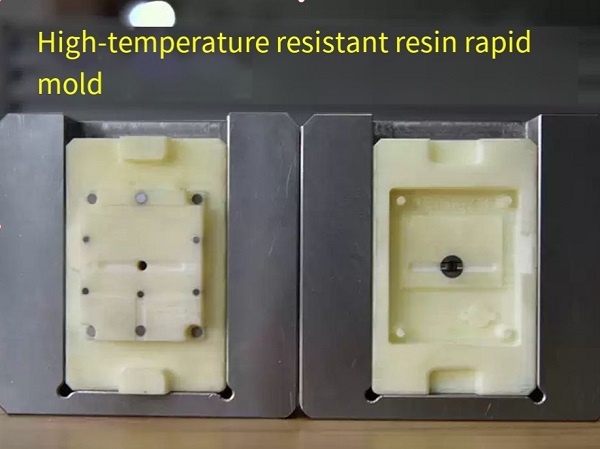
| 3D-Printed Composite/Resin Tools | Molds are printed from high-temperature resistant resins or composites. | Ultra-fast, ultra-low-cost proof of concept for simple parts. Very limited life (<100 shots). |
What Materials Can Be Used for Tools and Parts?
Your choice of tool material dictates durability, and your choice of part material dictates function.
Common Rapid Tool Materials:
- Aluminum (7075-T6): The workhorse. Offers an excellent balance of fast machining, good thermal conductivity for shorter cycle times, and sufficient life for thousands of shots. Avoid for highly abrasive plastics (e.g., glass-filled).
- P20 / NAK80 Pre-Hardened Steel: A step up from aluminum. Offers longer tool life and better resistance to wear, but with increased machining time and cost.
- 3D-Printed Maraging Steel: Used in DMLS. Can be heat-treated to high hardness and enables complex internal geometries like conformal cooling.
Common Part Materials (for injection molding in rapid tools):
You are not limited to "prototype" plastics. You can use production-grade thermoplastics:
- ABS: Good impact strength, aesthetic finish.
- Polypropylene (PP): Flexible, chemical resistant.
- Nylon (PA6, PA66): Strong, wear-resistant.
- Polycarbonate (PC): High impact strength, transparent.
- POM (Acetal): Low friction, high stiffness.
How to Choose the Right Process for Your Design?
A simple decision matrix based on your primary project driver can guide you:
| If your top priority is… | Then the recommended RTP process is… | Because… |
|---|---|---|
| Speed to First Part & Low Cost | CNC Machined Aluminum Mold | Fastest and most cost-effective for getting true molded parts. The industry standard. |
| Complex Internal Cooling or Geometry | DMLS Printed Metal Mold | Additive manufacturing can create cooling channels that follow the part contour, improving quality and cycle time. |
| Lowest Possible Cost for <50 Parts | Vacuum Casting with Urethane | Avoids metal tooling entirely; good for form/fit testing with reasonable material properties. |
| Testing Multiple Design Iterations | Aluminum Mold or 3D-Printed Resin Tool | Modifications are easier and cheaper than with steel. A resin tool can be printed for each iteration. |
How to Optimize Cost and Lead Time?
As a designer, your decisions have a direct and dramatic impact on the economics of RTP.
- Simplify Geometry: Minimize undercuts, deep thin ribs, and tiny features. Each complexity adds machining time and cost.
- Design for Uniform Wall Thickness: This is the #1 rule for injection molding. It ensures even filling and cooling, preventing defects and allowing for faster cycle times. Target walls between 1.5mm and 3.0mm for most plastics.
- Incorporate Adequate Draft: Every vertical wall needs draft (taper). A minimum of 1 degree is standard; 2-3 degrees is better for texture or deep draws. This ensures the part can be ejected without sticking or scuffing.
- Specify Tolerances Wisely: Only apply tight tolerances (±0.1mm or tighter) to critical features. Use general tolerances (±0.25mm or looser) elsewhere. Tighter tolerances increase machining time and cost exponentially.
What Design Adjustments Improve Tool Life?
While rapid tools have shorter lives, good design can maximize their output.
- Generous Radii: Use fillets (radii) on all internal corners. Sharp corners create stress concentrations in the mold steel, which can lead to cracking over time. A radius also improves plastic flow.
- Avoid Abrasive Fillers: If testing allows, specify unfilled or mineral-filled plastics instead of glass-filled or carbon-fiber-filled versions for your RTP run. These abrasive materials wear down aluminum tools much faster.
- Optimize Gate Locations: Work with your RTP partner during the design phase. A well-placed gate (where plastic enters the cavity) ensures smooth filling and reduces stress on the tool.
How to Validate Parts Before Full-Scale Production?
The parts from your rapid tool are the ultimate validation tool.
- Form & Fit Testing: Assemble parts into their final configuration. Check clearances, mating surfaces, and fastener alignment.
- Functional Testing: Subject parts to real-world operating conditions—load, temperature, chemicals, UV exposure—to verify performance.
- Material Property Verification: Test parts for mechanical properties (tensile strength, impact resistance) to ensure the chosen plastic meets spec.
- Process Validation: Use the RTP run to dial in the perfect injection molding parameters (temperature, pressure, cycle time). This "recipe" can be handed directly to the high-volume production molder, saving weeks of setup time.
How to Select a Reliable Rapid Tooling Partner?
Choosing the right company is as important as the design itself. Look for a partner who is a collaborative engineer, not just an order-taker.
Key Selection Criteria:
- Design for Manufacturability (DFM) Feedback: They should proactively review your files and suggest modifications to improve manufacturability, reduce cost, and prevent defects.
- Technology Range: Do they offer both CNC and additive options? A company with a broad capability set can recommend the objectively best process, not just the one they have.
- In-House Tooling & Production: Companies that control both toolmaking and molding under one roof ensure better communication, accountability, and faster turnaround.
- Communication & Transparency: They should provide clear timelines, cost breakdowns, and regular updates. Ask for examples of their project communication.
- Experience in Your Industry: Have they worked on similar parts or with similar materials? Ask for case studies or client references.
Conclusion
For designers, Rapid Tooling Prototyping is a superpower. It transforms your role, allowing you to shepherd your design further down the production path with confidence and control. By understanding the available technologies, making smart design choices to optimize for the process, and partnering with a capable RTP company, you can drastically reduce the time and risk associated with bringing a new product to life. The ability to hold hundreds of high-quality, production-material parts in your hands within weeks of finalizing a design is not just a convenience—it's a competitive advantage that enables better products, faster launches, and more successful outcomes.
Frequently Asked Questions (FAQ)
What is a typical order of magnitude for cost and lead time?
For a common part like a small enclosure (e.g., a smartphone-sized housing):
- Tooling (Aluminum Mold): $5,000 - $15,000
- Lead Time for First Parts: 3 - 5 weeks
- Per-Part Cost (for 500 units in ABS): $5 - $15
This is dramatically less than a $50,000+ steel mold with a 15-week lead time.
Can rapid tools produce parts with textures or logos?
Yes, but with considerations. Textures can be added to aluminum molds via chemical etching (photo etching). Fine, laser-etched logos can also be added. However, deep, complex textures may be challenging and add cost. For the highest fidelity textures, a production steel mold with EDM (electrical discharge machining) is still superior. Discuss aesthetic requirements early with your partner.
What happens if I need to make a design change after the rapid tool is made?
This is a key advantage of RTP. Changes are far easier and less costly than with hard steel tooling. For an aluminum mold, the affected area can often be welded up and re-machined. For a simple change, a new 3D-printed insert might be made. While there is a cost and time impact, it is a fraction of what it would be for a production tool.
How many parts can I realistically get from a rapid aluminum tool?
It depends heavily on the plastic material.
- For non-abrasive plastics (ABS, PP, PC): 1,000 - 5,000+ shots is common.
- For abrasive plastics (glass-filled nylon, PPS): 200 - 1,000 shots before significant wear may appear.
Your RTP partner will help you estimate tool life based on your material choice and part design.
Contact Yigu Technology for Custom Manufacturing.
At Yigu Technology, we specialize in being the ideal Rapid Tooling Prototyping partner for designers. We understand that your goal is not just to make a mold, but to de-risk your design and accelerate your product's journey to market.
Our process begins with a collaborative Design for Manufacturability (DFM) review, where our engineers work side-by-side with you to optimize your design for success. We offer the full spectrum of rapid tooling solutions, from CNC-machined aluminum molds to advanced DMLS metal printing, all paired with our in-house injection molding presses.
Ready to turn your design into tangible, high-quality parts with speed and confidence? Contact Yigu Technology today for a comprehensive design review and project quote. Let's build it together.