Introduction
You are standing in front of a milling machine. You have a block of metal, a design in your head, and a question: what is the right way to cut this? The answer depends on what you need to create. A flat surface requires a different approach than a curved contour. A narrow slot needs a different tool than a wide pocket.
Milling is not one operation. It is a family of operations, each suited to specific tasks. Choosing the wrong type leads to poor surface finish, broken tools, and wasted time. Choosing the right type makes the job faster, easier, and more precise.
At Yigu Technology, we use all these milling types daily. This guide explains the five most common methods, how they work, and when to use them. Whether you are setting up a home workshop or optimizing a production line, this information will help you get better results.
Face Milling: Creating Flat, Smooth Surfaces
What It Does
Face milling is the go-to method for creating flat surfaces. It targets the top or bottom face of a workpiece. Think of squaring off the end of a metal bar or finishing a large plate. The goal is a smooth, flat surface ready for assembly or further processing.
How It Works
A face mill does the work. This is a large-diameter cutter with multiple indexable inserts—replaceable cutting tips that distribute wear evenly. The cutter spins with its face against the workpiece, removing material across a wide area.
For extra-smooth finishes, many machinists use a wiper insert. This specialized tip has a flat edge that "wipes" the surface as it cuts, reducing tool marks.
Key parameters:
- Cutter diameter: Typically 1.5–2 times the workpiece width
- Depth of cut: Shallow (0.5–2 mm) for finishing; deeper for roughing
- Feed rate: Higher for roughing; lower for finishing
High-Efficiency Milling (HEM) takes face milling further. By using high feed rates and shallow depths of cut, it boosts speed while reducing tool stress. This technique is especially effective in aluminum and other soft metals.
Real-World Example
A small manufacturing shop was struggling to finish aluminum engine blocks. They were using an old end mill for the top surface, which left rough edges and required extra sanding. We switched to a 4-inch face mill with carbide wiper inserts and adjusted to HEM parameters.
Results:
- Cycle time dropped by 35%
- Surface finish improved enough to eliminate the sanding step
- The shop saved over 10 hours per week on that project alone
Key Facts
| Metric | Typical Value |
|---|---|
| Surface finish | Ra 0.8–3.2 μm |
| Best materials | Metals (aluminum, steel, stainless), plastics, composites |
| Cutter size | 1.5–2× workpiece width |
| Primary use | Creating flat surfaces |
Peripheral Milling: Cutting Along the Edges
What It Does
Peripheral milling (also called slab milling) cuts along the sides of a workpiece. It removes material from the edges rather than the face. This method is perfect for creating straight, parallel surfaces or reducing the width or thickness of a part.
How It Works
A slab mill does the cutting. This is a cylindrical cutter with teeth along its outer edge. It is typically mounted on a horizontal milling machine, where the cutter spins on an arbor (a long shaft).
To reduce vibration and improve cut quality, many slab mills use:
- Helical cutters: Teeth angled like a helix for smoother cutting
- Staggered teeth: Teeth offset to alternate sides, reducing vibration
Side milling is a related technique where the cutter works along the side of the workpiece to create grooves or step features.
Peripheral vs. Face Milling
| Feature | Peripheral Milling | Face Milling |
|---|---|---|
| Cutter use | Peripheral edges | Face of the cutter |
| Primary surface | Sides or edges | Top/bottom face |
| Machine type | Mostly horizontal | Vertical or horizontal |
| Best for | Reducing width/thickness, straight edges | Flat finishes, squaring stock |
| Vibration risk | Lower | Higher |
Real-World Example
A furniture maker needed to trim large oak boards to a consistent thickness for table tops. A table saw caused splintering. Hand planing was too slow. We set up a horizontal mill with a 6-inch helical slab mill.
The helical teeth pulled the wood through smoothly, eliminating splinters. The arbor mount kept the cutter aligned perfectly. The maker went from trimming 10 boards per hour to 30, all with uniform thickness.
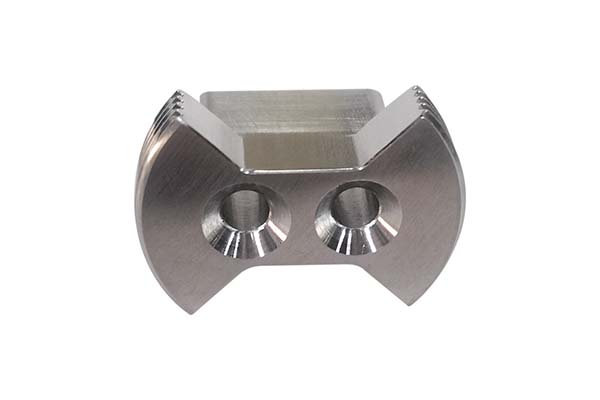
End Milling: The Versatile Workhorse
What It Does
End milling is the Swiss Army knife of milling. It can do almost anything. An end mill has teeth on both the end and the sides, allowing it to cut in multiple directions. This method is a staple in almost every workshop.
Common Operations
| Operation | Description | Example |
|---|---|---|
| Slotting | Cutting straight grooves | Slot for a bolt |
| Profiling | Shaping outer edges | Curved bracket |
| Contouring | Cutting 3D shapes | Mold for a plastic part |
| Pocketing | Cutting recesses | Nut pocket that does not go through |
| Keyway cutting | Small slots for keys | Locking a shaft and gear |
| Shoulder milling | Cutting steps | Bolt with thicker head, thinner shaft |
| Plunge milling | Drilling straight down | Starting a deep pocket |
| Trochoidal milling | Circular pattern cutting | Reduces heat and tool wear |
How It Works
End mills come in different flute counts:
- 2-flute: Better chip evacuation; ideal for plastics and aluminum
- 4-flute: Smoother finish; better for steel and harder metals
Trochoidal milling is a high-efficiency technique. The cutter moves in a circular pattern while advancing. This keeps the tool engaged consistently, reducing heat and extending tool life.
Real-World Example
A friend building custom drones needed a lightweight frame from carbon fiber-reinforced plastic (CFRP). The frame had tiny pockets, thin walls, and curved edges. We used a 1/8-inch carbide end mill with a 4-flute design and programmed trochoidal milling for the pockets.
Result: The end mill handled the curves and thin walls without breaking. The trochoidal path kept the tool cool enough to avoid melting the plastic. The final frame was strong, lightweight, and exactly what he needed.
Key Tips for End Milling
| Material | Recommended End Mill | Notes |
|---|---|---|
| Aluminum | 2-flute carbide | High speeds; good chip evacuation |
| Steel | 4-flute carbide | Lower speeds; smoother finish |
| Plastics | 2-flute sharp | Prevent melting; use compressed air |
| CFRP | 4-flute carbide | Sharp edges to prevent fraying |
Form Milling: Shaping Complex Contours
What It Does
Form milling creates complex, non-flat shapes in a single pass. Instead of cutting step by step, a specially shaped cutter produces the final contour directly. This method is ideal for parts like gears, cams, and custom profiles.
How It Works
A form cutter is ground to match the exact shape you need. Common profiles include:
- Gear teeth: Precise tooth profiles for power transmission
- Cam profiles: Curved shapes that open and close valves in engines
- Concave and convex shapes: Bowls, domes, and rounded surfaces
- Radius cutting: Rounded edges and fillets
Template milling is a related technique. A physical template guides the cutter, ensuring consistency across multiple workpieces.
Real-World Example
A small automotive shop needed to replace a worn-out camshaft for a vintage car. The part was no longer in production. They machined it from scratch using a form cutter with the exact cam profile measured from the old shaft.
The form cutter replicated the cam’s curves perfectly in a single pass. Without form milling, this project would have taken days of careful profiling. Instead, it was done in a few hours.
When to Choose Form Milling
| Condition | Why Form Milling Works |
|---|---|
| Complex contours | Cutter matches the shape exactly |
| Multiple identical parts | Consistency across the batch |
| Tight tolerances | Form cutters can hold ±0.001 inches |
Angular Milling: Cutting Inclined Surfaces
What It Does
Angular milling creates surfaces that are not parallel or perpendicular to the workpiece base. It is used for chamfers, dovetails, bevel gears, and any feature that requires an angle.
How It Works
An angular cutter has teeth ground at a specific angle. There are two main types:
| Cutter Type | Best For | Example |
|---|---|---|
| Single-angle | One inclined surface | Chamfers, beveled edges |
| Double-angle | Two intersecting inclined surfaces | Dovetails, V-grooves, bevel gears |
To hold round or irregular parts stable during angular milling, V-blocks are often used. These V-shaped clamps prevent the workpiece from rotating.
Common Angles and Uses
| Angle | Common Application | Tool Type |
|---|---|---|
| 30° | Bevel gears, custom brackets | Single or double-angle |
| 45° | Chamfers, decorative edges | Single-angle |
| 60° | Dovetails, threaded grooves | Double-angle |
| 90° | Square notches, V-grooves | Double-angle |
Real-World Example
A bike repair shop needed custom brake brackets for a vintage motorcycle. The brackets required a 30° angle to fit the frame and chamfers on the edges to avoid sharp points.
We used a single-angle cutter (30°) for the inclined surface and a smaller 45° cutter for the chamfers. The bracket was clamped in a V-block to keep it stable. The result: a perfect fit with no gaps or adjustments needed.
How to Choose the Right Milling Type
Decision Framework
| If you need… | Choose… |
|---|---|
| A flat, smooth surface | Face milling |
| To reduce width or thickness | Peripheral milling |
| Slots, pockets, or complex shapes | End milling |
| A specific curved profile (gear, cam) | Form milling |
| An angled surface or chamfer | Angular milling |
Material Considerations
| Material | Recommended Approach |
|---|---|
| Aluminum | Face milling (HEM), end milling (2-flute) |
| Steel | Face milling (slower speeds), end milling (4-flute) |
| Stainless steel | Carbide tools; slower speeds; avoid heat buildup |
| Plastics | End milling (2-flute); compressed air for cooling |
| Composites (CFRP) | Sharp carbide end mills; trochoidal paths to reduce heat |
Common Mistakes to Avoid
| Mistake | Consequence | Solution |
|---|---|---|
| Using a face mill for edge cuts | Poor finish, tool wear | Use peripheral milling for edges |
| Wrong flute count for material | Poor finish, heat buildup | 2-flute for plastics; 4-flute for metals |
| Too deep a cut in one pass | Tool deflection, breakage | Multiple shallow passes |
| No cooling for plastics | Melting, gumming | Compressed air; reduce speed |
Yigu Technology's Perspective
At Yigu Technology, we see the choice of milling type as a balance between precision, efficiency, and cost. Many manufacturers overlook small details—like using a wiper insert for face milling or trochoidal paths for end milling—that make a big difference.
We have seen shops reduce cycle times by 20–40% simply by switching to the right milling method for their material and part design. For beginners, we recommend starting with end milling (versatile) and face milling (easy to master) before moving to more complex methods like form or angular milling.
As technology advances, we are seeing more integration of CNC with these milling types. This allows for even tighter tolerances and faster production. The best milling type is the one that fits your specific project needs. With the right knowledge, you can make that choice with confidence.
Conclusion
Milling is not one thing. It is a collection of techniques, each suited to specific tasks. Face milling creates flat surfaces. Peripheral milling cuts along edges. End milling handles slots, pockets, and complex shapes. Form milling produces precise contours in a single pass. Angular milling creates inclined surfaces and chamfers.
Choosing the right method:
- Saves time—the right tool cuts faster
- Improves quality—the right geometry produces better finishes
- Reduces costs—less tool wear, fewer scrapped parts
Start with the shape you need. Then work backward to the method that creates it efficiently. With practice, selecting the right milling type becomes second nature.
FAQ
What is the difference between end milling and face milling?
End milling uses an end mill (teeth on end and sides) for versatile tasks like slotting, profiling, and pocketing. Face milling uses a face mill (teeth on the face) to create flat, smooth surfaces on the top or bottom of a workpiece. Think of end milling as shaping, face milling as finishing.
Can I use a face mill for peripheral milling?
Technically, yes—but it is not recommended. Face mills are designed for cutting on their face, not their peripheral edges. Using a face mill for peripheral milling leads to poor surface finish, increased tool wear, and higher vibration. Stick to slab mills (peripheral milling) or end mills (side milling) for edge cuts.
What is the best milling type for plastics?
End milling is the best choice for plastics. Use a 2-flute end mill for better chip evacuation—plastics tend to melt if chips get stuck. Use lower cutting speeds to avoid heat buildup. Compressed air cooling helps prevent melting. Face milling can also work for flat surfaces, but use a wiper insert to prevent melting.
How do I choose between single-angle and double-angle cutters?
Use a single-angle cutter if you need to create a single inclined surface (e.g., a chamfer). Use a double-angle cutter if you need two intersecting inclined surfaces (e.g., a dovetail or a V-groove). The angle of the cutter should match the angle of the surface you want to create.
Is high-efficiency milling (HEM) suitable for all materials?
HEM works best with metals like aluminum, steel, and stainless steel. Its high feed rates and shallow cuts reduce tool stress and heat. It is less ideal for brittle materials like cast iron or ceramics, which can crack under high feed rates. For plastics, HEM can work but requires lower speeds to avoid melting.
Contact Yigu Technology for Custom Manufacturing
At Yigu Technology, we use all these milling types daily. Our capabilities include face milling, peripheral milling, end milling, form milling, and angular milling across metals, plastics, and composites. We serve the automotive, aerospace, medical, and industrial sectors with precision components that meet demanding specifications.
We help clients choose the right milling method for their project—balancing speed, precision, and cost. Whether you need a simple flat surface or a complex gear profile, we have the tools and the expertise to deliver.
Contact us today to discuss your milling project.