Understanding 3D Printing Basics
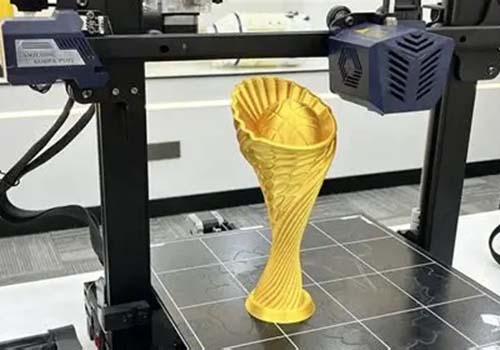
3D printing, also known as additive manufacturing, is a revolutionary technology that has transformed the way we create three - dimensional objects. Instead of traditional subtractive manufacturing methods, which involve removing material from a larger block, 3D printing builds objects layer by layer from a digital model.
The process begins with creating a 3D model using computer - aided design (CAD) software or by scanning an existing object. This digital model is then sliced into thin layers by specialized software. The 3D printer reads these slices and deposits materials, such as plastics, metals, ceramics, or even food and biological materials, one layer at a time until the entire object is complete.
3D printing has found applications in a wide range of industries. In the aerospace industry, it is used to manufacture lightweight yet strong components, reducing the weight of aircraft and improving fuel efficiency. For example, GE Aviation uses 3D printing to produce fuel nozzles for its LEAP jet engines, which are not only lighter but also more durable. In the medical field, 3D printing enables the creation of customized prosthetics, dental implants, and even organ models for surgical planning. A patient - specific prosthetic limb can be designed and printed to fit the exact shape and needs of the individual, providing a more comfortable and functional solution.
The advantages of 3D printing are numerous. It offers high design freedom, allowing for the creation of complex geometries that are difficult or impossible to achieve with traditional manufacturing methods. This is especially beneficial for creating parts with internal cavities or intricate lattice structures. Another advantage is rapid prototyping. Designers can quickly turn their ideas into physical prototypes, enabling faster product development cycles. For instance, a startup in the consumer electronics industry can use 3D printing to quickly produce prototypes of a new smartphone case, test different designs, and make improvements before mass production. Additionally, 3D printing is cost - effective for small - batch production, as it eliminates the need for expensive molds and tooling.
Why Screw Holes Matter in 3D Printing
Screw holes might seem like a small detail in 3D printing, but they play a crucial role in the functionality and integrity of the final printed objects.
Connecting Components
One of the primary functions of screw holes in 3D - printed parts is to connect multiple components together. In complex assemblies, such as those in robotics or custom - made electronic enclosures, 3D - printed parts often need to be joined with other 3D - printed components, metal parts, or off - the - shelf components. For example, in a DIY 3D - printed quadcopter, the frame components, which are usually 3D - printed, are connected using screws that pass through precisely printed screw holes. This allows for easy disassembly and reassembly, which is essential for maintenance, upgrades, or repairs. Without well - designed screw holes, creating a stable and reliable connection between parts would be extremely challenging, if not impossible.
Enhancing Structural Stability
Screw holes can also significantly enhance the structural stability of 3D - printed objects. When a screw is inserted into a 3D - printed screw hole and tightened, it creates a mechanical bond that helps distribute stress evenly across the connected parts. In large 3D - printed structures, like architectural models or industrial prototypes, this is vital. For instance, in a 3D - printed bridge model for structural engineering testing, screw - fastened joints can prevent the structure from collapsing under simulated loads. A study by [Insert relevant research institution] found that 3D - printed structures with properly designed screw - hole connections were able to withstand [X]% more stress compared to those without such connections, highlighting the importance of screw holes in maintaining structural integrity.
Facilitating Mounting and Assembly
In many applications, 3D - printed parts need to be mounted onto other surfaces or integrated into existing systems. Screw holes make this process straightforward. For example, a 3D - printed camera mount for a drone needs to be securely attached to the drone's body. The screw holes in the mount allow for a simple and reliable way to fasten it in place, ensuring that the camera remains stable during flight. This is also true for 3D - printed jigs and fixtures in manufacturing, which are often mounted onto workbenches or machine surfaces using screws.
Different Methods for 3D Printing Screw Holes
Method 1: Printing Threaded Holes Directly
Printing threaded holes directly in a 3D - printed object can be a convenient option, especially when you want to complete the entire object in one printing process.
Materials Required
- Filament Type: For most common 3D printers, materials like PLA (Polylactic Acid), ABS (Acrylonitrile Butadiene Styrene), or PETG (Polyethylene Terephthalate Glycol - modified) are used. PLA is popular due to its ease of printing, low odor, and relatively low cost. However, it may not be as strong as ABS or PETG in some applications. For example, if the 3D - printed part with the screw hole will be exposed to mechanical stress, ABS or PETG might be a better choice. ABS has high strength and heat resistance, while PETG offers good chemical resistance and toughness.
Printing Parameter Settings
- Layer Height: A smaller layer height, such as 0.1 - 0.15mm, can result in a smoother surface finish for the threaded hole. This is crucial as rough surfaces can make it difficult for screws to thread properly. For instance, if the layer height is too large (e.g., 0.3mm), the threads may have visible steps, which can cause the screw to bind or not engage evenly.
- Printing Temperature: The temperature should be set according to the filament type. For PLA, a temperature range of 190 - 210°C is typical. If the temperature is too low, the filament may not flow properly, leading to gaps in the threads. On the other hand, if it's too high, the material may over - extrude, distorting the thread shape. For ABS, the temperature usually ranges from 220 - 250°C, and for PETG, it's around 230 - 250°C.
- Infill Density: A higher infill density, like 30 - 50%, is recommended for threaded holes to ensure sufficient strength. A low infill density (e.g., 10 - 20%) might cause the hole to collapse or the threads to strip easily when a screw is inserted.
Potential Problems and Solutions
- Thread Defects: Sometimes, the printed threads may have missing segments or inconsistent pitch. This can be caused by incorrect extrusion settings or vibrations during printing. To solve this, check the extrusion multiplier in the printer settings and ensure that the printer is properly calibrated. Also, make sure the printer is placed on a stable surface to minimize vibrations.
- Screw Fit: The printed screw holes may be too tight or too loose for the screws. If they are too tight, you can try using a tap to slightly enlarge the hole. If they are too loose, you can coat the screw with a thread - locking compound or use a slightly larger - diameter screw.
Method 2: Post - Processing for Screw Holes
Post - processing to create screw holes involves drilling and tapping after the 3D - printing process is complete.
- Drilling: First, use a drill bit of the appropriate diameter to create a hole in the 3D - printed part. The diameter of the drill bit should be slightly smaller than the outer diameter of the screw's thread. For example, if you are using a M3 screw (with an outer diameter of approximately 3mm), a 2.5mm drill bit is often a good choice. This ensures that the subsequent tapping process will create a proper thread for the screw to engage with.
- Tapping: After drilling, use a tap to create the internal threads in the hole. Taps come in different sizes corresponding to the screw sizes. For a M3 screw, a M3 tap is used. Tapping should be done carefully, applying even pressure and rotating the tap in a clockwise direction to cut the threads. It's important to use a lubricant during tapping to reduce friction and prevent damage to the tap and the 3D - printed material.
Comparison of Direct Printing and Post - Processing
| Aspect | Direct Printing of Threaded Holes | Post - Processing for Screw Holes |
| Accuracy | May have some tolerance issues due to printer limitations. Slight variations in layer height or extrusion can affect the thread pitch and diameter accuracy. | Can achieve higher accuracy as the drilling and tapping processes can be more precisely controlled, resulting in a more consistent thread size and pitch. |
| Strength | The strength depends on the infill density and filament used. If not properly set, the printed threads may be weak and prone to stripping. | Generally stronger as the drilled and tapped holes can better distribute the stress when a screw is inserted. The post - processed threads are also less likely to be damaged during assembly. |
| Time - Consuming | Can be faster as it's part of the one - step printing process. Once the print starts, the threaded holes are created along with the rest of the object. | More time - consuming as it requires an additional drilling and tapping step after the 3D - printing is complete. |
| Complexity | Easier in terms of the overall workflow as there is no need for additional tools and processes during the main manufacturing stage. However, it requires careful parameter tuning to get good results. | More complex as it involves using additional tools (drill and tap) and proper techniques for drilling and tapping, which may require some practice to master. |
Yigu Technology's View
As a non - standard plastic metal products custom Supplier, Yigu Technology has in - depth experience in 3D printing applications. We understand that 3D printing screw holes requires a comprehensive understanding of materials and printing techniques.
When it comes to materials, we have extensive experience in handling various plastics and metals suitable for 3D printing. For instance, we know how to optimize the use of different filaments like PLA, ABS, and PETG for creating high - quality screw holes. Our team can accurately adjust printing parameters based on the material's characteristics, ensuring that the printed screw holes have the right strength and dimensional accuracy.
In terms of quality control, we have a strict inspection process. Before delivering any 3D - printed parts with screw holes, we check for thread integrity, hole diameter accuracy, and overall structural strength. This ensures that our products meet or exceed industry standards, providing our customers with reliable and durable components. Whether it's for small - scale prototyping or large - scale production, Yigu Technology is committed to delivering the best - quality 3D - printed parts with well - designed screw holes.
FAQ
Q1: What is the best material for 3D printing screw holes?
- PLA (Polylactic Acid): It is easy to print and has a relatively low cost. It is suitable for non - critical applications where strength requirements are not extremely high. However, it has lower heat resistance compared to some other materials.
- ABS (Acrylonitrile Butadiene Styrene): Offers high strength and heat resistance, making it a good choice for applications where the 3D - printed part will be exposed to mechanical stress or higher temperatures. But it has a strong odor during printing and may require a heated print bed.
- PETG (Polyethylene Terephthalate Glycol - modified): Combines good chemical resistance and toughness. It can provide a balance between strength and ease of printing, and is also suitable for applications where the part needs to withstand certain environmental factors.
Q2: Can I 3D print screw holes in complex - shaped objects?
Yes, it is possible to 3D print screw holes in complex - shaped objects. However, there are some things to note. When designing the model, consider the accessibility of the screw holes. For internal or hard - to - reach screw holes, you may need to use support structures during printing. But be aware that removing supports from complex - shaped objects can be challenging and may require careful planning. Also, the orientation of the object during printing can affect the quality of the screw holes. Try to orient the object in a way that minimizes the impact of layer lines on the hole's threads and ensures proper deposition of material for a strong and accurate hole.
