Introduction to 3D Print Smoothing
The world of 3D printing has evolved tremendously over the past few years, with advancements in technology making it possible to create highly detailed and complex objects. However, one common challenge that many face is achieving a smooth finish on their prints. While the layer-by-layer process inherent to 3D printing can result in visible lines and a rough texture, there are numerous methods and materials available to help achieve a smoother, more polished look. In this article, we will explore various techniques for smoothing 3D prints, including sanding, chemical smoothing, heat-based methods, and the use of specialized filaments and coatings.
Overview of the Importance of Smoothing
Achieving a smooth finish on 3D prints is crucial for several reasons. Firstly, it enhances the aesthetic appeal of the object, making it look more professional and refined. Secondly, a smooth surface can improve functionality by reducing friction and wear, which is particularly important for moving parts or components that come into contact with other surfaces. Additionally, smooth finishes can make cleaning and maintenance easier, as they are less likely to accumulate dirt and debris. Finally, certain applications may require a specific level of surface quality, such as when creating prototypes or end-use products that need to meet strict standards.
Common Issues with 3D Print Finishes
Before diving into the various smoothing techniques, it's essential to understand some of the common issues that can affect the surface quality of 3D prints:
- Layer Lines: These are the visible lines between each printed layer, which can be prominent on certain types of prints.
- Warping and Distortion: Uneven cooling or poor adhesion between layers can cause warping or distortion, leading to an uneven surface.
- Bubbles and Imperfections: Air bubbles trapped during printing or imperfections in the print bed can result in a rough or uneven surface.
- Material Properties: Some materials inherently have a rougher texture or are more prone to warping, making them challenging to work with.
Understanding these issues can help you identify the best smoothing technique for your specific needs and address any underlying problems before attempting to smooth your prints.
Techniques for Smoothing 3D Prints
There are several methods for achieving a smooth finish on 3D prints, each with its own advantages and limitations. Here are some of the most popular techniques:
Sanding Methods
Sanding is one of the simplest and most accessible methods for smoothing 3D prints. It involves using abrasive materials to remove small amounts of material from the surface, gradually evening out the layer lines and imperfections.
Tools and Materials
- Sandpaper: Available in various grits, from coarse (e.g., 80 grit) to fine (e.g., 1200 grit). Start with a coarser grit and progress to finer grits for a smoother finish.
- Abrasive Pads: These can be used for larger areas or more aggressive sanding.
- Power Sanders: For more efficient sanding, especially on large or complex prints.
Steps for Sanding
- Start Coarse: Begin with a coarser grit sandpaper to remove any high spots or major imperfections.
- Progress to Finer Grits: Gradually move to finer grits to achieve a smoother finish. Ensure you sand evenly to avoid creating flat spots or uneven surfaces.
- Clean Thoroughly: After sanding, remove all dust and debris from the surface to prevent contamination during subsequent steps.
Chemical Vapour Smoothing
Chemical vapour smoothing (CVS) involves exposing the 3D print to the fumes of certain chemicals, which soften the plastic and allow the layers to blend together, resulting in a smoother surface. This technique is particularly effective for ABS prints.
Materials and Equipment
- ABS Printed Object: The most commonly smoothed material using this method.
- Acetone: The primary chemical used for smoothing ABS. Other solvents may be used for different materials.
- Enclosed Chamber: A container to hold the print and solvent fumes, such as a glass jar or a dedicated CVS chamber.
- Protective Gear: Gloves and a mask to protect against harmful fumes.
Steps for Chemical Vapour Smoothing
- Prepare the Print: Clean the print thoroughly to remove any dust or oils that could interfere with the process.
- Set Up the Chamber: Place the print in the enclosed chamber and add a small amount of acetone. Be careful not to oversaturate the chamber, as too much solvent can damage the print.
- Expose to Fumes: Seal the chamber and allow the print to be exposed to the solvent fumes for several hours. The time required depends on the size and complexity of the print.
- Remove and Clean: Once the desired smoothness is achieved, remove the print from the chamber and clean it thoroughly to remove any residual solvent.
Heat Gun Techniques
Using a heat gun to smooth 3D prints involves applying controlled heat to the surface, causing the plastic to soften and the layers to blend together. This method is suitable for various materials, including PLA and ABS.
Tools and Materials
- Heat Gun: An adjustable heat gun is recommended for better control over the temperature.
- Protective Gear: Gloves and goggles to protect against heat and potential burns.
- Work Surface: A heat-resistant mat or pad to protect your work area.
Steps for Using a Heat Gun
- Preheat the Heat Gun: Set the heat gun to a low setting and allow it to warm up for a few minutes.
- Apply Heat Evenly: Hold the heat gun a few inches away from the print and move it back and forth to apply heat evenly across the surface. Avoid concentrating the heat on one spot for too long, as this can cause warping or burning.
- Monitor the Process: Observe the print closely as it begins to soften and the layers start to blend. You can use a tool like a spatula to gently press and smooth the surface if needed.
- Cool Down: Allow the print to cool down completely before handling or using it further. Rapid cooling can help set the new shape and finish.
Materials for Smoothing
In addition to post-processing techniques, there are specialized materials designed to reduce print layer lines and achieve a smoother finish right from the start. These include specialized filaments and surface coatings.
Specialized Filaments
Certain filaments are formulated to produce smoother prints with fewer visible layer lines. These filaments often have modified properties that make them easier to work with and result in higher-quality finishes.
Examples of Specialized Filaments
- Polypropylene (PP): Known for its smooth finish and resistance to warping, PP is an excellent choice for prints that require a polished look.
- Nylon (PA): Nylon filaments can produce strong and flexible prints with a relatively smooth surface. They are often used in functional prototypes and end-use parts.
- Tri-Colour or Rainbow Filament: These filaments change colour as they are extruded, allowing for unique visual effects while maintaining a smooth finish.
Surface Coatings and Sealants
Applying a surface coating or sealant can enhance the smoothness and durability of 3D prints. These coatings can fill in minor imperfections and provide a glossy or matte finish depending on your preference.
Types of Surface Coatings
- Epoxy Resin: A two-part resin that cures to a hard, durable finish. It can be tinted or left clear and is often used for detailed miniatures and models.
- Acrylic Lacquer: A fast-drying clear coat that provides a hard, protective finish. It can be sprayed or brushed onto the print surface.
- Polyurethane: A versatile sealant that offers excellent durability and can be applied in multiple coats for added protection.
Post-Processing Equipment and Tools
To effectively smooth 3D prints, you'll need the right tools and equipment. Here are some essential items for your post-processing toolkit:
Sandpaper and Abrasives
- Sandpaper: As mentioned earlier, having a range of grits from coarse to fine is essential for progressive sanding.
- Abrasive Pads: Useful for larger areas or more aggressive sanding tasks.
- Power Sanders: Electric or pneumatic sanders can speed up the sanding process, especially for large or complex prints.
Chemical Smoothing Agents
- Acetone: The primary chemical used for smoothing ABS prints through CVS.
- Other Solvents: Depending on the material, other solvents like isopropyl alcohol or specialized smoothing agents may be used.
- Safety Equipment: Always use gloves and a mask when working with chemicals to protect yourself from harmful fumes.
Heat Guns and Controlled Heating Devices
- Heat Gun: An adjustable heat gun is ideal for heat-based smoothing techniques.
- Hot Plate: A flat, heated surface can be used for certain types of smoothing, especially for flat prints.
- Oven: In some cases, a conventional oven can be used for heat treatment, but this requires careful monitoring and safety precautions.
Case Studies and Examples of Successful Smoothing Techniques
To illustrate the effectiveness of these smoothing techniques, let's look at some case studies and examples where these methods were successfully applied:
Case Study 1: Sanding a Complex Model
A hobbyist created a detailed scale model of a car using PLA filament. To achieve a smooth finish, they started with coarse grit sandpaper (120 grit) to remove major layer lines and then progressed to finer grits (up to 1200 grit). The final result was a model with a glass-like finish, free from visible layer lines.
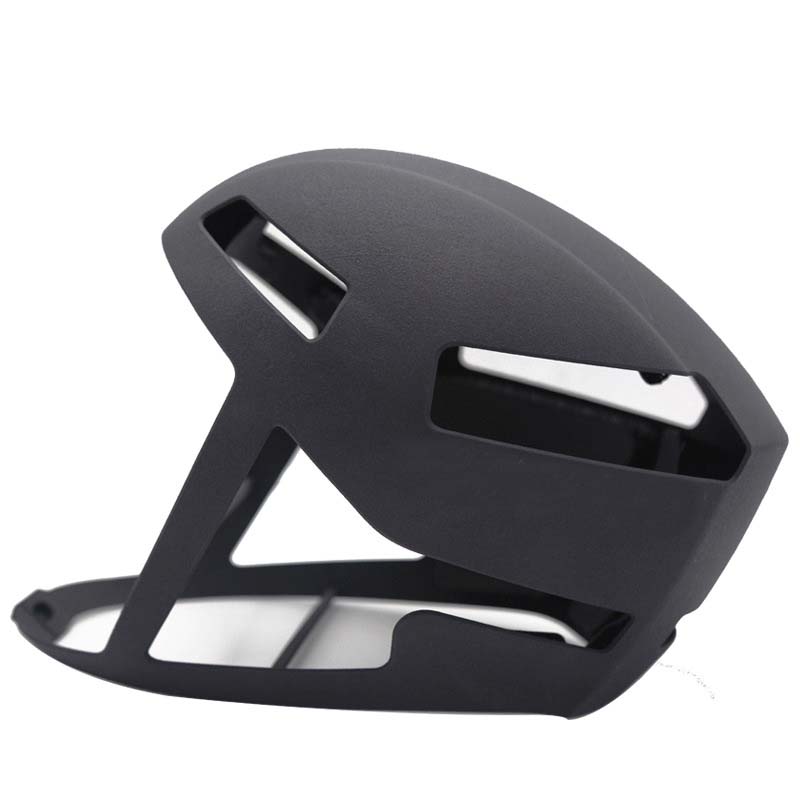
Case Study 2: Chemical Vapour Smoothing an ABS Helmet
An engineer wanted to smooth an intricate ABS helmet design. They placed the helmet in an enclosed chamber with a small amount of acetone and allowed it to sit for several hours. The result was a helmet with a perfectly smooth surface, ready for painting and customization.
Case Study 3: Using a Heat Gun on a Large Print
A maker created a large cosplay prop using PLA filament. To smooth the surface, they used a heat gun on a low setting, moving it evenly across the print. The heat caused the layers to blend together, creating a seamless finish without the need for extensive sanding.
These examples demonstrate how different smoothing techniques can be applied to various types of prints and materials, yielding impressive results.
Conclusion
Smoothing 3D prints is a crucial step in achieving high-quality, aesthetic and functional outcomes. By understanding the common issues that affect print quality and exploring various smoothing techniques—such as sanding, chemical vapour smoothing, heat gun methods, and using specialized materials—you can significantly enhance the appearance and performance of your 3D prints. Whether you're a hobbyist looking to perfect your models or an engineer seeking functional prototypes, remember that the right combination of post-processing techniques and materials can make all the difference in your final product's success.