Understanding Wax Pattern Injection Molding
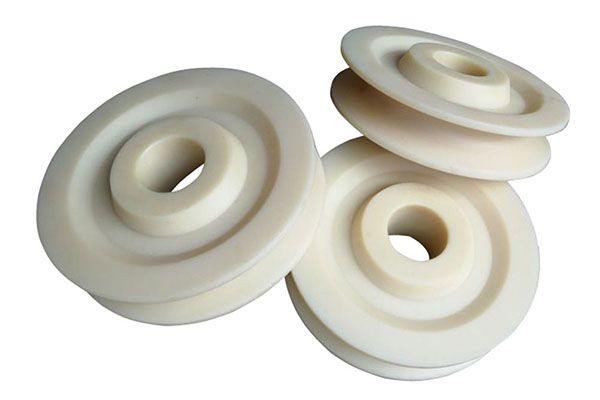
Wax pattern injection molding is a specialized manufacturing process that plays a crucial role in various industries, particularly in precision casting. At its core, this process involves injecting molten wax into a mold cavity under high pressure to create intricate wax patterns. These patterns serve as the precursors for the production of metal or ceramic components through processes like investment casting.
The Basics of the Process
- Material Preparation: High - quality wax, often a blend of paraffin wax and other additives to control its viscosity, melting point, and dimensional stability, is first melted in a heated reservoir. For example, some waxes used in jewelry casting may have specific formulations to ensure fine details can be replicated accurately.
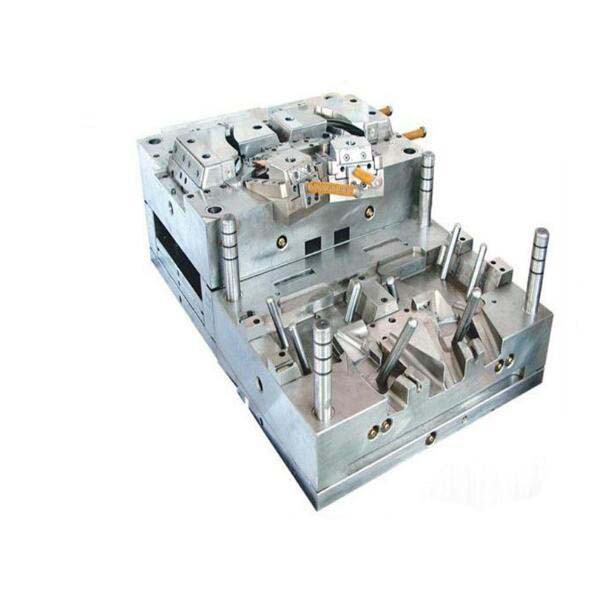
- Mold Design and Preparation: The mold, typically made of steel or aluminum, is designed with the exact shape of the final product in mind. It is pre - heated to a specific temperature, usually slightly below the melting point of the wax. This pre - heating helps in ensuring smooth filling of the mold and reduces the risk of thermal stress on the mold surface. For instance, in the production of turbine blades for the aerospace industry, the molds are engineered with extremely tight tolerances to achieve the required precision in the wax patterns.
- Injection Phase: The molten wax is then injected into the mold cavity at a high pressure, typically ranging from 500 to 2000 psi, depending on the complexity of the pattern and the properties of the wax. The injection speed is also carefully controlled; a faster injection may be suitable for simple shapes, while a slower, more controlled injection is needed for intricate designs to prevent air entrapment and ensure uniform filling.
- Cooling and Solidification: After injection, the wax cools and solidifies inside the mold. This cooling process is carefully regulated to ensure that the wax pattern shrinks evenly and maintains its dimensional accuracy. In some cases, cooling channels within the mold are used to accelerate the cooling process while maintaining temperature uniformity.
- Ejection and Finishing: Once solidified, the wax pattern is ejected from the mold. Minor finishing operations such as trimming excess wax, also known as flash, may be required to achieve the final desired shape.
Key Equipment and Materials
Injection Molding Machines
There are several types of injection molding machines commonly used in wax pattern injection molding, each with its own working principle and suitable scenarios.
- Horizontal Injection Molding Machines: This is the most common type. The injection unit and the clamping unit are arranged horizontally. Its working principle is that the screw rotates to melt and plasticize the wax material in the barrel, and then under the action of the injection cylinder, the molten wax is injected into the mold cavity at high pressure. For example, in large - scale industrial production of wax patterns for automotive engine parts casting, horizontal injection molding machines are often used due to their high - volume production capabilities, stable operation, and easy mold installation and maintenance. They can handle large - sized molds and are suitable for mass - production scenarios.
- Vertical Injection Molding Machines: The injection unit and the clamping unit are arranged vertically. In this type, the wax material is gravity - fed into the screw for plasticization. Vertical injection molding machines are often used for small - scale production or when dealing with small - sized, intricate wax patterns, such as those used in the production of small jewelry components or dental wax patterns. Their compact size and easy access for inserting small inserts make them ideal for these applications.
- Rotary Table Injection Molding Machines: These machines feature a rotating table with multiple molds. While one mold is being injected, others can be in the process of cooling, ejection, or mold - changing. They are suitable for high - volume production of wax patterns where the cycle time needs to be minimized. For instance, in the production of wax patterns for the consumer electronics industry, which requires a large number of identical parts, rotary table injection molding machines can significantly increase production efficiency.
When choosing an injection molding machine for wax pattern injection, several key points should be considered:
- Shot Capacity: Ensure that the machine's shot capacity, which is the amount of molten wax it can inject in one cycle, is sufficient for the size of the wax pattern. For large - scale wax patterns, a machine with a large shot capacity is required.
- Clamping Force: The clamping force should be adequate to keep the mold closed during the injection process. If the clamping force is too low, the mold may open slightly, causing flash (excess wax around the edges of the pattern). Calculate the required clamping force based on the projected area of the wax pattern and the injection pressure.
- Injection Pressure and Speed: Different wax materials and pattern complexities require different injection pressures and speeds. For complex wax patterns with thin - walled sections, a higher injection pressure and a precisely controlled injection speed may be needed to ensure complete filling of the mold cavity.
Wax Materials
The choice of wax materials is crucial in wax pattern injection molding as different waxes have distinct characteristics and application advantages.
- Paraffin Wax: This is one of the most commonly used waxes. It has a relatively low melting point, usually between 47 - 64°C. Paraffin wax is easy to melt and inject, making it suitable for creating simple wax patterns. It is cost - effective and widely available. In the production of basic wax patterns for general - purpose casting, such as small - scale metal handicrafts casting, paraffin wax is often the first choice. However, it has relatively poor dimensional stability compared to some other waxes, and may shrink more during cooling.
- Microcrystalline Wax: Microcrystalline wax has a higher melting point than paraffin wax, typically in the range of 70 - 90°C. It has a finer crystal structure, which gives it better toughness and flexibility. This makes it suitable for wax patterns that require more durability during handling and subsequent casting processes. For example, in the investment casting of high - strength metal components where the wax pattern needs to withstand more physical stress during the ceramic shell - making process, microcrystalline wax can be a better option.
- Wax Blends: Many manufacturers use wax blends to combine the advantages of different waxes. For example, a blend of paraffin wax and microcrystalline wax can have both the easy - processing property of paraffin wax and the better dimensional stability and toughness of microcrystalline wax. Some wax blends may also contain additives such as plasticizers to improve the flowability of the wax during injection or to enhance its resistance to thermal stress. These blends are often used in industries with high - precision requirements, like the aerospace and medical device manufacturing, where the quality and consistency of the wax patterns are of utmost importance.
The Injection Molding Process Step - by - Step
Step 1: Wax Preparation
The first step in wax pattern injection molding is wax preparation. Begin by selecting the appropriate wax material based on the requirements of the final product. As mentioned earlier, paraffin wax, microcrystalline wax, or wax blends can be used. Once the wax is chosen, it is placed in a melting tank.
The wax needs to be heated to a specific temperature, typically around 70 - 90°C for microcrystalline wax and 47 - 64°C for paraffin wax. This melting process should be carefully monitored to ensure uniform melting. During heating, a stirrer is often used to mix the wax evenly. Stirring helps to prevent the formation of temperature gradients within the wax, which could lead to inconsistent viscosity. For example, if the wax at the bottom of the tank is over - heated while the top - layer wax is not fully melted, the resulting wax pattern may have defects such as uneven density or poor surface finish.
The melted wax should also be filtered to remove any impurities or solid particles. These impurities could cause surface imperfections on the wax pattern or even block the injection nozzle, disrupting the injection process. A fine - mesh filter, usually with a mesh size of 100 - 200 microns, is commonly used for this purpose.
Step 2: Mold Preparation
Mold preparation is a crucial step that significantly impacts the quality of the wax pattern. Start with a thorough cleaning of the mold using a suitable solvent to remove any residual wax, dirt, or release agent from previous molding cycles. Residual wax can build up over time and affect the surface finish of the new wax pattern, causing roughness or unevenness.
After cleaning, a release agent is applied to the mold cavity. The release agent acts as a lubricant, allowing the wax pattern to be easily removed from the mold after solidification. There are various types of release agents available, such as silicone - based, fluorocarbon - based, and water - based release agents. The choice of release agent depends on factors like the type of wax used, the mold material, and environmental considerations. For instance, in a food - related application where wax patterns are used for casting food - contact components, a food - grade, water - based release agent would be preferred.
The mold is then pre - heated to a specific temperature, usually slightly below the melting point of the wax. Pre - heating the mold helps to ensure that the wax fills the mold cavity evenly and completely. If the mold is too cold, the wax may solidify prematurely, resulting in incomplete filling and a defective wax pattern. On the other hand, if the mold is too hot, the wax may flow too freely, leading to dimensional inaccuracies.
Step 3: Injection
Once the wax and the mold are prepared, the injection process begins. The molten wax is injected into the mold cavity using an injection molding machine. The injection pressure is a critical parameter and typically ranges from 500 to 2000 psi. For simple wax patterns with thick walls, a lower injection pressure, around 500 - 1000 psi, may be sufficient. However, for complex patterns with thin - walled sections or intricate details, a higher pressure, up to 2000 psi, may be required to ensure that the wax reaches every corner of the mold cavity.
The injection speed also plays a vital role. A fast injection speed is suitable for large - scale, simple - shaped wax patterns as it can reduce the cycle time. But for patterns with fine details or when dealing with low - viscosity waxes, a slower injection speed is necessary. A slow injection speed allows the wax to flow smoothly into the mold, minimizing the risk of air entrapment. Air entrapment can cause voids or bubbles in the wax pattern, which can weaken the structure and affect the final product quality.
The injection time is another factor to consider. It is calculated based on the volume of the mold cavity, the injection speed, and the viscosity of the wax. For example, if the mold cavity has a volume of 100 cubic centimeters and the injection speed is 10 cubic centimeters per second, the injection time would be approximately 10 seconds, assuming a constant wax viscosity.
Step 4: Cooling and Solidification
After injection, the wax pattern needs to cool and solidify inside the mold. The cooling process should be carefully controlled to ensure uniform solidification and dimensional accuracy. The cooling time depends on several factors, including the thickness of the wax pattern, the type of wax used, and the cooling method.
For thin - walled wax patterns, the cooling time may be relatively short, perhaps 30 seconds to 2 minutes. In contrast, thick - walled patterns may require 5 - 10 minutes or more to cool completely. If the cooling is too fast, the wax may shrink unevenly, leading to warping or cracking of the wax pattern. On the other hand, if the cooling is too slow, it will increase the production cycle time, reducing productivity.
To aid in the cooling process, molds often have cooling channels through which a coolant, usually water or a water - glycol mixture, circulates. The temperature of the coolant is maintained at a specific level, typically around 20 - 30°C. This helps to extract heat from the wax pattern efficiently. For example, in a large - scale production of wax patterns for automotive engine components, the cooling system is designed to ensure that the wax patterns cool uniformly, resulting in high - quality patterns with consistent dimensions.
Step 5: Demolding
Once the wax pattern has cooled and solidified, it is time for demolding. Demolding should be carried out carefully to avoid damaging the wax pattern or the mold. The mold is first opened, and the wax pattern is ejected using ejector pins or other ejection mechanisms.
The ejector pins should be properly designed and located to ensure that they exert an even force on the wax pattern during ejection. If the ejector pins are too small or not evenly distributed, they may cause the wax pattern to break or deform during ejection. For example, in a wax pattern with a complex shape, multiple ejector pins may be needed to ensure that the pattern is ejected smoothly.
It is also important to ensure that the release agent has been applied correctly. If the release agent has not formed a proper film on the mold surface, the wax pattern may stick to the mold, making demolding difficult. In such cases, excessive force may be required to remove the wax pattern, which can damage both the pattern and the mold. After demolding, any excess wax, also known as flash, around the edges of the wax pattern can be trimmed using sharp tools such as knives or scissors to achieve the final desired shape.
Yigu Technology's View
As a non - standard plastic metal products custom supplier, Yigu Technology highly values wax pattern injection molding. Over the years, we've witnessed its pivotal role in producing intricate components. The precision it offers is unrivaled, especially when creating custom - designed parts.
We've mastered the art of choosing the right wax materials, be it paraffin, microcrystalline, or blends, based on product requirements. Our team is well - versed in operating different injection molding machines, ensuring optimal settings for pressure, speed, and temperature. This expertise allows us to create high - quality wax patterns with tight tolerances. Whether it's for small - scale, high - precision jewelry pieces or large - scale industrial components, we have the experience and capabilities to meet diverse customer needs.