Introduction
In product development, getting the prototype right is critical. The prototype stage can make or break a product—whether in automotive, aerospace, medical, or consumer goods. Traditional prototyping methods come with challenges. Manual crafting is time-consuming and lacks precision. Injection molding is costly for small batches. CNC prototyping changes this. Using computer-controlled machines to cut, shape, and form materials from digital designs, it delivers high precision, complex geometries, and consistent quality. This guide explores CNC prototyping technology, applications, materials, advantages and disadvantages, comparisons with other methods, and best practices to help you make informed decisions for your product development.
What Is CNC Prototyping Technology?
The Basics of CNC Machining
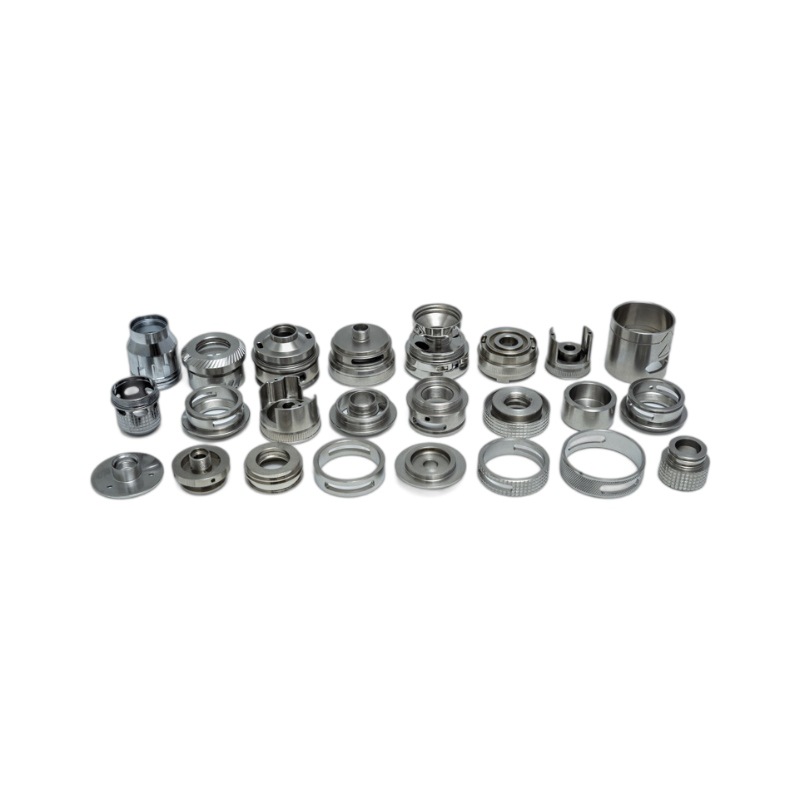
CNC machining is a subtractive manufacturing process that uses computer-controlled machines to cut, shape, and form materials into desired parts. The process begins with a digital design created in CAD (Computer-Aided Design) software. This design is translated into instructions via CAM (Computer-Aided Manufacturing) software. The CNC machine follows these instructions precisely, removing material layer by layer to create the prototype.
Example: A complex automotive part with intricate curves and precise dimensions can be accurately reproduced using CNC machining. The machine’s ability to follow programmed toolpaths ensures each cut is made with utmost precision—far beyond manual capability.
Precision Engineering and Toolpath Generation
CNC machines achieve tolerances as low as ±0.01 mm —sometimes tighter. This high precision comes from accurate toolpath generation. CAM software calculates optimal toolpaths based on CAD design, considering:
- Material type
- Cutting tool geometry
- Desired surface finish
Automation: Once the program is set, the CNC machine operates continuously with minimal human intervention—reducing error risk and ensuring consistency across multiple prototypes.
Where Is CNC Prototyping Applied?
Automotive Industry
CNC prototyping develops new engine components, chassis parts, and interior components. For a new engine block, CNC machining creates prototypes with exact specifications for performance testing. Engineers test functionality before committing to mass production—saving time and cost.
Aerospace Parts
Aerospace components demand the highest precision and quality. CNC prototyping creates turbine blades, aircraft brackets, and landing gear components. A single turbine blade with intricate shape is accurately prototyped to ensure optimal engine performance.
Medical Devices
Medical devices require extreme precision and biocompatibility. CNC prototyping creates surgical instruments, implantable devices, and diagnostic equipment. For example, a custom orthopedic implant is CNC machined from biocompatible titanium—ensuring perfect patient fit.
Electronics Casings and Consumer Products
CNC machining produces casings with precise cutouts for buttons, ports, and displays. In consumer products, high-end watches or smartphone accessories are prototyped to achieve high-quality finish and precise dimensions.
What Materials Are Used for CNC Prototyping?
Metals
| Material | Key Properties | Applications |
|---|---|---|
| Aluminum | Excellent machinability, lightweight, low cost | Aerospace, automotive (weight-sensitive) |
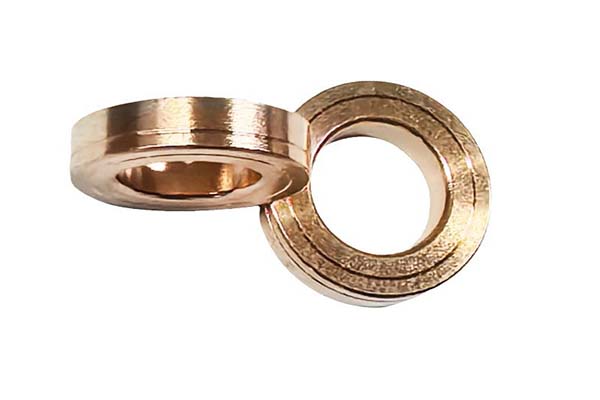
| Stainless steel | Strength, durability, corrosion resistance | Medical devices, industrial equipment, food processing |
| Titanium | High strength-to-weight, biocompatibility | Aerospace, medical implants, defense |
Plastics
| Material | Key Properties | Applications |
|---|---|---|
| ABS | Easy to machine, dimensional stability, paintable | Consumer products, electronics enclosures, visual models |
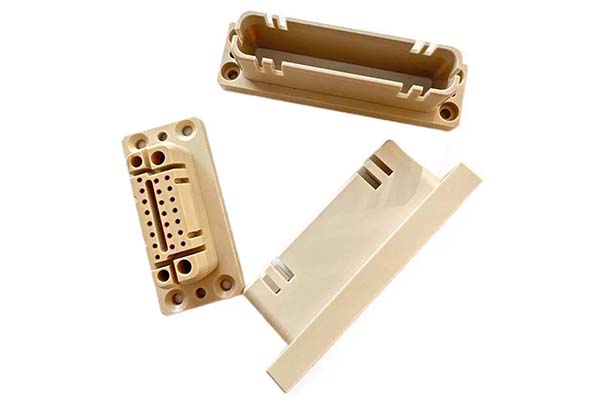
| PEEK | Chemical resistance, high temperature tolerance, mechanical strength | Aerospace, medical implants, extreme conditions |
| Acrylic | Clarity, transparency | Display cases, optical components |
Other Materials
- Wood: Decorative prototypes, models
- Composites: High strength-to-weight applications (aerospace, automotive)
What Are the Advantages and Disadvantages of CNC Prototyping?
Advantages
High Precision:
CNC machines achieve tolerances as low as ±0.01 mm —crucial where even small deviations cause significant problems. Prototypes closely match final product design, reducing rework.
Consistency:
Automation ensures consistent production. Once the program is set, each prototype has the same dimensions and quality—critical for standardization and replacement parts.
Complex Geometries:
CNC machines handle undercuts, internal cavities, and intricate patterns with ease. Designers have greater freedom to create innovative products.
Cost-Effectiveness for Small Batches:
For small-batch production (1–100 units), CNC prototyping is cost-effective. While initial setup costs exist, per-unit cost is reasonable compared to injection molding, which requires expensive tooling.
Disadvantages
High Setup Costs:
Setting up a CNC machine requires programming, tool selection, and parameter setting. This can be costly and time-consuming for one-off prototypes.
Material Waste:
CNC is subtractive—removing material from a larger block. This results in waste, especially for complex parts. High-cost materials (certain metals) make waste a significant cost factor.
Limited Material Options:
While CNC works with a wide range of materials, some exotic or newly developed materials may be difficult or impossible to machine. Machining characteristics vary widely; not all materials are well-suited.
How Does CNC Prototyping Compare to Other Methods?
CNC Prototyping vs. 3D Printing
| Aspect | CNC Prototyping | 3D Printing |
|---|---|---|
| Speed | Faster for complex parts requiring assembly | Faster for simple, one-piece designs |
| Cost-effectiveness | Better for larger, complex parts; materials | Better for small, simple parts; lower material cost |
| Surface finish | Smooth directly from machine | Visible layer lines; post-processing required |
| Material properties | Isotropic (consistent) from solid block | Anisotropic (layer-dependent) |
| Material range | Metals, plastics, composites, wood | Limited to printable materials |
CNC Prototyping vs. Injection Molding
| Aspect | CNC Prototyping | Injection Molding |
|---|---|---|
| Cost | Lower upfront; suitable for small batches | High upfront tooling costs; low per-unit at volume |
| Design flexibility | High; design changes require only program update | Limited; mold changes costly |
| Lead time | Days to weeks | Weeks to months (mold fabrication) |
| Best for | 1–1,000 units, complex geometries, prototypes | 10,000+ units, simple geometries, mass production |
CNC Prototyping vs. Hand Crafting
| Aspect | CNC Prototyping | Hand Crafting |
|---|---|---|
| Precision | ±0.01 mm consistent | Variable; operator dependent |
| Production time | Fast; automated | Slow; labor-intensive |
| Cost (multiple prototypes) | Lower per-unit; consistent | Higher per-unit; variable quality |
What Equipment Is Used for CNC Prototyping?
| Equipment | Function | Best For |
|---|---|---|
| Milling machines | Rotary cutters remove material | Flat surfaces, holes, pockets, complex 3D shapes |
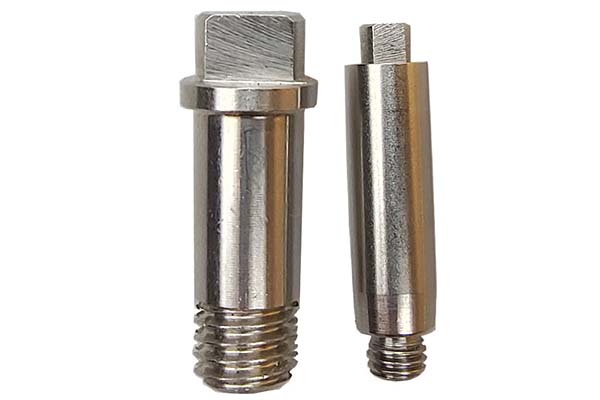
| Lathes | Workpiece rotates; stationary cutter | Cylindrical parts: shafts, bushings, screws |
| Routers | Similar to mills; softer materials | Wood, plastics, foam—furniture, signage, models |
| Plasma cutters | Ionized gas jet cuts metal | Large sheet metal cutting |
| Laser cutters | Focused laser beam cuts/engraves | Metals, plastics, wood—precise cuts, detailed patterns |
| CNC controllers | “Brain” of the machine | Interprets CAM instructions; controls axes, spindle, functions |
What Are the Best Practices for CNC Prototyping?
1. Start with Design for Manufacturability (DFM)
Before programming, review the design for manufacturability:
- Avoid sharp internal corners (use radii)
- Consider tool access for deep features
- Specify realistic tolerances—unnecessarily tight tolerances add cost
- Use standard hole sizes when possible
2. Select the Right Material
Match material to prototype purpose:
- Functional testing: Use production-equivalent material (aluminum, stainless, PEEK)
- Visual/ergonomic testing: Lower-cost materials (ABS, acrylic)
- Consider machinability—some materials are harder to machine than others
3. Optimize Toolpaths and Parameters
- Use climb milling for cleaner cuts
- Maintain consistent chip load to prevent rubbing
- Match cutting speed and feed to material
- Use coolant appropriate for material (air for plastics, flood for metals)
4. Plan for Multiple Iterations
CNC prototyping enables rapid iteration. Plan for:
- Initial prototype for design validation
- Second iteration for functional testing
- Third iteration for final design freeze
5. Allow Post-Processing Time
Factor in time for:
- Deburring and edge finishing
- Surface finishing (polishing, anodizing, painting)
- Inspection and measurement
6. Communicate Clearly with Your CNC Partner
Provide:
- Complete CAD models (STEP files)
- 2D drawings with critical dimensions and tolerances
- Material specifications
- Surface finish requirements
- Quantity and timeline expectations
A Real-World CNC Prototyping Success
A medical device startup needed prototypes for a new surgical instrument. Requirements:
- Functional testing with actual surgical materials
- Biocompatible material (stainless steel)
- Complex ergonomic handle shape
- 5 iterations within 8 weeks
Approach:
- CNC milling for complex handle geometry
- Stainless steel 316L for biocompatibility
- 3-day turnaround per iteration
- In-process inspection for tolerance verification
Results:
- 5 iterations completed in 6 weeks
- Final design validated with surgeons
- Tooling for production initiated
- Product launch accelerated by 4 months
Conclusion
CNC prototyping has revolutionized product development by delivering high precision (tolerances to ±0.01 mm), consistency (identical parts across runs), complex geometries (undercuts, internal cavities), and cost-effectiveness for small batches. It serves automotive (engine components), aerospace (turbine blades), medical (implants, instruments), and consumer goods (casings, accessories). Materials range from metals (aluminum, stainless steel, titanium) to plastics (ABS, PEEK, acrylic) to wood and composites. While setup costs and material waste are considerations, the ability to iterate quickly, achieve production-equivalent properties, and transition seamlessly to manufacturing makes CNC prototyping indispensable. By following best practices—DFM, material selection, toolpath optimization, iteration planning, and clear communication—you can leverage CNC prototyping to bring better products to market faster.
FAQs
What is the typical lead time for CNC prototyping?
Lead time depends on design complexity, material, and machine availability. Simple parts from common materials take 2–5 days. Complex parts with tight tolerances and less common materials take 1–3 weeks. Iterative prototyping with multiple versions can be scheduled in parallel to compress overall timeline.
Can CNC prototyping be used for large-scale production?
Yes, but with considerations. CNC prototyping is cost-effective for 1–1,000 units . For very high volumes (10,000+), injection molding or casting may be more cost-effective. However, CNC is ideal for production when parts have complex geometries, require frequent design changes, or need to be made from materials not suited for molding.
How do I choose the right material for my CNC prototype?
Consider: (1) Intended use—functional testing requires production-equivalent materials; visual/ergonomic tests can use lower-cost materials. (2) Mechanical properties—strength, flexibility, heat resistance. (3) Surface finish—some materials machine to smoother finishes. (4) Machinability—softer materials (aluminum, ABS) are easier and faster to machine; harder materials (stainless steel, PEEK) require specialized tooling and longer cycle times.
What is the difference between CNC prototyping and 3D printing?
CNC is subtractive—removes material from a solid block—achieving high precision (±0.01 mm), isotropic material properties, and smooth surface finish. 3D printing is additive—builds layer by layer—offering faster turnaround for simple designs but lower precision, anisotropic properties, and visible layer lines. Choose CNC for functional prototypes requiring production-equivalent properties; choose 3D printing for rapid visualization or non-functional models.
How can I reduce CNC prototyping costs?
Reduce costs by: (1) Designing for manufacturability—avoid sharp internal corners, use standard hole sizes, specify realistic tolerances. (2) Selecting easier-to-machine materials when possible (aluminum over stainless, ABS over PEEK). (3) Combining multiple parts into a single setup. (4) Planning iterations to reuse setups across versions. (5) Avoiding unnecessary surface finishes for initial prototypes. (6) Using experienced CNC partners who provide DFM feedback.
Contact Yigu Technology for Custom Manufacturing
At Yigu Technology, we specialize in CNC prototyping for automotive, aerospace, medical, and consumer product development. Our CNC mills, lathes, and 5-axis machines achieve tolerances down to ±0.005 mm. We work with metals (aluminum, stainless steel, titanium), plastics (ABS, PEEK, acrylic), and composites. Our engineers provide DFM feedback to optimize your design for manufacturability. Whether you need functional prototypes, iterative design validation, or small-batch production, we deliver precision parts that accelerate your product development. Contact us to discuss your CNC prototyping project.