Understanding the Injection Molding Process
Injection molding is a widely used manufacturing process that has found its applications in numerous industries, from automotive and electronics to consumer goods and medical devices. Its versatility and efficiency make it an ideal choice for producing high - volume, complex - shaped plastic parts.
Basic Steps of the Injection Molding Process
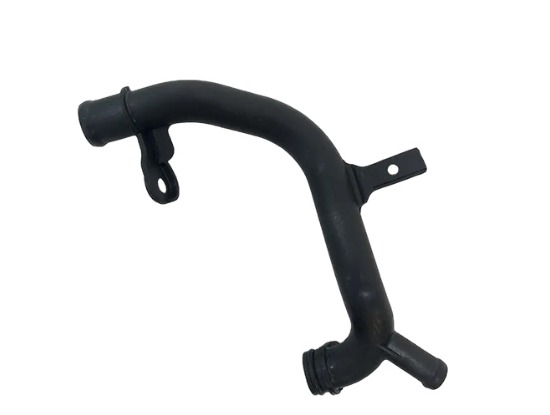
- Plastic Raw Material Preparation: The process begins with the selection of appropriate plastic materials. These are usually in the form of pellets or granules. The choice of plastic depends on the requirements of the final product, such as its mechanical properties, heat resistance, and chemical resistance. For example, acrylonitrile - butadiene - styrene (ABS) is often used for its strength and impact resistance, making it suitable for products like automotive interior parts and electronic device housings. The plastic pellets are then loaded into the hopper of the injection molding machine.
- Heating and Melting: Inside the injection molding machine, a heated barrel is equipped with a screw or a plunger. As the plastic pellets are fed into the barrel, the screw rotates or the plunger moves, pushing the pellets forward. The barrel is heated to a specific temperature, which varies depending on the type of plastic. For instance, polyethylene (PE) typically melts at around 120 - 180°C, while polycarbonate (PC) requires a higher temperature range of about 250 - 320°C. This heating process softens and melts the plastic, turning it into a viscous, flowable state.
- Injection: Once the plastic is fully molten, it is forced under high pressure into a closed mold cavity. The pressure applied during injection can range from 50 to 200 MPa, depending on factors like the complexity of the mold, the size of the part, and the type of plastic. The injection system of the machine, which includes the screw or plunger, injects the molten plastic through a nozzle and into the runner system of the mold, which then distributes the plastic evenly into the mold cavity.
- Cooling and Solidification: After the mold cavity is filled with molten plastic, the cooling stage begins. The mold is usually cooled by circulating water or other cooling media through channels within the mold. This rapid cooling causes the plastic to solidify and take the shape of the mold cavity. The cooling time is a crucial factor; it can range from a few seconds to several minutes, depending on the thickness and size of the part. Thicker parts generally require longer cooling times to ensure proper solidification. For example, a small, thin - walled plastic toy may cool in just 10 - 20 seconds, while a large automotive bumper could take several minutes.
- Mold Opening and Part Ejection: Once the plastic part has cooled and solidified sufficiently, the mold opens. Ejection pins or other ejection mechanisms inside the mold then push the finished part out of the mold cavity. The part is now in its final shape, but it may still have some flash (excess plastic that has leaked into the parting lines of the mold) or other minor imperfections.
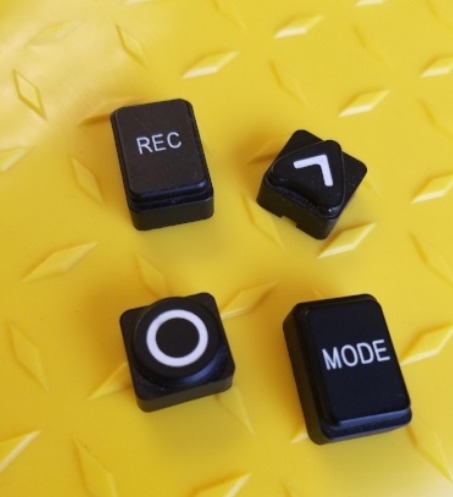
- Post - processing: In many cases, the ejected part undergoes post - processing operations. This can include trimming off the flash, deburring, sanding, painting, or assembling multiple parts together. For example, a plastic smartphone case may be painted to give it an attractive finish or have additional components such as buttons or inserts added during the post - processing stage.
Common Problems in the Injection Molding Process
1. Part Warpage
Part warpage is a common defect where the molded part deviates from its intended shape, often taking on a curved or twisted form. This can be visually observed as the part not lying flat on a surface or having uneven edges.
Causes:
- Uneven Mold Cooling: If the cooling channels in the mold are not evenly distributed or if there are blockages, different parts of the plastic part will cool at different rates. For example, if one side of the mold cools much faster than the other, the faster - cooled side will contract more rapidly, causing the part to warp. A study showed that in cases where the temperature difference between two sides of the mold was more than 10°C during cooling, the likelihood of part warpage increased by 30%.
- Improper Packing Pressure: Incorrect packing pressure can lead to uneven distribution of the plastic material within the mold cavity. If the packing pressure is too high in some areas and too low in others, the areas with higher pressure will experience more compression and subsequent shrinkage, resulting in warpage.
- Differences in Plastic Material Shrinkage Rates: Different types of plastic materials have varying shrinkage rates. Even within the same material, factors like filler content and molecular orientation can cause non - uniform shrinkage. For instance, fiber - reinforced plastics may shrink more in the direction parallel to the fiber alignment, leading to warpage.
2. Short Shots
Short shots occur when the molten plastic does not completely fill the entire mold cavity, resulting in an incomplete part.
Causes:
- Insufficient Injection Pressure: If the injection pressure is too low, the molten plastic will not have enough force to travel through the entire runner system and fill the mold cavity. In some cases, a pressure drop of more than 20% during injection can lead to short shots. For small, intricate molds, injection pressures may need to be in the range of 100 - 150 MPa, while for larger molds, pressures up to 200 MPa might be required.
- Poor Plastic Flowability: Some plastic materials have inherently low flowability, especially at lower temperatures. Additionally, factors like high viscosity due to improper heating or the presence of contaminants can impede the flow of the plastic. For example, if the plastic pellets are not fully dried before processing, the moisture can cause the plastic to have a higher viscosity and reduced flowability.
- Inadequate Mold Venting: Air trapped inside the mold cavity can prevent the molten plastic from filling the space completely. When the air cannot escape, it creates a barrier, and the plastic will stop flowing once it reaches the area where the air is trapped. Molds should have proper venting channels with a width of about 3 - 5 mm and a depth of around 0.02 - 0.03 mm to ensure effective air escape.
3. Flash
Flash is the thin, excess plastic that seeps out of the mold cavity along the parting lines, ejector pin holes, or other openings, creating a thin, often unwanted protrusion on the part.
Causes:
- Insufficient Clamping Force: If the clamping force of the injection molding machine is not strong enough to keep the two halves of the mold tightly closed during injection, the high - pressure molten plastic can push the mold halves apart slightly, allowing plastic to leak out. For a medium - sized mold with a projected area of 0.05 square meters, a clamping force of at least 50 - 80 tons might be required.
- Excessive Mold Clearance: Large gaps or clearances between the mold components, such as between the moving and stationary halves or around ejector pins, can provide a path for the molten plastic to escape. These clearances should be kept to a minimum, typically less than 0.05 mm.
- Over - injection: Injecting too much plastic into the mold cavity can also cause flash. This can happen if the injection volume settings are incorrect or if there are malfunctions in the injection system that lead to over - filling.
4. Surface Defects
There are several types of surface defects that can occur during injection molding:
- Silver Streaks: These are thin, silver - colored lines on the surface of the part, usually caused by moisture in the plastic material. When the hot molten plastic comes into contact with moisture, the water vaporizes, creating small voids or streaks on the surface. For hygroscopic plastics like nylon, proper drying to a moisture content of less than 0.1% is crucial to avoid silver streaks.
- Air Bubbles: Air bubbles appear as small voids within the plastic part or on its surface. They can be caused by trapped air during the injection process, either due to improper mold venting or when the plastic is injected too quickly, entraining air. In some cases, air bubbles can also be a result of the decomposition of the plastic material at high temperatures.
- Flow Marks: Flow marks are visible lines or patterns on the surface of the part that follow the flow direction of the molten plastic. They are typically caused by a non - uniform flow of the plastic during injection. This can happen if the injection speed is too slow, allowing the plastic to cool and solidify unevenly as it flows through the mold. Adjusting the injection speed to ensure a smooth, continuous flow can help reduce flow marks.
Troubleshooting Solutions
1. Adjusting Process Parameters
Process parameters play a crucial role in the injection molding process and can be adjusted to solve many common problems.
- Injection Pressure and Speed: If you are facing short shots, increasing the injection pressure can be an effective solution. For example, if the initial injection pressure of 80 MPa is not sufficient to fill the mold cavity, gradually increasing it to 100 - 120 MPa may solve the problem. However, be cautious as too high an injection pressure can lead to flash or excessive stress on the part. Adjusting the injection speed can also help. A faster injection speed can ensure that the molten plastic fills the mold cavity quickly before it starts to cool and solidify too much. But if the speed is too fast, it may entrain air, causing air bubbles in the part.
- Packing Pressure and Time: Incorrect packing pressure and time can lead to part warpage and shrinkage. If the part shows signs of shrinkage, increasing the packing pressure slightly can help to compensate for the volume reduction during solidification. The packing pressure is usually applied after the mold cavity is filled, and the time it is applied can range from a few seconds to tens of seconds. For a medium - sized part, a packing pressure of 30 - 50 MPa and a packing time of 5 - 10 seconds might be appropriate, but this needs to be adjusted according to the specific situation.
- Cooling Time: An inappropriate cooling time can cause part warpage or affect the production efficiency. If the part warps, it may be due to uneven cooling. In this case, increasing the cooling time uniformly or optimizing the cooling channels can help. Thicker parts generally require longer cooling times. For instance, a part with a thickness of 5 mm may need a cooling time of 30 - 40 seconds, while a part with a thickness of 2 mm may only need 15 - 20 seconds.
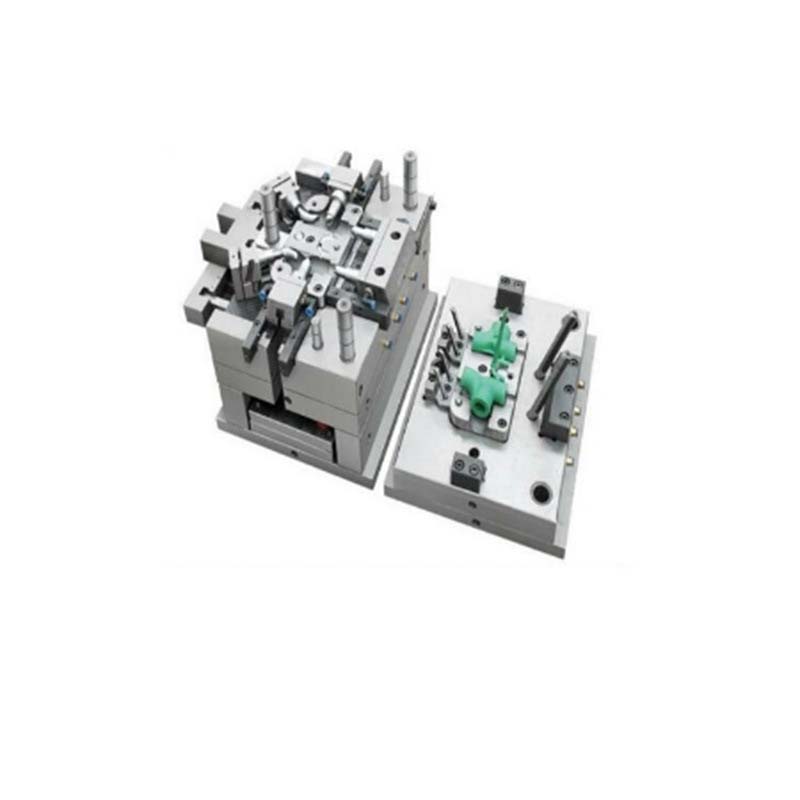
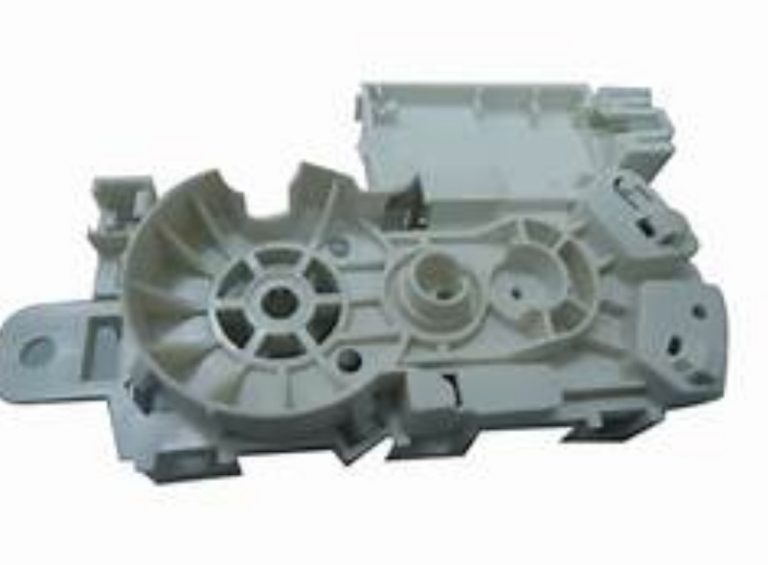
2. Optimizing Mold Design
A well - designed mold is essential for successful injection molding.
- Gate Location: The position of the gate greatly affects the flow of molten plastic. If the gate is located in an improper position, it can cause flow marks, short shots, or uneven filling. For example, for a large, flat - shaped part, a central gate or multiple evenly - distributed gates may be more suitable to ensure uniform plastic flow. A side gate may be sufficient for a simple - shaped part, but for complex - shaped parts, a pin - point gate or a submarine gate might be a better choice to control the flow direction and rate more precisely.
- Cooling System Design: An efficient cooling system is crucial to prevent part warpage. The cooling channels in the mold should be evenly distributed around the mold cavity. The diameter of the cooling channels usually ranges from 8 - 12 mm. Additionally, the distance between the cooling channels and the mold cavity should be consistent, typically around 15 - 20 mm. If there are hot spots in the mold (areas that cool more slowly), adding additional cooling channels or adjusting the coolant flow rate in those areas can help to balance the cooling.
- Ventilation Structure: Proper ventilation is necessary to allow air to escape from the mold cavity during injection. Molds should have vents, which can be small grooves or holes. The width of the vents is usually around 0.02 - 0.05 mm, and the depth is about 3 - 5 mm. If the vents are too large, plastic may leak out, while if they are too small, air cannot escape effectively, leading to short shots or air - trapped defects.
3. Material Selection and Handling
The choice of plastic material and how it is handled can significantly impact the injection molding process.
- Material Selection: Different plastic materials have different properties. For example, if the final product requires high heat resistance, materials like polyetheretherketone (PEEK) or polyphenylene sulfide (PPS) may be more suitable. PEEK can withstand temperatures up to 260°C continuously. On the other hand, if cost - effectiveness and general - purpose use are the main requirements, materials like polyethylene (PE) or polypropylene (PP) can be considered. PP has good chemical resistance and is relatively inexpensive. The melt flow index (MFI) of the plastic material also affects its flowability during injection. A higher MFI value indicates better flowability.
- Material Drying: Most plastic materials absorb moisture to some extent. Hygroscopic materials like nylon need to be dried properly before injection molding. Moisture in the plastic can cause surface defects such as silver streaks and air bubbles. The drying temperature and time vary depending on the material. For nylon, it is usually dried at a temperature of around 80 - 100°C for 4 - 6 hours. Using a desiccant dryer can effectively reduce the moisture content of the plastic to an acceptable level, typically less than 0.1%.
4. Equipment Maintenance
Regular maintenance of the injection molding machine and the mold is vital for smooth operation.
- Injection Molding Machine Maintenance: Regularly check the wear of the screw. A worn - out screw can affect the plasticization and injection of the plastic. The surface roughness of the screw should be monitored, and if it exceeds the allowable range (usually around 0.05 - 0.1 mm increase in surface roughness), the screw may need to be replaced. Clean the nozzle regularly to prevent the accumulation of plastic residue, which can block the flow of molten plastic. The temperature control system of the injection molding machine should also be calibrated regularly to ensure accurate heating.
- Mold Maintenance: Lubricate the moving parts of the mold, such as the ejector pins and slides, regularly. This helps to ensure smooth movement during the mold opening and closing process. Check for any signs of damage or wear on the mold surface, especially around the cavity and core areas. If there are scratches or dents, they can affect the surface quality of the molded part. Regularly inspect the alignment of the mold components to ensure that the mold closes properly and there are no gaps that could cause flash.
Yigu Technology's View
Yigu Technology, as a non - standard plastic metal products custom Supplier, has extensive experience in the injection molding process. With years of dedication to providing customized solutions, we understand the nuances of this manufacturing method.
We firmly believe that customized mold design is the cornerstone of preventing many injection molding problems. A tailor - made mold, designed according to the specific requirements of the product, can ensure better plastic flow, uniform cooling, and reduced stress points. This, in turn, minimizes issues like part warpage, short shots, and flash. For example, when dealing with complex - shaped parts, our engineers use advanced CAD/CAM software to optimize the mold design, taking into account factors such as gate location, cooling channel layout, and venting structure.
Strict process control is another key aspect we emphasize. From the selection of high - quality raw materials to the precise adjustment of injection molding parameters, every step is closely monitored. We ensure that the plastic materials are dried to the appropriate moisture content and that the injection molding machine is regularly maintained. By doing so, we can consistently produce high - quality products that meet and exceed customer expectations, providing reliable solutions for various industries.