Introduction
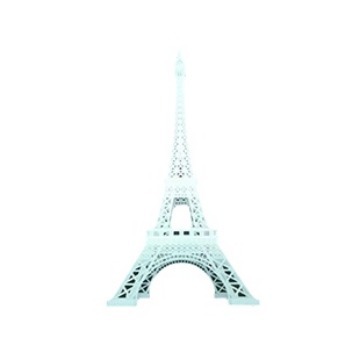
In today's rapidly evolving manufacturing and prototyping landscapes, SLA 3D printing has emerged as a game - changing technology. Consider a scenario in the automotive industry: a car manufacturer is developing a new concept vehicle. They need to quickly produce intricate and highly detailed parts for aerodynamic testing. Using SLA 3D printing, they can turn their digital designs into physical prototypes in a fraction of the time compared to traditional manufacturing methods. This not only speeds up the R & D process but also allows for more design iterations.
So, what exactly is SLA 3D printing? If you've been in the manufacturing, design, or even the hobbyist 3D - printing space, you've likely heard the term "SLA 3D printing" thrown around. But its meaning, working principles, applications, and advantages might still be a bit of a mystery. This article aims to demystify SLA 3D printing, answering all your burning questions, from the basic definition to its real - world applications and how it stacks up against other 3D - printing technologies.
What is SLA 3D Printing?
Definition and Basic Concept
SLA, short for Stereolithography, is one of the most well - known and widely used 3D - printing technologies. At its core, SLA 3D printing is a process that creates three - dimensional objects from a digital model file. It works by using an ultraviolet (UV) light source to cure, or solidify, a liquid photopolymer resin layer by layer.
The process begins with a 3D model designed in computer - aided design (CAD) software. This model is then sliced into thin cross - sectional layers, usually ranging from 0.05 to 0.2 mm in thickness, by slicing software. In the SLA printer, a build platform is initially positioned just below the surface of the liquid resin tank. The UV light source, often a laser or a digital light processing (DLP) projector, traces the shape of the first layer onto the surface of the resin. As the light hits the resin, it causes a chemical reaction, polymerizing the resin and turning it into a solid plastic. Once the first layer is cured, the build platform is lowered by the thickness of one layer, and a new layer of resin is spread over the previously cured layer. The UV light then traces the shape of the next layer, bonding it to the previous one. This process repeats until the entire 3D object is built, layer by layer.
How Does SLA 3D Printing Work?
Step - by - Step Process
- CAD Model Creation: First, you need to design a 3D model using CAD software. This model serves as the digital blueprint for the final 3D - printed object. For example, if you're creating a custom - designed jewelry piece, you would use CAD to define its shape, curves, and any intricate details.
- Model Slicing: Once the CAD model is complete, it is imported into slicing software. This software divides the 3D model into numerous thin horizontal layers. The thickness of these layers, as mentioned before, usually ranges from 0.05 to 0.2 mm. A smaller layer thickness results in a smoother surface finish but increases the printing time. For instance, for a highly detailed figurine, a layer thickness of 0.05 mm might be chosen to capture all the fine features.
- Printing Process Setup: After slicing, the printer software is configured with parameters such as build orientation, support structure placement, and exposure time for each layer. The build orientation is crucial as it can affect the strength, surface quality, and printing time of the object. If a large, flat - bottomed object is printed flat, it may require more support structures to prevent warping.
- Resin Curing: In the SLA printer, the build platform is initially positioned just below the surface of the liquid resin in the resin tank. The UV light source, either a laser or a DLP projector, traces the shape of the first layer onto the resin surface. As the UV light hits the resin, it initiates a photopolymerization reaction. The resin molecules bond together, transforming the liquid resin into a solid plastic layer. For example, in a DLP - based SLA printer, a digital image of the layer is projected onto the resin, curing the entire layer at once, which can speed up the printing process compared to point - by - point laser scanning.
- Layer - by - Layer Building: After the first layer is cured, the build platform is lowered by the thickness of one layer. A recoater mechanism spreads a new layer of resin over the previously cured layer. The UV light then traces the shape of the next layer, bonding it to the previous one. This process repeats continuously, layer by layer, until the entire 3D object is built.
- Post - Processing: Once the printing is complete, the object is removed from the build platform. It then undergoes post - processing steps. This includes removing any support structures, which were added during the printing process setup to hold the object in place during printing. The object is then usually cleaned in a solvent, like isopropyl alcohol, to remove any uncured resin. Finally, it may be placed in a post - curing station, where additional UV light exposure ensures that the resin is fully cured, improving the object's mechanical properties.
Key Components Involved
- UV Light Source: This is the heart of the SLA 3D printer. Lasers are often used in high - end SLA printers. They can precisely focus the UV light, allowing for high - resolution printing. For example, a 355 - nm wavelength UV laser can accurately cure the resin, enabling the creation of very fine details. DLP projectors, on the other hand, are used in some SLA printers to cure an entire layer at once. They offer faster printing speeds for certain applications.
- Resin Tank: Holds the liquid photopolymer resin. The resin tank is usually made of a material that is transparent to UV light, such as acrylic, so that the UV light can penetrate and cure the resin. Some resin tanks are designed to be easily removable, making it convenient to change the resin type or clean the tank.
- Build Platform: This is where the 3D object is built. It can be raised or lowered during the printing process. The build platform needs to be flat and stable to ensure accurate layer - by - layer deposition. In some printers, the build platform has a rough surface or a special coating to help the first layer of resin adhere properly.
- Laser Scanning System (for laser - based SLA printers): This system controls the movement of the laser beam across the resin surface. It consists of mirrors and motors that can quickly and accurately direct the laser to the desired locations, following the path defined by the sliced model data.
- Recoater: After each layer is cured, the recoater spreads a new, even layer of resin over the previously cured layer. It can be a simple blade - like mechanism that moves across the resin surface, ensuring a consistent layer thickness for the next layer to be printed.
SLA 3D Printing vs Other 3D Printing Technologies
Comparison with FDM
FDM (Fused Deposition Modeling) is another popular 3D - printing technology. Here is a comparison between SLA and FDM in several aspects:
| Aspect | SLA | FDM |
| Precision | High precision, can achieve layer thicknesses as low as 0.05 mm, with fine details and smooth surface finishes. | Lower precision compared to SLA. Layer thicknesses usually range from 0.1 to 0.4 mm, resulting in a more textured surface. |
| Speed | Generally slower as each layer curing process takes time, especially for high - precision prints. | Faster in some cases, especially for large, simple - shaped objects. The extrusion process of FDM can deposit material relatively quickly. |
| Materials | Mainly uses liquid photopolymer resins, which come in various types such as standard, flexible, high - temperature - resistant, and biocompatible resins. | Utilizes a wide range of thermoplastic filaments like PLA (Polylactic Acid), ABS (Acrylonitrile Butadiene Styrene), PETG (Polyethylene Terephthalate Glycol - modified), etc. |
| Cost | Higher cost in terms of equipment, resins, and post - processing. The UV light sources and high - precision components in SLA printers contribute to the high cost. | Lower equipment cost, and filaments are relatively inexpensive. However, for large - scale production, the cost may increase due to longer printing times. |
| Surface Quality | Produces smooth surfaces, suitable for applications where aesthetics and fine details are crucial, like jewelry and high - end product prototypes. | Surfaces are rougher, often requiring post - processing such as sanding or polishing to achieve a smooth finish. |
| Application Scenarios | Ideal for creating highly detailed prototypes, dental models, jewelry casting patterns, and parts where high precision and smooth surfaces are required. | Suited for functional prototypes, DIY projects, and the production of large, low - cost parts where precision and surface finish are not the top priorities, such as some simple jigs and fixtures. |
Comparison with SLS
SLS (Selective Laser Sintering) is also a significant 3D - printing technology. Here's how SLA stacks up against SLS:
| Aspect | SLA | SLS |
| Precision | High precision, capable of achieving high - resolution prints with small feature sizes. | Moderate precision. While it can produce complex geometries, the powder - based sintering process may result in slightly lower precision compared to SLA in some cases. |
| Speed | Printing speed can be relatively slow, especially for large and complex models. | Generally slower than SLA for small to medium - sized models due to the powder - handling and sintering process, which often requires pre - heating and post - cooling times. |
| Materials | Liquid photopolymer resins with different properties. | Uses powdered materials, such as nylon, polypropylene, and metal powders. These materials offer a wide range of mechanical properties, especially high - strength and heat - resistant options. |
| Cost | High equipment cost, and resin costs can also be significant. However, post - processing costs may be lower than SLS in some cases. | High equipment cost due to the need for a high - power laser and complex powder - handling systems. Powder materials can be expensive, and post - processing may also add to the cost. |
| Surface Quality | Produces smooth - surfaced parts, with the ability to create a high - quality finish straight from the printer. | The sintered parts may have a somewhat rough surface due to the nature of the powder sintering process, often requiring additional finishing operations. |
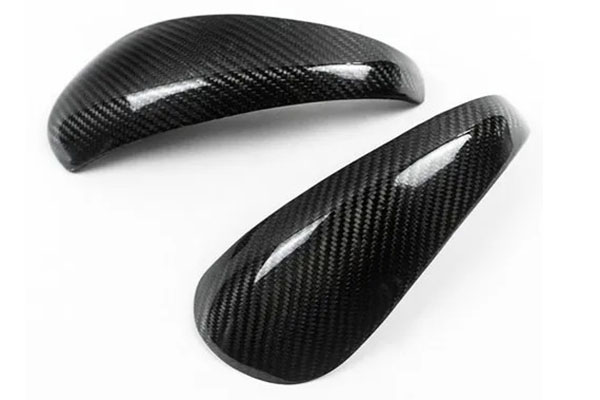
| Application Scenarios | Best for applications where high - detail and smooth - surface parts are needed, like in the production of intricate molds, art pieces, and some medical implants prototypes. | Suited for functional parts in industries such as automotive and aerospace, where high - strength and heat - resistant materials are required, and for creating parts with complex internal structures. |
Yigu Technology's View
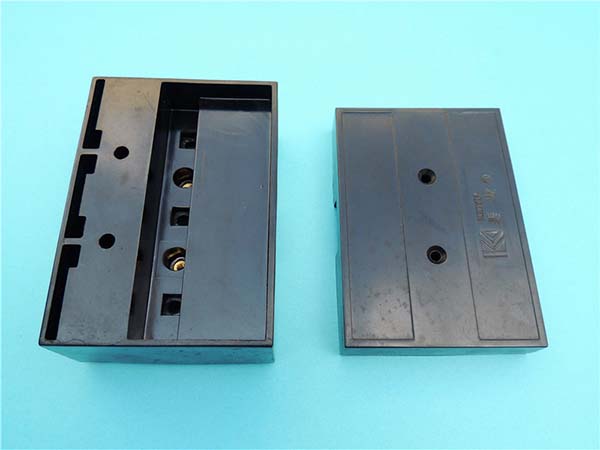
As a non - standard plastic metal products custom supplier, Yigu Technology sees great potential in SLA 3D printing. For complex plastic parts prototyping and small - batch production, SLA 3D printing offers distinct advantages. It allows for the quick realization of design ideas, enabling our clients to test and validate their concepts faster. By using SLA 3D printing, we can reduce the upfront investment in mold - making, which is especially beneficial for products with short development cycles or those still in the design - refinement stage. We believe that in the future, SLA 3D printing will integrate with more advanced materials, further expanding its application scenarios and contributing to more innovative product development.