Introduction
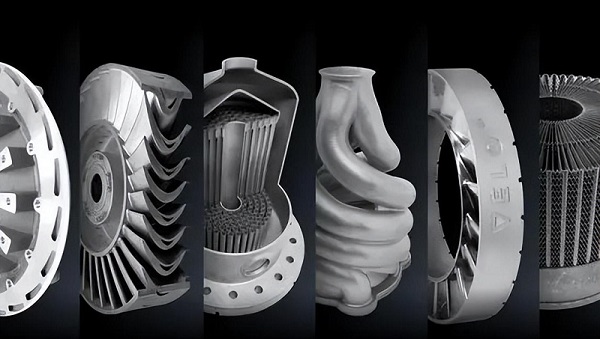
Metal 3D printing offers incredible potential: complex geometries, part consolidation, and on-demand manufacturing. Yet many companies struggle to move beyond prototypes. The reality often involves high costs, inconsistent quality, and manual processes that eat into profits.
The problem isn't the printer—it's the workflow surrounding it. Disconnected steps, hidden bottlenecks, and lack of data integration prevent metal additive manufacturing from becoming a reliable production method.
This guide provides a practical roadmap for improving metal 3D printing workflows. You'll learn how to identify weak points, implement data-driven strategies, and transform your operation from prototype-focused to production-ready. The goal: predictable quality, lower costs, and faster delivery.
What Does a Complete Metal 3D Printing Workflow Look Like?
Understanding the full production chain is essential. Most inefficiencies hide not in the print itself, but in the steps before and after.
The Five Essential Stages
1. Design & Engineering
This is where parts are born. Engineers apply Design for Additive Manufacturing (DfAM) principles, using tools like topology optimization to create geometries impossible with traditional methods. The decisions made here ripple through every subsequent stage.
2. Pre-Processing & Simulation
Digital preparation transforms designs into printable files. This includes part positioning, support generation, and slicing. Crucially, process simulation predicts thermal stresses and distortion before you waste material.
3. Additive Build & Monitoring
The physical printing stage. Advanced operations use real-time monitoring to collect data on melt pool behavior, temperature distribution, and layer quality. This data becomes invaluable for later stages.
4. Post-Processing & Finishing
Often the most time-consuming stage. Parts require stress relief, support removal, heat treatment, and surface finishing. In many facilities, post-processing accounts for 50-60% of total part cost.
5. Quality Assurance & Validation
Final inspection ensures parts meet specifications. This involves dimensional measurement, non-destructive testing, and documentation for certification.
Industry data: A 2023 survey of metal AM facilities found that 75% of production delays occur in pre-processing and post-processing stages—not during printing.
Why Is a Digital Thread Critical for Production?
The digital thread connects every stage through continuous data flow. It transforms disconnected steps into an intelligent system.
What Data Flows Through Each Stage?
| Stage | Key Data Generated | How It's Used Later |
|---|---|---|
| Design | CAD files, material specs, simulation parameters | Becomes baseline for QA comparison |
| Pre-Processing | Build files, support strategy, stress predictions | Sets expectations for monitoring |
| Build | Melt pool data, thermal images, sensor logs | Provides real-time quality indicators |
| Post-Processing | Heat treat logs, machining reports | Documents critical property changes |
| QA | 3D scan data, CT results, test certificates | Validates against original design |
Three Benefits of a Strong Digital Thread
Complete traceability: Every part has a permanent record linking its design file, material batch, printer, parameters, monitoring data, and inspection results. Essential for aerospace and medical certification.
Intelligent feedback loops: QA data revealing consistent distortion feeds back to design and simulation, improving future builds. One aerospace supplier reduced scrap by 40% after implementing closed-loop data analysis.
Automated workflows: Data flows seamlessly between software and hardware, eliminating manual entry errors. Build files transmit automatically; inspection data links directly to part records.
Real-world example: A medical implant manufacturer implemented digital thread across their metal AM operation. When auditors requested proof of process control for a specific batch of titanium hip stems, they generated complete digital histories for 500 parts in minutes—a task that previously took weeks of manual record gathering.
How Can You Improve Each Workflow Stage?
Stage 1: Design & Engineering
Common challenges:
- Designing parts as if they'll be machined (requiring excessive supports)
- Over-engineering for strength without considering weight
- Missing opportunities to consolidate assemblies
Improvement strategies:
Make DfAM mandatory: Train engineers to think additively from the start. Design self-supporting features (typically angles below 45°) to reduce material waste. Combine multiple components into single prints—one automotive supplier reduced a 12-part assembly to a single printed component, eliminating assembly labor and potential failure points.
Use generative design systematically: AI-driven software explores hundreds of iterations meeting performance constraints with minimal mass. The resulting organic shapes are often naturally optimized for printing. A racing team used generative design for a suspension upright, achieving 35% weight reduction while maintaining strength.
Co-select material and process: Design choices should reflect whether you're using Laser Powder Bed Fusion (fine features) or Directed Energy Deposition (large scale). A design optimized for titanium on L-PBF won't work for Inconel on DED without modification.
Stage 2: Pre-Processing & Simulation
Common challenges:
- Poor part positioning increasing build time
- Inefficient supports difficult to remove
- Unexpected build failures from unpredicted stress
Improvement strategies:
Automate build preparation: Advanced software automatically positions parts to maximize plate utilization, minimize Z-height (which determines print time), and reduce supported surface area. One service bureau increased build density by 30% after implementing automated nesting.
Make simulation mandatory: Process simulation predicts distortion and residual stress before printing. This "print it right the first time" approach saves enormous cost. A case study from a major aerospace supplier showed simulation reduced build failures from 25% to under 2% for a critical engine component.
Use advanced supports: Parametric or tree-like supports use less material, print faster, and break away more easily. One facility reduced support removal time by 50% after switching from block supports to optimized tree structures.
Stage 3: Additive Build & Monitoring
Common challenges:
- The build process as a "black box"
- Process drift causing defects
- Flaws discovered too late
Improvement strategies:
Add real-time monitoring: Melt pool monitoring (using photodiodes or cameras) analyzes melt characteristics linked to part density. Thermal imaging maps temperature distribution layer by layer. This data provides early warning of quality problems.
Implement closed-loop control: Sensor data feeds back to adjust parameters in real time. If a melt pool runs too cool, the system increases laser power automatically. One facility saved a 40-hour titanium build when monitoring detected contaminated argon gas—the system paused before defects occurred.
Develop parameter "passports": For serial production, establish validated parameter sets for each material-machine combination. Lock these down and version-control them. Every part then prints using an identical, qualified recipe.
Stage 4: Post-Processing & Finishing
Common challenges:
- Manual support removal (slow, messy, risky)
- Long heat treatment cycles
- Inefficient part movement between stations
Improvement strategies:
Automate depowdering and support removal: Automated systems safely reclaim unused powder. For supports, explore electrochemical polishing (dissolves supports without force) or vibration-assisted removal. One aerospace supplier cut support removal from 4 hours of manual work to 30 minutes automated.
Create integrated work cells: Use robotics to move parts between stations. A robotic arm can take a build plate from the printer, move it to a saw, place parts in a heat treatment basket, then load them into CNC machines. This reduces handling time and potential damage.
Optimize thermal cycles with simulation: FEA software simulates heat treatment to optimize cycle times and temperature profiles. Plan batch processing in larger furnaces to improve throughput. One heat treater increased furnace utilization by 40% through optimized scheduling.
Stage 5: Quality Assurance & Validation
Common challenges:
- Slow CMM measurements
- Inability to inspect internal features
- Manual report compilation
Improvement strategies:
Standardize automated 3D scanning: Blue light or laser scanners capture full geometry in minutes, generating color-coded deviation maps against CAD models. This is dramatically faster than CMM probing.
Use CT scanning for critical parts: Computed Tomography reveals internal defects—porosity, powder entrapment—non-destructively. Essential for parts with internal channels or lattice structures.
Generate unified digital quality reports: All QA data—monitoring logs, scan deviations, CT results—combines automatically into a single report tied to the part serial number. Complete birth history for certification, generated in minutes rather than days.
What KPIs Should You Track?
You can't improve what you don't measure. These key performance indicators reveal workflow health:
| Stage | KPI | Improvement Goal |
|---|---|---|
| All stages | End-to-end lead time | Reduce order-to-shipment time |
| All stages | Final part cost | Reduce total cost (material, labor, overhead) |
| Design | Build nesting density | Maximize parts per build plate |
| Build | First-time right rate | Increase successful builds without failure |
| Build | OEE (Overall Equipment Effectiveness) | Maximize productive printing time |
| Post-process | Post-processing time per part | Reduce manual labor and cycle time |
| QA | Scrap rate | Reduce parts failing inspection |
Industry benchmark: Top-performing metal AM facilities achieve 95%+ first-time right rates, <5% scrap, and >70% machine utilization. Most operations fall significantly short—but closing the gap is achievable through systematic workflow improvement.
How Did One Company Transform Their Workflow?
Aerospace Bracket Case Study
The situation: An aerospace supplier struggled with an aluminum (AlSi10Mg) avionics bracket. Traditional approaches yielded:
- 4-week lead time
- High cost (mostly post-processing labor)
- 25% build failure rate from warping
The problem: The design wasn't optimized for printing, requiring dense supports. Post-processing was entirely manual. Build failures had unknown causes—leading to "print and pray" mentality.
The solution: Systematic workflow improvement across all five stages.
Design: Topology optimization reduced part mass by 30% while maintaining stiffness. The new design incorporated self-supporting angles, eliminating many supports.
Simulation: Process simulation identified warping cause—excessive thermal stress at the base. Adjusting positioning and support strategy eliminated the problem. Build success rate jumped from 75% to 98%.
Post-processing: Automated electrochemical polishing reduced support removal from 4 hours manual to 30 minutes automated.
Digital thread: An MES platform connected design, simulation, build, and QA data, providing full traceability for flight-critical certification.
The results:
| Metric | Before | After | Improvement |
|---|---|---|---|
| Lead time | 4 weeks | 6 days | 79% reduction |
| Part cost | Baseline | 45% lower | Significant savings |
| First-time right | 75% | 95% | 20% increase |
| Scrap rate | 25% | 2% | 92% reduction |
The company won new business by offering certified parts with unprecedented speed and cost-effectiveness.
What Does the Future Hold?
Metal 3D printing workflows are evolving toward full automation. The vision: "lights-out" manufacturing where parts move from design to delivery with minimal human intervention.
Emerging trends:
AI-driven process optimization: Machine learning analyzes thousands of builds to identify optimal parameters automatically. Systems learn from every print, continuously improving.
In-situ monitoring with predictive analytics: Real-time data feeds algorithms that predict final part quality during the build, flagging potential issues before they become defects.
Robotic post-processing cells: Integrated robotic workcells handle depowdering, support removal, heat treatment loading, and CNC finishing without human touch.
Digital twin integration: Every physical part has a continuously updated digital twin reflecting its actual as-built geometry and material state throughout its service life.
Conclusion: Workflow Is the Competitive Advantage
Improving metal 3D printing workflows isn't optional for production—it's essential. The technology exists to create amazing parts. The challenge is doing it consistently, cost-effectively, and at scale.
Success requires:
- A complete view of the five-stage workflow
- Digital thread integration connecting every stage
- Targeted improvements addressing specific bottlenecks
- KPI tracking measuring real progress
- Continuous learning from data at every step
Companies that master workflow outperform competitors on cost, speed, and quality. They turn metal 3D printing from an expensive prototyping tool into a profitable production method.
The path is clear: move from disconnected steps to integrated systems, from manual processes to automation, from intuition to data-driven decisions. Do that, and metal 3D printing delivers on its production promise.
Frequently Asked Questions
What is the biggest bottleneck in metal 3D printing workflows?
Post-processing consistently ranks as the top bottleneck, consuming 50-60% of total part cost and time in many facilities. Support removal, heat treatment, and surface finishing are typically manual, slow, and inconsistent. Automating these steps offers the largest improvement opportunity.
How much does workflow automation cost?
Costs vary widely based on current state and goals. A small shop might spend $50,000 on software and training. A large production facility could invest millions in robotics and integrated systems. Most operations see payback within 12-24 months through reduced labor, higher success rates, and increased throughput.
Can small shops benefit from workflow improvement?
Absolutely. Even basic steps—standardizing file management, implementing simulation, tracking KPIs—deliver significant gains without major investment. Start with low-cost improvements, measure results, and reinvest savings into further automation.
What software do I need for digital thread implementation?
Core components include: CAD (design), build preparation software (pre-processing), MES (manufacturing execution system) for tracking, and QA software for inspection data. Look for platforms with open APIs that connect easily rather than isolated solutions.
How do I convince management to invest in workflow improvement?
Focus on measurable business outcomes: reduced lead time, lower cost per part, higher first-time right rates, and new business opportunities. Use case studies like the aerospace bracket example to show what's possible. Start with a pilot project demonstrating ROI before scaling.
What's the biggest mistake companies make?
Focusing only on printer speed or material cost while ignoring the rest of the workflow. A faster printer with inefficient pre- and post-processing still loses money. The holistic view—improving all five stages together—delivers real results.
How long does workflow transformation take?
Most companies see meaningful improvement within 6-12 months of focused effort. Full transformation to automated, lights-out operation typically takes 3-5 years with sustained investment and commitment.
Contact Yigu Technology for Custom Manufacturing
Improving metal 3D printing workflows requires expertise across design, materials, processes, and quality systems. At Yigu Technology, we've helped dozens of clients transform their operations from prototype struggles to production successes.
Our workflow optimization services include:
- Workflow audit and bottleneck identification
- Digital thread implementation (software selection, integration)
- DfAM training and design optimization
- Process simulation and parameter development
- Post-processing automation solutions
- Quality system development and certification support
Whether you're starting your metal AM journey or seeking to scale existing operations, our team delivers practical, results-focused guidance.
Contact us today to discuss your workflow challenges. Let's turn metal 3D printing's potential into your production reality.