What is Hopper Injection Moulding?
Hopper injection moulding is a fundamental process in the plastic manufacturing industry. At its core, it involves the use of a hopper, which is a funnel - shaped container, to feed plastic pellets or granules into an injection moulding machine. This machine then heats the plastic until it reaches a molten state. Once molten, the plastic is forced, under high pressure, into a precisely designed metal mould cavity. This cavity is the negative impression of the final product. After filling the cavity, the plastic cools and solidifies, taking on the exact shape of the mould. Finally, the mould opens, and the newly formed plastic part is ejected.
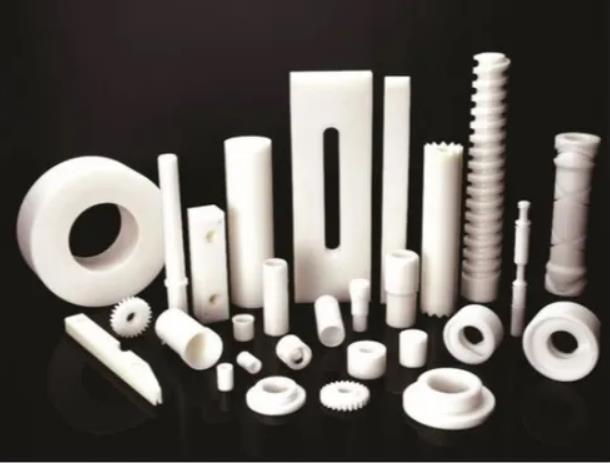
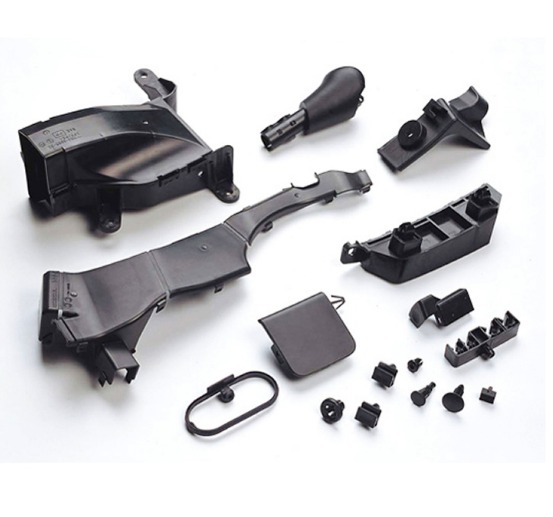
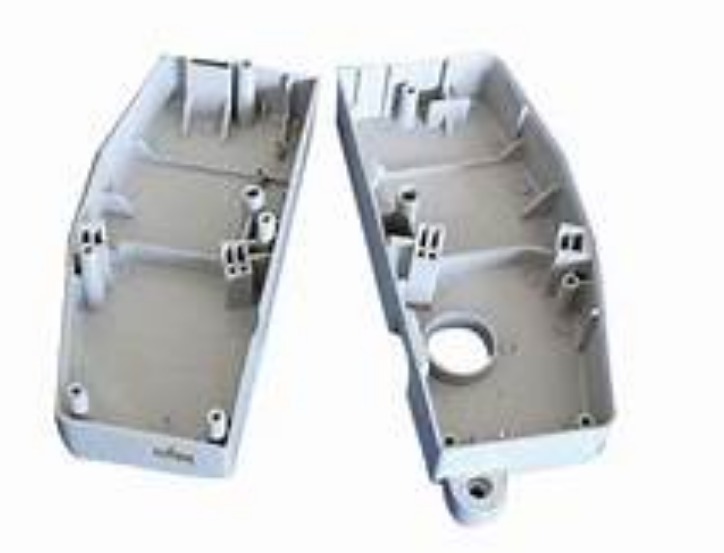
This process is of utmost importance in plastic manufacturing for several reasons. Firstly, it enables the mass production of highly precise and complex plastic components. For example, in the automotive industry, many interior parts such as dashboard components, door handles, and even some engine components made of plastic are produced through hopper injection moulding. The ability to create parts with tight tolerances ensures that these components fit perfectly within the vehicle's assembly.
Secondly, it offers a high degree of flexibility in terms of the types of plastics that can be used. Common plastics like polyethylene (PE), polypropylene (PP), and acrylonitrile - butadiene - styrene (ABS) can all be processed using this method. Each plastic has its own unique properties, such as strength, flexibility, and heat resistance, allowing manufacturers to select the most suitable material for their specific application.
Moreover, hopper injection moulding is cost - effective for large - scale production. Once the initial investment in the mould and the injection moulding machine is made, the cost per unit of production decreases significantly as the number of parts produced increases. This makes it an ideal choice for industries that require a large volume of plastic parts, such as the consumer goods and electronics industries.
Key Components of Hopper Injection Moulding
The Hopper Itself
The hopper is the starting point of the injection moulding process. Structurally, it is typically a funnel - shaped or cylindrical container with a wide opening at the top for easy loading of plastic pellets and a narrow outlet at the bottom. This design allows for the smooth flow of materials by gravity.
Most hoppers are made from durable materials such as stainless - steel or high - density polyethylene (HDPE). Stainless - steel hoppers are preferred in industrial settings where corrosion resistance and high - temperature tolerance are crucial. For example, when processing engineering plastics that require high - temperature melting, stainless - steel hoppers can withstand the heat without deforming or deteriorating. HDPE hoppers, on the other hand, are more cost - effective and lightweight, making them suitable for less demanding applications.
The hopper not only stores the plastic pellets but also controls their rate of delivery to the injection unit. Some hoppers are equipped with a feeding mechanism, such as a vibrating tray or a screw feeder. A vibrating tray gently agitates the pellets, ensuring a consistent flow, while a screw feeder uses a rotating screw to push the pellets towards the injection unit at a controlled speed. This precise control over the material flow is essential for maintaining a stable injection process and producing high - quality plastic parts.
Injection Unit
The injection unit is the heart of the hopper injection moulding machine. Its primary function is to heat the plastic pellets from the hopper until they reach a molten state and then inject this molten plastic into the mould cavity with high pressure.
The heating system of the injection unit usually consists of several heating zones along the barrel. Each zone can be independently controlled to achieve the desired temperature profile. For instance, the initial zones near the hopper inlet may have a lower temperature to pre - heat the pellets gradually, while the zones closer to the nozzle have a higher temperature to ensure complete melting. Common heating methods include electric resistance heating and induction heating. Electric resistance heating is widely used due to its simplicity and cost - effectiveness, while induction heating offers faster heating rates and better temperature control.
Once the plastic is molten, a screw or a plunger is used to inject it into the mould. In screw - type injection units, the screw rotates to convey the plastic forward and also compresses and mixes it. As the screw moves forward, it forces the molten plastic through the nozzle and into the mould cavity. The injection pressure can range from several hundred to several thousand pounds per square inch (psi), depending on the complexity of the mould and the properties of the plastic material. High - pressure injection is often required for filling intricate mould cavities with thin walls, while lower - pressure injection may be sufficient for simpler parts.
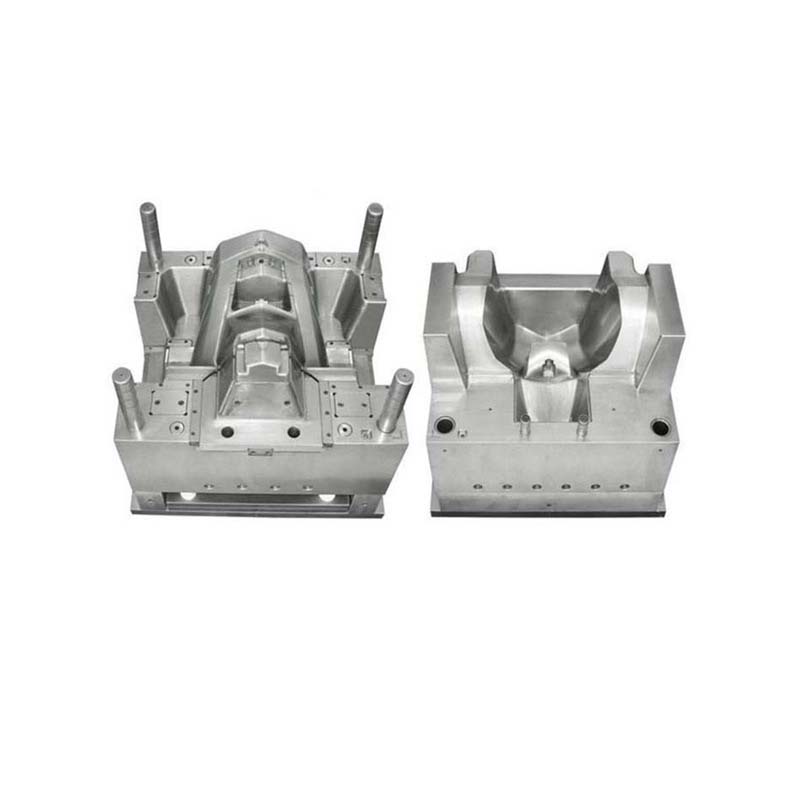
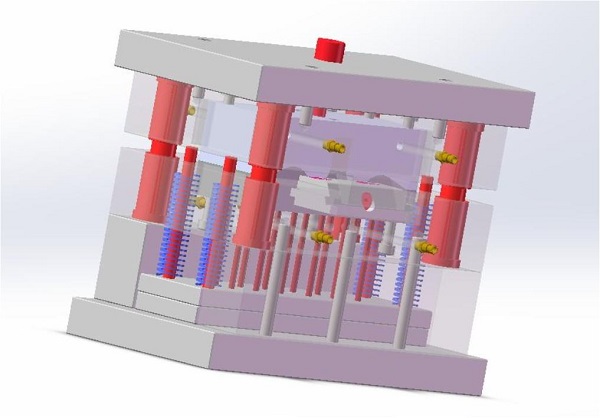
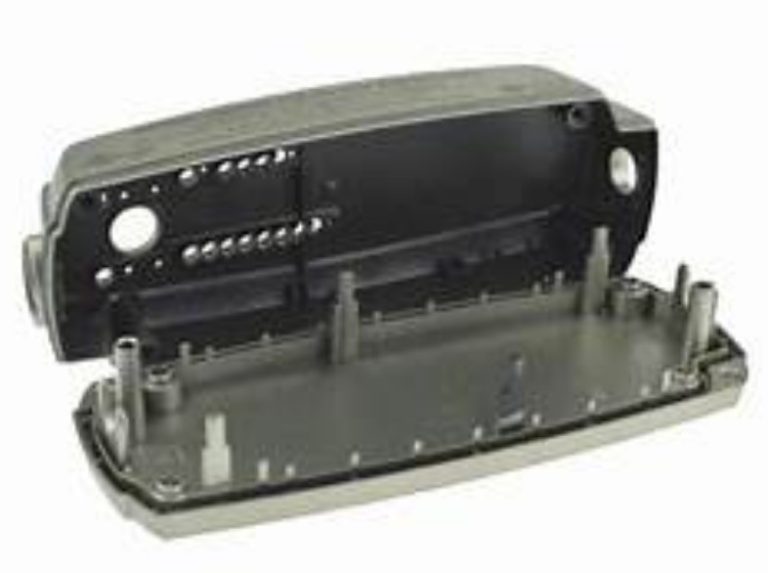
Mould
The mould is a critical component that determines the final shape and quality of the plastic product. Moulds are typically made from high - strength metals such as steel or aluminium. Steel moulds are known for their excellent durability and high - temperature resistance, making them suitable for long - term production runs and the processing of high - temperature plastics. Aluminium moulds, on the other hand, have a lower cost and a higher thermal conductivity, which allows for faster cooling times. However, they are less durable than steel moulds and may not be suitable for high - volume production of complex parts.
The design of the mould is a complex process that takes into account factors such as the shape of the product, the desired surface finish, and the ease of ejection. Moulds can have single or multiple cavities. A single - cavity mould is used when producing large or complex parts, while multiple - cavity moulds are more efficient for mass - producing small parts. For example, a mould for producing small plastic buttons may have dozens or even hundreds of cavities, allowing for a high - volume output in a single injection cycle.
The surface finish of the mould also affects the appearance of the final product. A smooth - finished mould will result in a plastic part with a high - quality surface, while a textured or engraved mould will impart the corresponding texture or pattern to the part. Additionally, the mould must be designed with proper ejection mechanisms to ensure that the solidified plastic part can be easily removed from the mould without damage. This may involve the use of ejector pins, air ejection, or other specialized ejection systems.
Process of Hopper Injection Moulding
Feeding
The feeding stage is the starting point of the hopper injection moulding process. Plastic pellets are initially loaded into the hopper. As mentioned earlier, the hopper's design, with its wide top and narrow bottom, allows for the smooth flow of pellets by gravity. However, to ensure a consistent and controlled flow of material into the injection unit, additional mechanisms are often employed.
For example, a vibrating feeder can be attached to the hopper. This device uses vibrations to gently agitate the plastic pellets, preventing them from bridging or jamming within the hopper. By providing a consistent vibration frequency and amplitude, the vibrating feeder ensures that the pellets move steadily towards the outlet of the hopper.
Another common feeding mechanism is the screw feeder. A rotating screw, located at the bottom of the hopper, gradually conveys the plastic pellets towards the injection unit. The speed of the screw can be adjusted according to the requirements of the injection process. For high - volume production runs where a large amount of plastic needs to be fed continuously, a faster - rotating screw may be used. Conversely, for more precise injection processes or when working with small - sized parts, a slower - speed screw can be set to achieve a more accurate and controlled material flow.
The rate of feeding is a crucial parameter to control. If the feeding rate is too high, it can lead to over - packing of the injection unit, causing issues such as inconsistent melting and uneven injection pressure. On the other hand, a too - low feeding rate can result in starved injection, where the injection unit does not receive enough plastic, leading to incomplete parts or defects.
Melting and Injection
Once the plastic pellets enter the injection unit from the hopper, the melting and injection process begins. The injection unit consists of a heated barrel and a screw or plunger mechanism.
The barrel is equipped with multiple heating zones, each with its own temperature control. As the plastic pellets move along the barrel, they are gradually heated. The initial heating zones near the hopper inlet are set at a relatively lower temperature. This pre - heating stage warms up the pellets, making them more pliable and easier to process further. As the pellets progress towards the nozzle end of the barrel, they encounter higher - temperature zones. Here, the plastic reaches its melting point and transforms into a molten state.
The screw in a screw - type injection unit serves multiple functions. As it rotates, it not only conveys the plastic forward but also compresses and mixes it. The compression action helps to expel any air trapped within the plastic pellets, ensuring a more homogeneous melt. The mixing function of the screw ensures that the molten plastic has a uniform temperature and composition throughout.
When the plastic is fully molten and a sufficient amount has accumulated at the front of the screw, the injection phase commences. The screw then moves forward rapidly, driven by the high - pressure hydraulic system of the injection moulding machine. This forces the molten plastic through the nozzle and into the mould cavity at a high velocity. The injection pressure can vary significantly depending on factors such as the type of plastic, the complexity of the mould, and the desired quality of the final product. For example, when injecting highly viscous plastics or filling moulds with intricate and thin - walled features, injection pressures can reach up to 20,000 psi or more.
Cooling and Ejection
After the molten plastic has filled the mould cavity, the cooling and ejection stages take place. Cooling is a critical step as it determines the final shape, dimensional stability, and physical properties of the plastic part.
The mould is typically equipped with a cooling system, which consists of channels through which a coolant, usually water or a specialized heat - transfer fluid, circulates. As the molten plastic comes into contact with the cool mould walls, heat is transferred from the plastic to the coolant. This causes the plastic to solidify and take on the shape of the mould cavity. The cooling time depends on several factors, including the thickness of the plastic part, the type of plastic used, and the efficiency of the cooling system. Thicker parts generally require longer cooling times to ensure complete solidification. For instance, a large plastic automotive bumper may need several minutes to cool properly, while a small plastic button can cool in a matter of seconds.
Once the plastic part has cooled and solidified sufficiently, the mould opens, and the ejection process begins. Ejection mechanisms are designed to safely and efficiently remove the finished part from the mould. One of the most common ejection methods is the use of ejector pins. These are small, cylindrical rods that are located within the mould. When the mould opens, the ejector pins are pushed forward by a mechanical or hydraulic system, gently pushing the plastic part out of the mould cavity. Another ejection method is air ejection, where compressed air is used to blow the part out of the mould. This method is often used for parts that are difficult to eject with pins, such as those with complex shapes or delicate features.
The successful completion of the cooling and ejection stages results in a high - quality plastic product that is ready for further processing, such as trimming, finishing, or assembly into a larger product.
Yigu Technology's Perspective
As a non - standard plastic metal products custom Supplier, Yigu Technology deeply understands the significance of hopper injection moulding. Our rich experience in the field enables us to handle complex mould designs with ease. For instance, when dealing with intricate plastic - metal composite parts, we can design moulds that ensure precise alignment and integration of different materials.
Our state - of - the - art manufacturing facilities are equipped with advanced injection moulding machines, allowing us to achieve high - quality production. We also place great emphasis on the selection of raw materials. By sourcing premium plastic pellets, we ensure that the final products have excellent mechanical properties and surface finishes.
Moreover, we pride ourselves on our quick response to customer custom requirements. Whether it's a small - batch production for a prototype or a large - scale production for mass - market products, we strive to meet the needs of our clients promptly. Our team of experienced engineers and technicians is always ready to provide technical support and optimize the injection moulding process to achieve the best results.
FAQs about Hopper Injection Moulding
What are the common materials used in hopper injection moulding?
- ABS (Acrylonitrile - Butadiene - Styrene): ABS is a popular choice due to its excellent mechanical properties, including high strength, impact resistance, and good dimensional stability. It also has good heat resistance and can be easily colored. ABS is widely used in the production of automotive parts, such as interior trims, and electronic device housings, like those for smartphones and laptops.
- PP (Polypropylene): PP is known for its high strength - to - weight ratio, good chemical resistance, and relatively high melting point. It is also cost - effective. PP is commonly used in the manufacturing of consumer goods, such as food containers, and automotive components like bumpers and interior parts.
- PE (Polyethylene): There are different types of PE, including low - density polyethylene (LDPE) and high - density polyethylene (HDPE). LDPE is flexible and has good transparency, making it suitable for applications like plastic bags and packaging films. HDPE, on the other hand, is more rigid and is often used in the production of pipes, containers, and industrial parts.
How to maintain the hopper injection moulding machine?
- Regular Cleaning: Clean the hopper regularly to remove any accumulated plastic dust, debris, or residues. This can be done using compressed air or a soft - bristle brush. Also, clean the injection unit, nozzle, and mould surfaces to prevent contamination, which can affect the quality of the plastic parts.
- Lubrication: Lubricate all moving parts of the machine, such as the screw, guide rails, and ejector pins, with the appropriate lubricants at regular intervals. This helps to reduce friction, wear, and tear, ensuring smooth operation and a longer lifespan of the components.
- Inspection of Key Components: Periodically check the heating elements, thermocouples, and pressure sensors for any signs of damage or malfunction. Replace any faulty components immediately to maintain accurate temperature and pressure control during the injection moulding process. Also, inspect the mould for any signs of wear, cracks, or damage, and perform necessary repairs or maintenance.
Can hopper injection moulding be used for small - batch production?
Yes, hopper injection moulding can be used for small - batch production. Although it is often associated with large - scale manufacturing, there are several reasons for its viability in small - batch scenarios. For example, the development of quick - change mould technology allows for rapid mould changes. This means that different products can be produced in a relatively short time, reducing the downtime between production runs. Additionally, modern injection moulding machines can be precisely controlled, enabling the production of high - quality parts even in small quantities. Small - batch production using hopper injection moulding is also beneficial when testing new product designs or producing customized items, as it provides the flexibility to make adjustments and modifications as needed.